
Beautiful Plants For Your Interior
Beautiful Plants For Your Interior
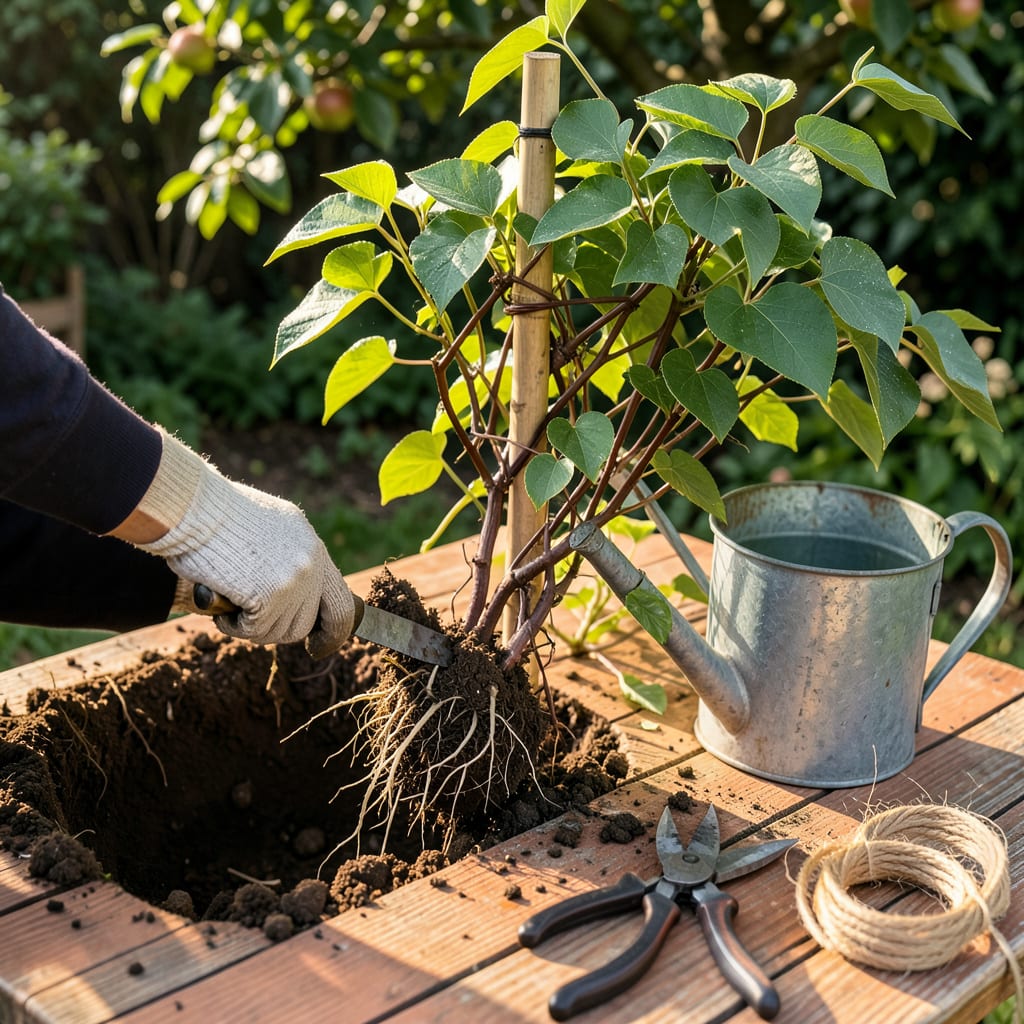
Moving a clematis vine feels like performing surgery on your garden’s star performer. I’ve relocated dozens over the years, and the ones that thrive follow a simple rule: timing and tenderness matter more than speed. The best window is early spring or fall when the plant is dormant but the soil is workable—this gives roots time to settle before summer heat or winter chill.
What most gardeners miss is that clematis roots hate two things: being baked by sun and being jostled. You’ll want to dig wide—not deep—to preserve the root ball, and replant it 2 inches deeper than before to encourage strong new growth. The payoff? A vine that doesn’t just survive the move but comes back bushier and more floriferous than ever. Here’s how to do it right.
📚 In This Guide
Moving a clematis vine doesn’t have to be stressful—follow this method and your plant will thrive in its new home.
The best time to transplant clematis is in early spring before new growth starts or in early fall at least 6 weeks before your first frost. This gives the roots time to establish before extreme temperatures hit. I’ve found that late afternoon works best because the plant has less stress from direct sun.
Dig the new hole twice as wide and just as deep as the root ball. Mix some compost into the soil you removed—this gives your clematis a nutrient boost as it settles in. The location should get at least 6 hours of sunlight daily but have some shade at the base to keep roots cool. A trellis or support structure should be in place before planting.
Water the plant deeply 24 hours before transplanting—this helps the root ball hold together. Use a sharp spade to dig in a wide circle around the plant, starting about 12 inches from the base to preserve as many roots as possible. Clematis roots run deep, so dig down at least 12-18 inches.
Once you’ve loosened the soil, gently lift the plant by the root ball, not the stems. If some roots break, don’t panic—just trim any damaged ones with clean pruners. Keep the root ball intact as much as possible, and move the plant to its new home immediately. If you must wait, wrap the roots in damp burlap to prevent drying.
Place the clematis in the new hole so that 2-3 inches of the stem will be buried below soil level. This encourages new shoots to form from the base, making the plant bushier and more resilient. The crown (where stems meet roots) should be 2 inches below ground level—this is deeper than most plants, but it’s crucial for clematis.
Backfill with the soil-compost mix, gently firming it around the roots to eliminate air pockets. Water thoroughly until the soil is saturated and you see it puddle slightly. I like to create a small soil berm around the edge of the planting hole to help direct water to the roots during the first few waterings.
Cut back the top growth by about one-third to reduce stress on the roots. This might seem drastic, but it helps the plant focus energy on root establishment rather than supporting leaves. Water deeply every 2-3 days for the first 2 weeks, then taper to weekly watering unless you get significant rain.
Apply a 2-3 inch layer of mulch around the base (but not touching the stems) to retain moisture and regulate soil temperature. Watch for wilting in the first week—this is normal as the plant adjusts. If leaves stay wilted after 24 hours, the plant may need more water or temporary shade protection during the hottest part of the day.
Check the plant daily for the first week, then weekly thereafter. New growth should appear within 2-4 weeks if the transplant was successful. Gently tie new vines to your support structure as they grow—clematis doesn’t cling on its own, so it needs guidance.
Hold off on fertilizing for 4-6 weeks to avoid burning new roots. When you do fertilize, use a balanced, water-soluble fertilizer at half strength. The first year after transplanting, you might see fewer blooms, but by the second year, your clematis should be back to its full flowering potential with proper care.
Transplanting clematis successfully comes down to timing and technique. Here’s what I’ve learned from years of moving these beautiful vines without stress.
Timing is Everything: The 6-week window before your first frost mentioned in Step 1 isn’t just a suggestion—it’s critical. I’ve found that transplanting exactly 6 weeks before frost gives roots enough time to establish without the stress of impending cold. In spring, aim for early season before new growth appears. Late afternoon transplanting really does reduce stress, as the plant won’t have to cope with midday sun immediately after moving.
Root Ball Protection: When you water deeply 24 hours before transplanting as directed in Step 2, use this trick: add a tablespoon of liquid seaweed extract to the water. This gives the plant an extra boost of nutrients right before the move. When digging, start exactly 12 inches from the base as specified—clematis roots spread wider than you think. The 12-18 inch depth mentioned is perfect for capturing the deep root system without unnecessary disturbance.
Planting Depth Secret: The 2-3 inches of stem burial in Step 3 might seem unusual, but it’s the key to a bushier plant. I always bury mine exactly 3 inches deep—this encourages multiple new shoots to emerge from below ground level. Create that soil berm mentioned in the instructions; it’s not just for water direction but also helps prevent soil erosion during heavy watering. Firm the soil gently but thoroughly to eliminate air pockets that could dry out roots.
Aftercare That Makes a Difference: When cutting back one-third of the top growth in Step 4, make your cuts just above a set of healthy buds. This precise pruning encourages bushier regrowth. The 2-3 day watering schedule for the first two weeks is perfect, but here’s what to watch for: if your soil drains very quickly, you might need to water daily. That 2-3 inch mulch layer is non-negotiable—it keeps roots cool and moist during the critical establishment period.
Early spring (before new growth starts) or early fall (4-6 weeks before frost) are ideal. Avoid transplanting during summer heat or winter dormancy—stress levels are lower when the plant is semi-dormant, improving survival rates.
Water deeply 2-3 days before moving, dig a wide root ball, and replant at the same depth as before. Trim back ⅓ of the vines post-transplant to reduce stress. A shade cloth for 1-2 weeks helps recovery!
Only as a last resort! If you must, choose a cloudy day, prune heavily (reduce foliage by 50%), and water daily for 2 weeks. Mulch heavily to retain moisture. Expect slower recovery.
Don’t panic—some wilting is normal. Check soil moisture (keep it evenly damp, not soggy), trim dead stems, and avoid fertilizer for 4-6 weeks. If wilting persists after 1 week, suspect root damage or poor drainage.
If your plant is mature or in a tricky spot, propagation (layering or cuttings) may be easier! Transplanting works best for younger vines (under 3 years). Learn propagation methods here.
