
Beautiful Plants For Your Interior
Beautiful Plants For Your Interior
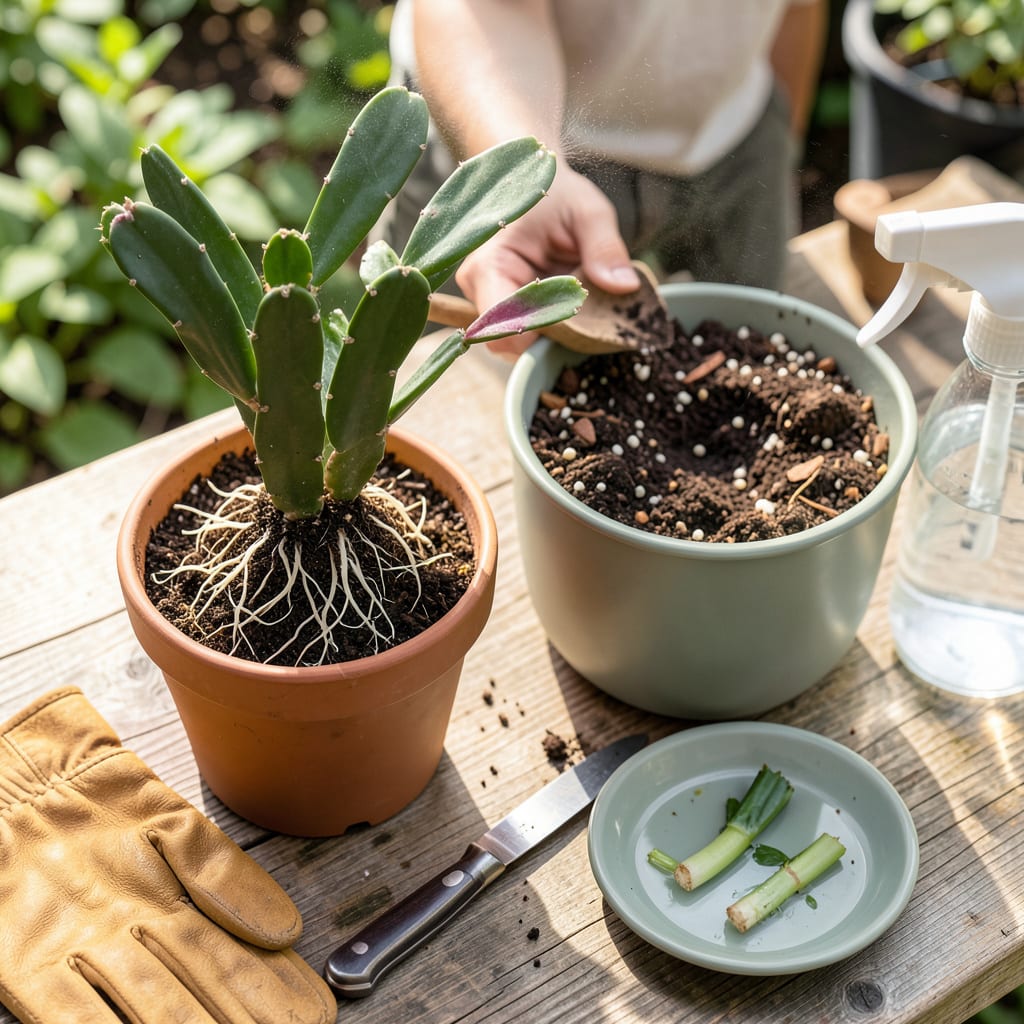
That moment when your Christmas cactus outgrows its pot is exciting—until you realize transplant shock could ruin next year’s blooms. I’ve moved dozens of these holiday favorites, and the secret is timing: do it 4-6 weeks after flowering when the plant’s energy shifts to root growth, not bud production.
You’ll need just three things: a pot 1-2 inches wider (never oversize), a fast-draining soil mix with perlite, and a gentle touch with the roots. The right approach means your cactus won’t skip a beat—it’ll reward you with even more vibrant blooms next season. Here’s exactly how to make the move without stress.
📚 In This Guide
Here’s how I move my Christmas cactus without stressing the plant—you’ll see new growth in no time.
The best time to transplant is 4-6 weeks after blooming when the plant enters its active growth phase. I water my cactus 2-3 days before transplanting to ensure the roots are hydrated but not soggy. This makes the transition smoother and reduces shock.
Gently remove the plant from its current pot by squeezing the sides to loosen the root ball. If it resists, run a butter knife around the inner edge to free it. You’ll feel when the roots release—the plant should come out cleanly with minimal tugging.
Choose a pot only 1-2 inches larger in diameter than the current one—too much space leads to overwatering issues. I use a well-draining mix of 60% cactus/succulent soil and 40% perlite or coarse sand. This prevents water from pooling around the roots, which causes rot.
Fill the new pot one-third full with your soil mixture. The goal is to position the plant at the same depth it was growing before. I check by placing the root ball on top of the fresh soil—it should sit so the base of the stems is just above the rim.
Place the root ball in the center of the new pot and fill around it with your soil mix, pressing lightly to eliminate air pockets. Don’t pack it tightly—just firm enough that the plant stands upright on its own. The soil line should match where it was on the stem in the old pot.
After transplanting, I let the plant sit unwatered for 5-7 days. This gives any damaged roots time to callous over, preventing rot. You’ll notice the segments might look slightly limp at first, but they’ll perk up once the roots re-establish.
Move the transplanted cactus to bright, indirect light (an east-facing window is perfect) and maintain temperatures between 65-75°F. Avoid direct sun for the first week—it stresses the plant while it’s adjusting to its new home.
Resume watering only when the top inch of soil feels dry. I water until it runs through the drainage holes, then empty the saucer immediately. You’ll see new growth emerging within 2-3 weeks, which means the transplant was successful.
Watch for signs of stress like yellowing segments or soft stems—this usually means too much water. If the plant looks wilted but the soil is dry, it needs a drink. I find that transplanted cacti often need slightly less water than usual for the first month as they recover.
Hold off on fertilizing for 4-6 weeks after transplanting. Once you see active growth, you can resume your normal feeding schedule. The key is patience—your cactus will reward you with vigorous growth and better blooms next season.
Here’s what I’ve learned from years of transplanting these beautiful plants—small details make all the difference.
The Timing Factor: That 4-6 week window after blooming mentioned in Step 1 isn’t arbitrary—it’s when the plant has maximum energy for recovery. I’ve tried transplanting during dormancy, and the stress often delays blooming the following season. Mark your calendar right after the last flowers fade to catch this perfect window.
Soil Mix Secret: The 60/40 ratio of cactus soil to perlite in Step 2 creates the ideal balance between moisture retention and drainage. I learned the hard way that regular potting soil holds too much water—my first attempt with it led to root rot within weeks. If you can’t find coarse sand, orchid bark makes a great alternative for that 40% component.
Root Handling Technique: When removing the plant as described in Step 1, resist the urge to pull by the stems. I gently massage the root ball with my fingers to loosen any circling roots before placing it in the new pot. This encourages outward growth and prevents the roots from becoming pot-bound again too quickly.
Recovery Environment: The 65-75°F range mentioned in Step 4 is crucial—cooler temperatures slow root recovery, while anything above 75°F can cause unnecessary stress. I use a simple indoor thermometer near my plants to monitor this. Also, that east-facing window recommendation isn’t just preference; direct southern exposure can scorch the leaves when the plant is vulnerable post-transplant.
The ideal time is 4-6 weeks after blooming (typically late winter or early spring). This gives your plant time to recover before its next growth cycle. Avoid transplanting during fall when buds are forming—stress can ruin the holiday show!
Nope! Regular soil stays too wet. Use a well-draining mix like 60% cactus/succulent soil + 40% perlite or orchid bark. This mimics their native epiphytic (tree-dwelling) conditions and prevents root rot.
Wilting usually means overwatering or shock. Let the soil dry completely before watering again, and keep it in bright, indirect light (no direct sun!). If roots look mushy, trim damaged parts and repot in fresh, dry mix.
Every 3-4 years or when roots circle the pot’s bottom. These slow growers thrive when slightly root-bound, so don’t upsize too soon—a pot just 1-2 inches larger in diameter is perfect.
Snip 2-3 segmented stems, let them callus for 24 hours, then plant in moist perlite or cactus mix. This is a great alternative if your plant is overgrown but you want to keep the parent small.
