
Beautiful Plants For Your Interior
Beautiful Plants For Your Interior
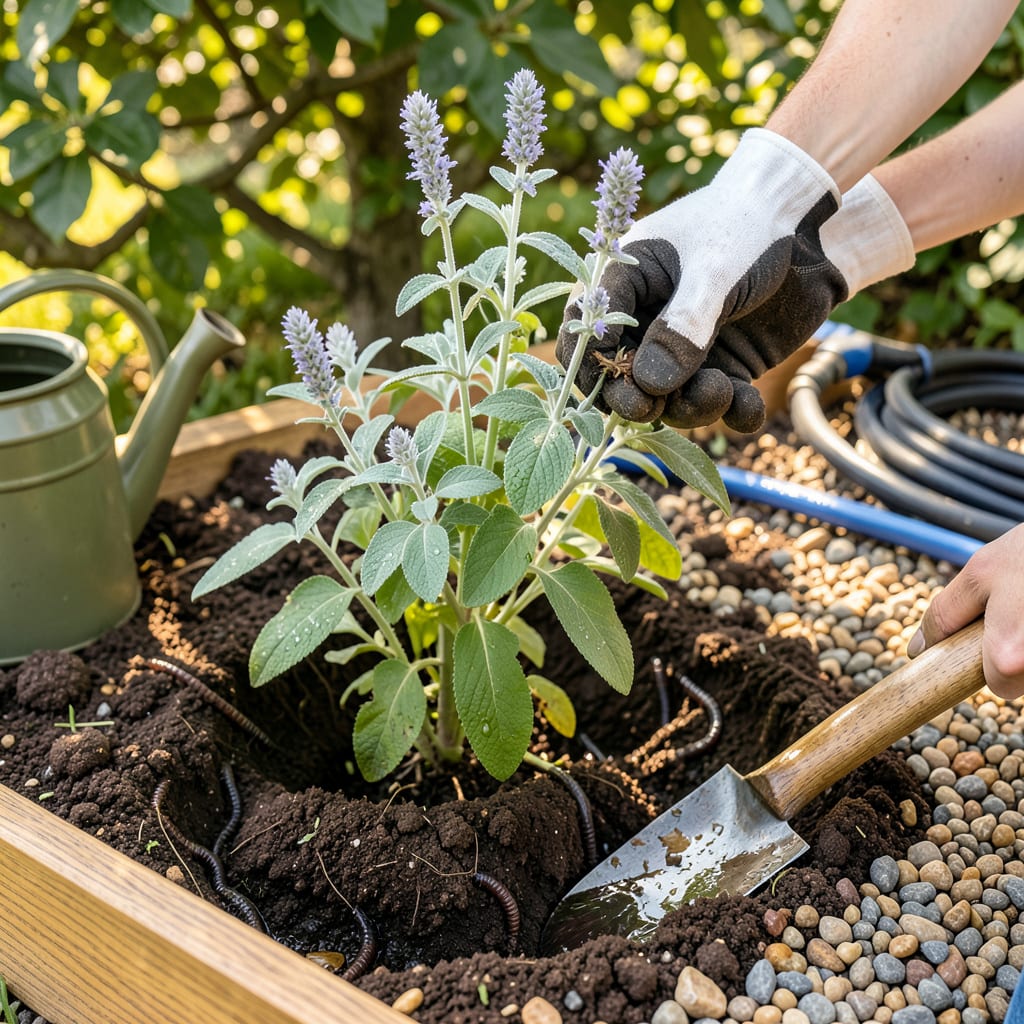
Moving catmint can feel like a gamble—until you know the timing. I’ve transplanted dozens of these tough perennials, and the secret is doing it in early spring or fall when the plant isn’t actively blooming. That’s when roots recover fastest, and you get zero transplant shock if you handle the root ball right.
You’ll need just three things: a sharp trowel, some compost for the new hole, and 10 minutes of your time. The payoff? A plant that bounces back in 2-3 weeks, then grows even fuller than before. No wilting, no drama—just a catmint that thrives in its new spot.
📚 In This Guide
Moving catmint to a new spot is simpler than you think—just follow these tested steps for stress-free plants.
Transplant catmint in early spring as new growth emerges or in early fall at least six weeks before your first frost. This timing gives roots a chance to establish before summer heat or winter cold. Avoid transplanting during flowering—it stresses the plant unnecessarily.
Select a location with full sun to partial shade and well-draining soil. I always dig the new hole twice as wide as the root ball but no deeper. Mix a handful of compost into the removed soil to give your catmint a nutrient boost without overwhelming it.
Water the catmint thoroughly 1-2 days before transplanting—moist soil holds together better around roots. Use a sharp spade to dig a wide circle around the plant, starting about 6 inches from the base to preserve as many roots as possible.
Once you’ve loosened the soil, slide the spade underneath to lift the entire root ball. If you’re dividing the plant, use your hands or a clean knife to separate the clump into sections, each with several shoots and a healthy portion of roots. Handle the roots gently—they’re more fragile than they look.
Place the catmint in the new hole so the top of the root ball sits level with the soil surface. Planting too deep suffocates the crown, while planting too high exposes roots. Backfill with your amended soil, gently firming it around the roots to eliminate air pockets.
Water immediately after planting until the soil is thoroughly moist but not soggy. I create a small soil berm around the edge of the planting hole to help direct water to the roots. This first watering is critical—it settles the soil around the roots and removes air gaps that could dry them out.
Keep the soil consistently moist (but not waterlogged) for the first 2-3 weeks while the plant establishes. You’ll know it’s time to reduce watering when you see new growth appearing—this signals the roots have taken hold in their new location.
Apply a 2-inch layer of mulch around the base (keeping it 1 inch away from stems) to conserve moisture and regulate soil temperature. Avoid fertilizing immediately after transplanting—wait until you see active growth, usually after 3-4 weeks, before applying any plant food.
Watch for signs of transplant shock like wilting or yellowing leaves, which typically appear within 24-48 hours if the plant is struggling. If this happens, provide temporary shade with a lightweight row cover for 3-5 days to reduce stress.
Catmint is resilient—most plants bounce back quickly with proper care. Once established, you’ll see vigorous growth and those lovely lavender-blue flowers. The first bloom after transplanting might be smaller, but subsequent seasons will reward you with the full, fragrant display you expect from healthy catmint.
Transplanting catmint doesn’t have to be stressful—these practical insights will help your plants thrive in their new home.
Timing is Everything: The early spring or early fall timing mentioned in Step 1 isn’t arbitrary. I’ve found that transplanting during these windows gives roots the perfect conditions to establish without the stress of extreme temperatures. In spring, aim for when you first see new shoots emerging—this is nature’s signal that the plant is ready for change. For fall transplanting, count backward at least six weeks from your average first frost date to ensure roots have time to settle before winter dormancy.
Root Ball Protection: When digging up your catmint in Step 2, that 6-inch radius from the base is crucial. Catmint develops an extensive root system, and cutting too close to the stem means losing valuable roots that help with water absorption. I use a sharp spade and work slowly around the plant, angling the blade slightly inward to create a clean cut through the soil. If you’re dividing the plant, make sure each section has both roots and several healthy shoots—this balance ensures quick recovery.
Watering Wisdom: The immediate watering after replanting in Step 3 serves two critical purposes. First, it eliminates air pockets around the roots that could dry them out. Second, it helps the soil settle naturally around the root ball. I’ve had the best success when I water until I see moisture reaching the surface, then I create that small berm mentioned in the instructions to contain the water right where it’s needed most. For the first 2-3 weeks, check soil moisture daily—catmint prefers consistent moisture during this establishment period, but be careful not to create soggy conditions that could lead to root rot.
Post-Transplant Monitoring: Those first 24-48 hours after transplanting are when you’ll see any signs of stress. If your catmint shows wilting or yellowing leaves, don’t panic—this is normal transplant shock. The temporary shade solution mentioned in Step 5 works wonders. I use a lightweight row cover or even an upside-down laundry basket for 3-5 days to create gentle shade. Remove it gradually over a day or two to help the plant acclimate. Most catmint bounces back quickly with this simple protection.
Early spring (after the last frost) or early fall (4-6 weeks before the first frost) are ideal. These times allow roots to establish before extreme heat or cold. Avoid transplanting in summer unless you provide extra water and shade during recovery.
Yes, but take precautions! Water deeply 1-2 days before moving the plant, transplant on a cloudy day, and provide temporary shade. Mulch heavily to retain moisture and reduce stress. Expect slower recovery compared to spring/fall transplanting.
Dig a hole twice as wide as the root ball but the same depth. This gives roots room to spread without sinking the plant too deep. For container-grown catmint, loosen roots gently if they’re circling to encourage outward growth.
Don’t panic! Wilting is normal for 2-3 days. Water thoroughly (but don’t oversaturate) and trim back one-third of the foliage to reduce stress. Avoid fertilizing until new growth appears. If wilting persists after a week, check for root damage or pests.
Early spring is the best time to divide mature catmint (every 3-4 years). Use a sharp spade to split the clump into sections with healthy roots and shoots. Replant divisions immediately, watering well to help them recover faster.
