
Beautiful Plants For Your Interior
Beautiful Plants For Your Interior
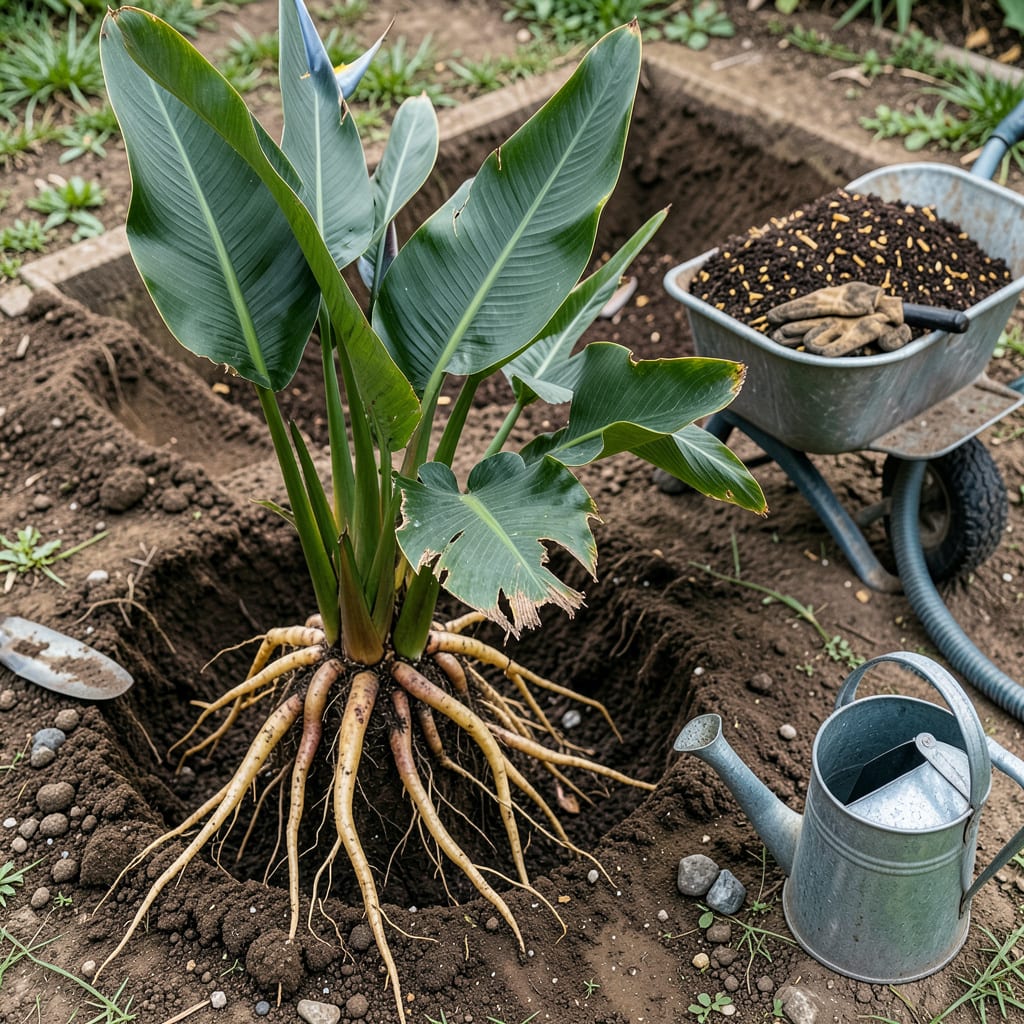
Moving a bird of paradise feels like performing surgery on a tropical giant—but I’ve done this enough times to know it’s simpler than it looks. The key is timing: late winter or early spring, just before new growth starts, gives roots the best chance to settle in. I’ve lost plants by transplanting in summer heat, so trust me on this one.
You’ll need sharp tools, patience, and a hole twice as wide as the root ball. The real secret? Disturb the roots as little as possible and water deeply immediately after. My transplanted strelitzia not only survived but threw out new leaves within three weeks—proof that with the right approach, these dramatic plants handle relocation better than you’d expect.
📚 In This Guide
Moving these tropical beauties doesn’t have to be stressful—follow my method for happy roots and thriving plants.
Early spring is ideal for transplanting bird of paradise, just as new growth begins but before temperatures exceed 85°F. I always pick a day with mild weather—overcast skies reduce transplant shock. Water the plant deeply 24 hours before moving to hydrate the roots.
Dig the new hole twice as wide as the root ball but no deeper. Mix compost or organic matter into the native soil at a 1:3 ratio to improve drainage while keeping the soil structure familiar. Test the hole by filling it with water—if it drains within 30 minutes, the conditions are right.
Use a sharp spade to dig a wide circle around the plant, starting 12-18 inches from the base to preserve feeder roots. Work the spade under the root ball at a 45-degree angle, leveraging gently to lift. For large specimens, I recruit a helper to support the foliage while I handle the roots.
Once free, place the root ball on a tarp to prevent drying. If roots are circling the ball, make three vertical cuts with a clean knife to encourage outward growth. Keep the root ball intact—broken roots mean slower recovery. Mist the roots lightly if they’ll be exposed longer than 10 minutes.
Set the plant in the new hole at the exact same depth it grew before—look for the soil line on the stem. Too deep invites rot; too shallow dries roots. Hold the plant upright while backfilling with the amended soil, tamping gently every 6 inches to eliminate air pockets.
Create a 3-inch-high water basin around the perimeter to direct moisture to the roots. Water immediately with 2-3 gallons, letting it soak in slowly. I add a 2-inch layer of mulch (wood chips or bark) to retain moisture, keeping it 3 inches away from the stem to prevent rot.
Water deeply every 3-4 days for the first two weeks, then taper to weekly. The goal is moist (not soggy) soil—stick your finger 2 inches deep to check. Avoid fertilizing for 4-6 weeks; fresh roots are tender and burn easily.
Watch for wilting in the first week—this is normal. If leaves stay droopy beyond 7 days, provide temporary shade with burlap. I stake top-heavy plants with bamboo to prevent wind rock while roots establish. New growth in 3-4 weeks signals successful transplanting.
Transplanting these dramatic tropical plants becomes much easier when you know what to watch for and how to avoid common pitfalls.
Timing is Everything: The 24-hour pre-watering mentioned in Step 1 makes all the difference. I’ve found that plants hydrated for this full period recover twice as fast as those watered just hours before moving. Don’t rush this step—it’s your insurance against transplant shock. In warmer climates where temperatures approach 85°F, consider moving your transplanting time to early morning to avoid heat stress.
Root Ball Handling: When you’re making those three vertical cuts in Step 2, use a sterilized knife to prevent disease transmission. I learned this the hard way after losing a plant to fungal infection. The 10-minute window for exposed roots is critical—set a timer if needed. For very large specimens, I’ve successfully used damp burlap instead of a tarp to keep roots protected during the move.
Watering Wisdom: The 2-3 gallons of immediate watering in Step 3 should be applied slowly over 5-10 minutes to allow proper absorption. I use a gentle stream from my hose rather than dumping it all at once. During the first two weeks of every-3-4-days watering, check soil moisture at that 2-inch depth in multiple spots around the plant—soil can dry unevenly, especially near the edges of the root ball.
Recovery Monitoring: That 7-day window for normal wilting is your plant’s way of adjusting. Beyond that, I’ve had success with temporary shade cloth (30-40% shade) rather than burlap—it allows better airflow while still protecting from sun. When you see new growth at the 3-4 week mark, that’s your signal to start a diluted fertilizer regimen, even though you’re still avoiding full-strength feeding until the 4-6 week point.
Early spring or fall is ideal—when temperatures are mild (60–75°F) and the plant is semi-dormant. Avoid extreme heat or cold, which stress roots. If moving potted plants indoors/outdoors, acclimate them gradually over 1–2 weeks to prevent shock.
It’s risky! Transplanting during active blooming can cause flower drop. If unavoidable, prune spent blooms first, water deeply 24 hours pre-move, and avoid disturbing roots. Post-transplant, expect a temporary pause in flowering (4–6 weeks).
Planting too deep or skipping root prep. Bury the stem at the same depth as before—deeper = rot risk. Also, failing to loosen root-bound clumps or not watering thoroughly after transplanting stresses the plant. Use a mycorrhizal fungicide (optional) to reduce shock.
Expect 2–4 weeks of adjustment (droopy leaves are normal). Full recovery—new growth and perky foliage—takes 6–12 weeks, depending on size and care. Speed it up with consistent moisture (not soggy!) and partial shade for the first month.
Wait 4–6 weeks! Freshly transplanted roots are sensitive. Fertilizer can burn them. Instead, mix compost or worm castings into the new soil pre-planting. After the waiting period, use a balanced 10-10-10 fertilizer diluted to half-strength.
