
Beautiful Plants For Your Interior
Beautiful Plants For Your Interior
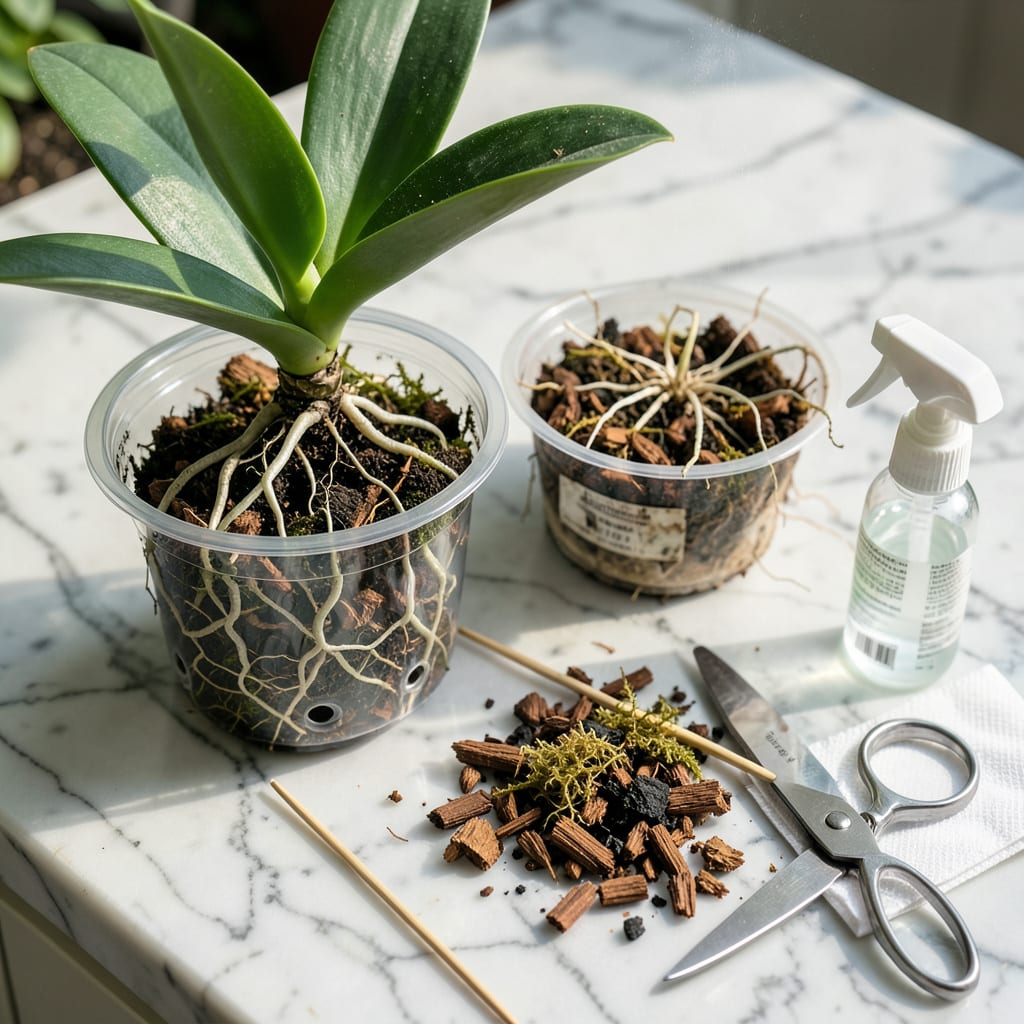
That moment when your orchid’s roots start crawling over the pot edge? That’s not enthusiasm—it’s a cry for help. I’ve rescued dozens of orchids from their sad, cramped pots, and the difference after transplanting is shocking: bigger blooms, faster growth, and roots that actually look happy instead of tangled and gray.
The process isn’t complicated once you know the tricks. Timing matters (right after blooming is ideal), the right mix is everything (regular potting soil is a death sentence), and those scary-looking roots? Most are supposed to be there. You’ll end up with a plant that recovers in 2-3 weeks and rewards you with stronger growth than before.
📚 In This Guide
This gentle process ensures your orchid recovers quickly and rewards you with vigorous growth and future blooms.
Select a clean pot that’s 1-2 inches larger than the current container—orchids thrive when slightly root-bound. I always use clear plastic pots with multiple drainage holes so I can monitor root health and prevent waterlogging. Soak the pot in a 10% bleach solution for 10 minutes, then rinse thoroughly to eliminate any pathogens.
Gather your sterilized orchid bark mix (never regular potting soil), sharp scissors or pruners, and a spray bottle with room-temperature water. Lay out everything on a clean workspace with good lighting. The reason we sterilize tools and containers is that orchids are extremely susceptible to bacterial and fungal infections through fresh cuts.
Water your orchid 24 hours before transplanting to hydrate the roots and make them more pliable. Gently squeeze the sides of the plastic pot to loosen the root ball, then turn it upside down while supporting the base of the plant. If it resists, run a clean knife around the inner edge of the pot to free stubborn roots.
Once removed, rinse the root system under lukewarm water to remove all old media. Healthy roots should be firm and silver-green when dry, turning green when wet. Black, mushy roots indicate rot and must be removed. This inspection is your chance to address hidden problems before they spread to the new container.
Using sterilized scissors, trim away any dead or rotting roots—these appear brown, hollow, or slimy. Make clean cuts just above the damaged area. I always sterilize my tools between cuts by dipping in rubbing alcohol to prevent spreading infections. Leave healthy roots intact, even if they extend beyond the pot.
If your orchid has particularly long aerial roots, don’t force them into the pot. These roots naturally absorb moisture from the air and will adapt to their new position over time. Spray the trimmed roots with your water bottle to keep them hydrated during the process. The goal is to remove only what’s necessary while preserving as much healthy root structure as possible.
Place a 1-inch layer of orchid bark mix in the bottom of your new pot. Position the orchid so its base sits just below the rim, allowing room for new growth. Hold it steady while gently filling around the roots with fresh media, tapping the pot occasionally to settle the bark without compacting it.
The base of the plant should rest just above the media surface—burying it too deep suffocates the crown and leads to rot. I use a chopstick to carefully tuck media between roots, ensuring good contact without damaging them. The plant should sit firmly but not tightly; you should be able to lift it slightly by the leaves without it coming out of the pot.
After repotting, place your orchid in bright, indirect light (east or north windows work well) and maintain temperatures between 65-75°F. Avoid direct sunlight for 7-10 days as the roots recover. Water lightly the first time, just enough to dampen the new media, then wait until the roots show silver-green tips before watering again.
Expect some leaf yellowing or drooping—this is normal transplant stress. Resist fertilizing for 3-4 weeks to avoid burning tender new roots. I’ve found that maintaining 50-70% humidity around the plant (using a humidity tray or room humidifier) significantly reduces recovery time. You’ll see new root growth emerging from the base within 2-3 weeks, signaling successful establishment.
Here’s what I’ve learned from years of repotting orchids—small details that make a huge difference in recovery.
Sterilization is Non-Negotiable: In Step 1, don’t rush the 10-minute bleach soak for your pot. I once skipped this and lost three orchids to fungal infections within weeks. The same goes for your tools—dip scissors in rubbing alcohol between every cut in Step 3, not just at the start. Orchids have no natural defenses against the pathogens we can’t see, so this step protects your investment.
Root Inspection Technique: When rinsing roots in Step 2, use lukewarm water and gently separate them with your fingers. Healthy roots feel firm like al dente pasta, while rotting ones collapse like overcooked noodles. I keep a magnifying glass handy to spot early-stage rot that isn’t yet black and mushy. This is your only chance to catch problems before they spread in the fresh media.
Media Placement Matters: In Step 4, that 1-inch bark layer at the bottom isn’t arbitrary—it creates crucial airflow around the root crown. I use a chopstick to create small air pockets throughout the media as I fill the pot. Compacted bark suffocates roots, so tap the pot gently against your work surface every few inches to settle the media without pressing it down. The plant should wobble slightly when done, indicating roots have room to breathe.
Recovery Environment Control: The 7-10 days of indirect light in Step 5 are critical, but here’s what nobody tells you: rotate the pot 180 degrees every other day. This prevents the plant from growing lopsided toward the light source while roots establish. I place my orchids on a lazy Susan for easy turning. Also, that 50-70% humidity isn’t just helpful—it’s essential. A simple pebble tray with water beneath the pot maintains this perfectly without expensive equipment.
Orchids typically need repotting every 1-2 years or when their potting mix breaks down. Look for signs like roots growing over the pot edges, yellowing leaves, or slow growth. Phalaenopsis orchids may need it more frequently (every 12-18 months), while others like Cattleyas can wait up to 3 years.
The ideal time is just after flowering or during early spring when new growth starts. Avoid repotting during dormancy or while in bloom—it stresses the plant. If roots are rotting, transplant immediately regardless of season to prevent further damage.
Never! Orchids need a fast-draining mix like bark chips, sphagnum moss, or coconut husk. Regular soil suffocates roots by retaining too much moisture. For beginners, pre-mixed orchid potting media (available at garden centers) is the safest choice.
Transplant shock is common. Check for overwatering (wait 5-7 days before watering post-repot), loose roots (firm them gently in the mix), or sunburn (keep it in indirect light for 1-2 weeks). Trim any black/mushy roots before repotting to prevent rot.
No! Wait 5-7 days to let roots heal from minor damage. Watering too soon can cause rot. Instead, mist the leaves lightly and place the pot in a humid spot (like a tray with pebbles and water). Resume normal watering once new root growth appears.
