
Beautiful Plants For Your Interior
Beautiful Plants For Your Interior
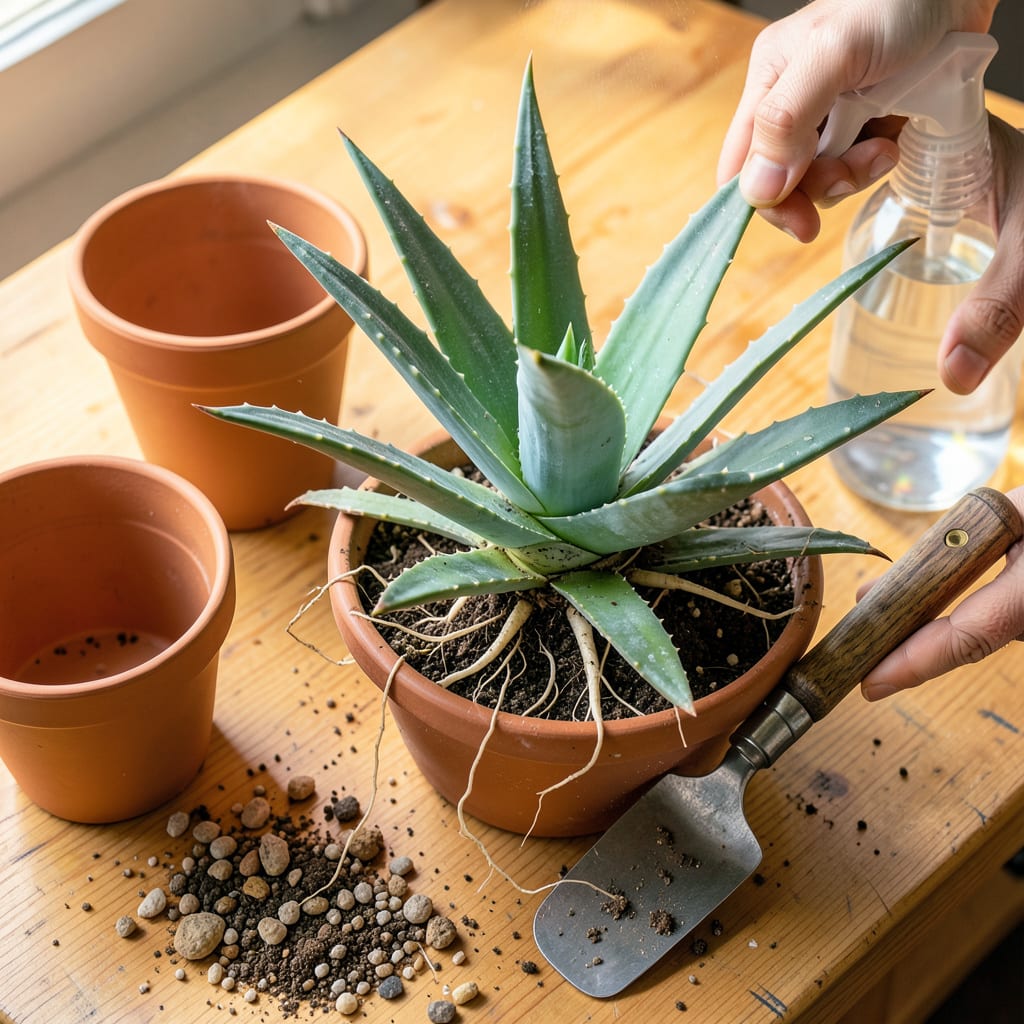
That moment when your aloe vera outgrows its pot is exciting—it means you’ve kept it alive long enough to thrive. I’ve transplanted dozens of these resilient plants, and the process is simpler than you’d think. The key is timing it right and handling those thick, water-filled leaves without snapping them.
You’ll need a pot just 2-3 inches wider than the current one, well-draining soil (cactus mix works perfectly), and about 10 minutes of your time. Do this in spring or early summer when the plant’s actively growing, and you’ll avoid the shock that stunts progress. No green thumb required—just follow the steps, and your aloe will reward you with faster growth and maybe even pups.
📚 In This Guide
Transplanting aloe vera doesn’t have to be intimidating—follow these clear steps for a smooth transition and healthier plants.
Choose a pot that’s 2-3 inches wider than your current one, with drainage holes at the bottom. Aloe vera roots rot easily in standing water, so proper drainage is non-negotiable. I like to use unglazed terra cotta pots because they allow excess moisture to evaporate through the walls.
Fill the new container about one-third full with fresh cactus/succulent potting mix. Don’t use regular potting soil—it holds too much moisture. Gently tap the container on a flat surface to settle the mix without compacting it too firmly. You want air pockets for root growth but no large gaps.
Water your aloe vera 2-3 days before transplanting—this helps the roots hold together when you remove it. Turn the current pot sideways and gently squeeze the sides while supporting the base of the plant. If it resists, run a butter knife around the inner edge to loosen the root ball.
Once free, examine the roots. Healthy aloe roots are firm and white or tan. If you see dark, mushy roots, trim them away with clean scissors. Be gentle—aloe leaves break easily, and damaged leaves invite infection. Hold the plant by its root base, not the leaves, to avoid bruising.
Place the aloe in the new container so the base sits at the same soil level as before. Burying the stem too deep causes rot. Fill around the root ball with more potting mix, pressing lightly to eliminate air pockets. Leave about 1 inch of space at the top for watering.
Don’t water immediately after transplanting. Wait 5-7 days before the first watering—this gives any damaged roots time to heal and prevents rot. You’ll know it’s time to water when the soil feels completely dry 2 inches down and the pot feels lightweight when lifted.
Move your transplanted aloe to bright, indirect light for the first week. Direct sun can stress the plant while it adjusts. After that, gradually reintroduce it to its usual sunny spot. Aloe vera thrives in 6-8 hours of sunlight daily but tolerates partial shade.
Resist the urge to fertilize immediately. Wait at least 4-6 weeks before applying a diluted succulent fertilizer. You’ll see new growth emerging from the center—that’s your sign the plant has recovered. Until then, just maintain proper light and water only when the soil is completely dry.
Transplanting aloe vera becomes much easier when you know these key details that most guides overlook.
Pot Selection Insight: When choosing your new container in Step 1, remember that terra cotta isn’t just about aesthetics—it actually helps prevent overwatering. The porous material wicks away excess moisture through the pot walls, which is exactly what aloe vera needs. If you prefer plastic pots, just be extra vigilant about drainage and watering frequency, as plastic retains more moisture than terra cotta.
Root Handling Technique: During Step 2 when examining the roots, here’s what nobody tells you: healthy aloe roots should feel firm like a raw carrot, not soft like a ripe banana. If you find any roots that are black and mushy, trim them immediately with sterilized scissors (wipe blades with rubbing alcohol). This prevents rot from spreading to healthy roots during the critical 5-7 day recovery period mentioned in Step 3.
Watering Wisdom: The 5-7 day waiting period before first watering in Step 3 is crucial, but here’s how to make it foolproof: lift the pot daily. When it feels as light as it did when you first filled it with dry soil, that’s your signal the soil is completely dry. This method works better than poking your finger in the soil, especially for beginners who might misjudge moisture levels.
Light Transition Strategy: For the bright, indirect light recommended in Step 4, an east-facing windowsill works perfectly for that first week. If you only have south or west-facing windows, place the plant 3-4 feet away from the glass or use a sheer curtain to filter the light. The gradual reintroduction to full sun prevents leaf scorch, which appears as brown, crispy patches on the leaves.
Transplant aloe vera every 2–3 years or when roots crowd the pot (visible through drainage holes). Young plants may need repotting yearly for faster growth. Spring or early summer is ideal—avoid winter when growth slows.
Yes! Aloe vera pups (offsets) or broken leaves can root in dry, well-draining soil. Let cut ends callus for 1–2 days before planting. Keep soil lightly moist (not soggy) until roots form in 3–4 weeks.
Use a cactus/succulent mix (50%) blended with perlite or coarse sand (50%) for drainage. Avoid dense potting soil—it retains too much moisture, risking rot. Add a handful of gravel at the pot’s base for extra airflow.
Drooping is usually transplant shock. Causes: overwatering, poor drainage, or root damage. Fix it by withholding water for 5–7 days, ensuring bright indirect light, and checking for soggy soil. Recovery takes 1–2 weeks.
Drainage holes are non-negotiable! Aloe vera rots in standing water. If your pot lacks holes, drill some or use it as a cachepot (place a plastic nursery pot inside). Terracotta pots help wick away excess moisture.
