
Beautiful Plants For Your Interior
Beautiful Plants For Your Interior
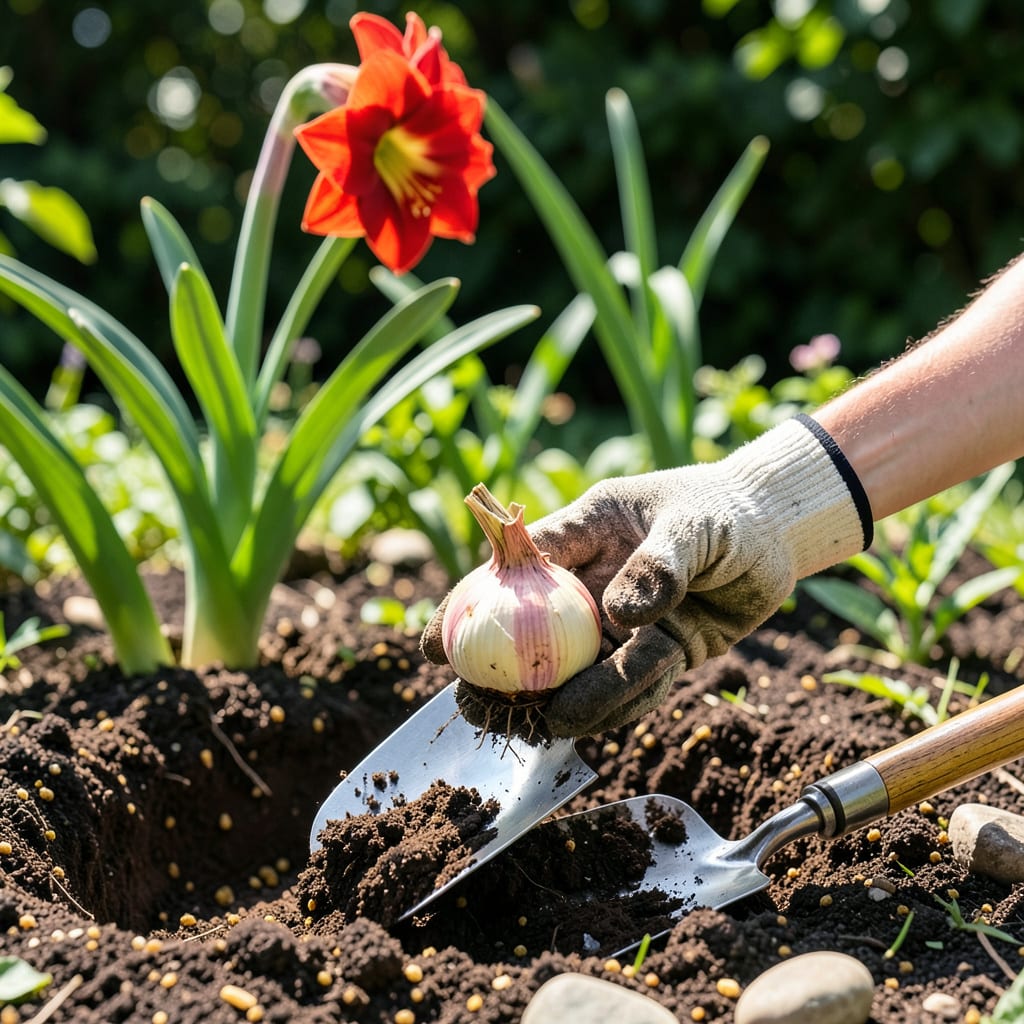
That moment when your amaryllis bulbs outgrow their pots is pure garden magic waiting to happen. I’ve moved dozens outside over the years, and the difference in bloom size and vigor is shocking—like comparing a sparkler to fireworks. The key is timing: wait until after your last frost, when soil temps hit 60°F, and the bulbs wake up hungry for space.
Here’s the thing—this isn’t about just digging a hole. It’s about giving those bulbs a five-star outdoor resort: well-draining soil, morning sun with afternoon shade, and room to stretch without crowding. Do it right, and you’ll get bigger flowers, stronger stems, and bulbs that come back for years. Skip the guesswork; I’ll walk you through every step, from hardening off to that first post-transplant watering.
📚 In This Guide
Moving your amaryllis bulbs outside is simpler than you think—just follow these seasonal cues and timing tricks.
Wait until all danger of frost has passed and soil temperatures reach at least 60°F—typically 2-3 weeks after your last frost date. I check by inserting a soil thermometer 2 inches deep at mid-morning. Amaryllis thrive in full sun to partial shade, with afternoon shade preferred in hotter zones (8+).
Avoid low-lying areas where cold air settles. The ideal spot has well-draining soil and protection from strong winds that could snap the tall flower stalks. If your garden has heavy clay, you’ll need to amend the planting area (I’ll cover that next). Watch for signs of spring growth—when you see green noses poking through the bulb’s neck, it’s time to transplant.
Dig a hole 12-18 inches wide and 8 inches deep—this gives roots room to establish without competition. Mix the excavated soil with equal parts compost to improve drainage and fertility. Amaryllis rot in soggy conditions, so if your soil stays wet, create a 3-inch raised mound at the hole’s base.
Add a handful of bone meal to the bottom of the hole and work it into the soil. This slow-release phosphorus encourages strong root development and vibrant blooms. I also sprinkle 1/4 cup of balanced 10-10-10 fertilizer around the hole’s perimeter, keeping it 6 inches away from the bulb to prevent root burn during initial establishment.
Place the bulb in the hole so the top third sits above soil level—this prevents rot and allows the neck to dry properly between waterings. The green growth tip should point upward. Backfill with your amended soil, gently firming as you go to eliminate air pockets. Don’t tamp down heavily; you want the soil to remain loose enough for new roots to penetrate easily.
Water deeply immediately after planting until moisture reaches 6 inches down (use a trowel to check). Then hold off on watering again until the top 2 inches of soil feel dry. This initial deep watering settles the soil around the roots while preventing waterlogging. I mark the planting spot with a small stake—it’s easy to lose track of dormant bulbs among other plants.
For the first 2 weeks, water when the top 2-3 inches of soil become dry, usually every 5-7 days depending on your climate. After that, reduce to once weekly unless you’re in extreme heat. Amaryllis prefer being slightly dry to soggy. Apply a 2-inch layer of mulch (I use shredded bark) to conserve moisture and regulate soil temperature, but keep it 1 inch away from the bulb’s neck.
Begin fertilizing 4 weeks after transplanting with a water-soluble 20-20-20 fertilizer every 2 weeks until blooms appear. Watch for yellowing leaves, which signal either overwatering or nitrogen deficiency. The real reward comes in 8-12 weeks when you’ll see flower stalks emerge—each healthy bulb produces 2-3 stalks with 4-6 blooms per stalk.
In fall, when leaves begin yellowing naturally (usually after the first light frost), reduce watering gradually over 2 weeks until you stop completely. This signals the bulb to enter dormancy. After foliage dies back, apply a 3-inch layer of straw mulch over the planting area to protect against winter temperature fluctuations.
In zones 8-10, bulbs can remain in ground year-round. For colder zones, dig bulbs after the first hard frost, brush off soil, and store in a cool (50-60°F), dark place for 8-10 weeks before replanting. I’ve found that bulbs transplanted outside for at least one season produce significantly larger blooms the following year compared to those kept exclusively indoors.
Transplanting amaryllis bulbs successfully comes down to timing, soil preparation, and post-planting care. Here’s what I’ve learned from years of growing these stunning flowers.
Soil Temperature Timing: The 60°F soil temperature mentioned in Step 1 isn’t arbitrary—it’s critical for root activation. I’ve found that planting when soil is just 5°F cooler can delay establishment by weeks. Use a soil thermometer inserted 2 inches deep at mid-morning for accuracy, as surface temperatures fluctuate dramatically throughout the day. The 2-3 week window after your last frost date gives you flexibility, but always prioritize that soil temperature reading over calendar dates.
Planting Depth Technique: When positioning your bulb in Step 3 with the top third exposed, here’s the trick: measure from the bulb’s base (where roots emerge) to the soil line. This exposure prevents the two most common issues I see—rot from burial too deep, and instability from planting too shallow. The exposed neck should be about 1-2 inches above soil level, allowing it to dry properly between waterings while still anchoring the bulb securely.
Watering Wisdom: That initial deep watering in Step 3 until moisture reaches 6 inches down is more important than you might think. It serves three critical purposes: settling the soil to eliminate air pockets, jumpstarting root growth toward the moisture, and providing immediate hydration to the bulb. I use a trowel to check depth—if you don’t reach that 6-inch mark, the roots may not establish properly in the amended soil zone you’ve created.
Fertilizer Strategy: The 4-week waiting period before fertilizing in Step 4 isn’t just about timing—it’s about root development. Those first weeks are when the bulb establishes its root system to access nutrients. Starting the 20-20-20 fertilizer too early can actually stress the plant as it tries to process nutrients before its roots are ready. I mark my calendar for that 4-week point and watch for new leaf growth as my signal that the bulb is ready for feeding.
Amaryllis bulbs are not frost-tolerant! Wait until after the last frost (spring/summer) when soil temps hit 60°F+. In USDA zones 8-11, they can stay outside year-round with mulch. Colder zones? Dig them up before first frost and store indoors.
Plant bulbs 6–8 inches deep with the neck (top third) above soil. Space them 12–15 inches apart for airflow. Too shallow = flopping stems; too deep = rot. Pro tip: Mix compost into the hole for nutrients!
Patience! Transplanted bulbs may skip a season while adjusting. Check for:
Use well-draining pots (12″+ diameter) and move outdoors in warm months. Benefits:
Yellowing leaves often mean stress—usually from:
