
Beautiful Plants For Your Interior
Beautiful Plants For Your Interior
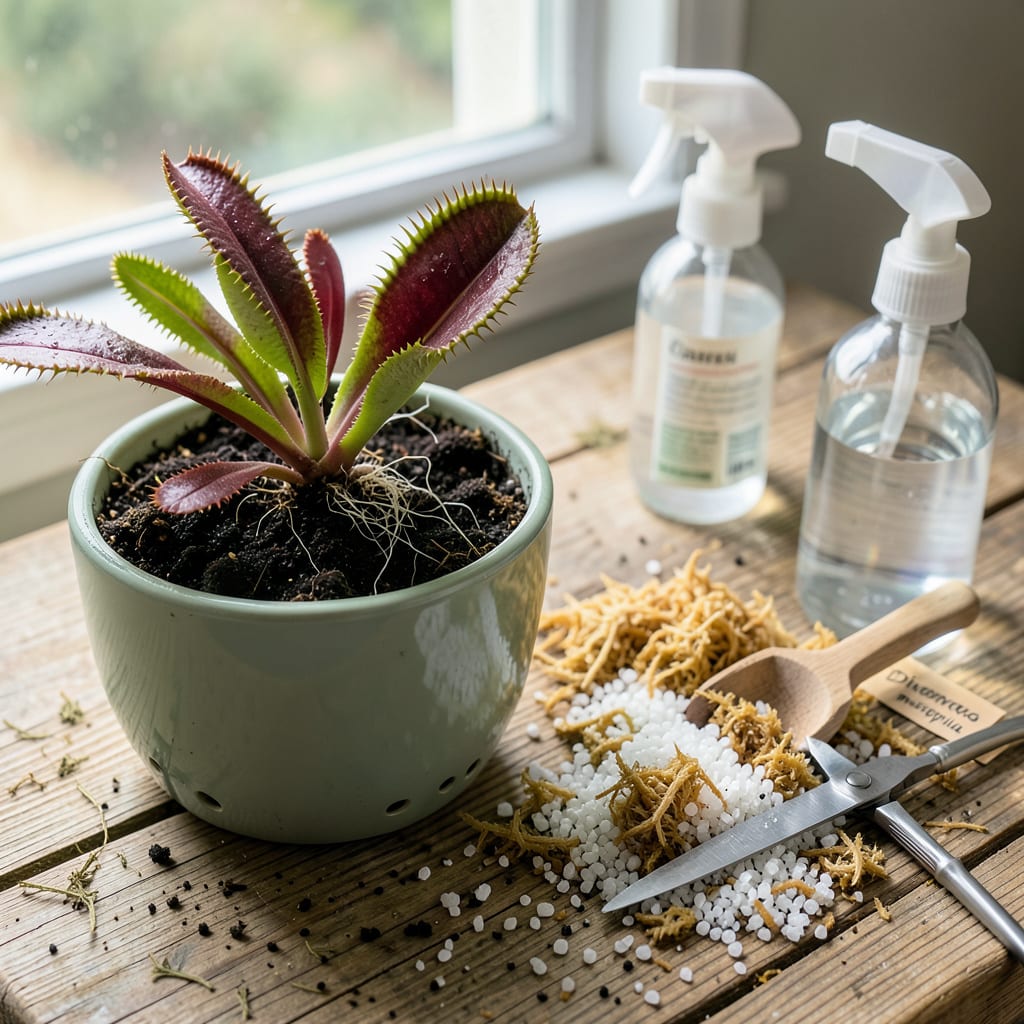
That moment when your Venus flytrap outgrows its pot is both exciting and nerve-wracking. I’ve learned the hard way that these plants don’t respond well to rough handling—but with the right approach, transplanting can actually boost their health and vigor. The key is timing it right, usually in early spring before they wake from dormancy, and using a soil mix that mimics their natural boggy habitat.
What you’re aiming for is minimal stress and maximum recovery. The wrong soil or a heavy hand can set them back for months, but do it properly, and you’ll see new traps forming within weeks. No fancy tools required—just patience, distilled water, and a gentle touch. Let’s get your plant settled into its new home the right way.
📚 In This Guide
Moving your carnivorous plant doesn’t have to be stressful—follow these gentle steps for a smooth transition.
Start by selecting a clean 4-6 inch pot with drainage holes. I always use plastic or glazed ceramic because unglazed terra cotta can leach minerals that harm the plant. Fill it with a mix of 50% peat moss and 50% perlite—this mimics the nutrient-poor bog conditions Venus fly traps thrive in.
Water the new mix thoroughly with distilled or rainwater until it’s evenly moist but not soggy. Tap the pot gently to settle the medium without compacting it. You’ll know it’s ready when the surface glistens slightly but no water pools at the top.
Gently squeeze the sides of the current pot to loosen the root ball. Turn it sideways and tap the bottom—this helps the plant slide out cleanly. Support the base of the plant with your fingers as you remove it to avoid damaging the delicate rhizome.
If the roots are tightly bound, don’t pull them apart. Instead, soak the root ball in room-temperature distilled water for 5-10 minutes to help loosen the medium. You’ll feel the roots relax and separate more easily when ready.
Create a small hole in the new mix just deep enough to accommodate the root system. Place the plant in the hole, ensuring the rhizome sits at the same level it was previously—burying it too deep can cause rot. Gently firm the mix around the base to stabilize the plant.
Water immediately after transplanting until you see moisture coming from the drainage holes. This helps settle the medium around the roots. The plant may look slightly wilted for 24-48 hours—this is normal transplant shock, not a cause for concern.
Move the transplanted Venus fly trap to a location with bright, indirect light for the first 3-5 days. Avoid direct sun during this recovery period, as the plant will be more sensitive to stress. Maintain consistent moisture by keeping the pot in a tray with ½ inch of distilled water.
Don’t feed your plant during this adjustment period. You’ll know it’s fully recovered when new growth appears—typically within 2-3 weeks. At this point, you can resume normal care and gradually reintroduce direct sunlight if desired.
After the initial recovery, keep the plant in full sun for 6+ hours daily and maintain the water tray method. Use only distilled or rainwater—tap water contains minerals that will accumulate and harm the plant over time. You’ll see the healthiest growth when daytime temperatures stay between 70-95°F.
Watch for signs of stress like blackening traps or stunted growth. These usually indicate either too much water (leading to rot) or insufficient humidity. A clear plastic dome over the pot can help maintain humidity during dry periods, but remove it daily to allow air circulation.
Transplanting carnivorous plants requires special care, but these insights will help ensure your Venus fly trap thrives after its move.
Water Quality is Critical: I can’t stress enough how important it is to use only distilled or rainwater throughout the entire process. Tap water contains minerals that will gradually poison your plant. In Step 1, when preparing the new mix, water it thoroughly until you see that perfect glisten on the surface—this ensures the peat moss and perlite are properly hydrated without becoming waterlogged. The 50/50 peat-perlite ratio is non-negotiable for proper drainage and aeration.
Root Handling Technique: When you reach Step 2, resist the urge to rush. If your plant’s roots are tightly bound, that 5-10 minute soak in room-temperature distilled water is your best friend. I’ve found that using lukewarm water (not hot) helps relax the roots more effectively. Gently massage the root ball underwater—you’ll feel when it’s ready to separate. Never pull or tug at resistant roots, as this can damage the delicate rhizome.
Post-Transplant Care: The 24-48 hours immediately after transplanting (mentioned in Step 3) are when your plant is most vulnerable. Keep it in bright, indirect light during this period, and maintain that ½ inch of water in the tray. I like to use a clear plastic bag loosely draped over the pot (not sealed) to maintain humidity during these first two days. Just remember to remove it for a few hours daily to prevent mold growth. The slight wilting you might see is completely normal—this is just transplant shock, not a sign of failure.
Recovery Monitoring: During the 3-5 day recovery period outlined in Step 4, watch for new growth as your signal that the plant has adjusted. I’ve noticed that maintaining temperatures between 70-95°F (as mentioned in Step 5) significantly speeds up recovery. If your home is cooler, consider using a small heat mat under the pot to keep the roots warm. Don’t be tempted to feed your plant during this adjustment period—it needs all its energy for root establishment, not digestion.
Got questions about transplanting your Venus flytrap? You’re not alone! Here are the most common concerns—and quick answers—to help your carnivorous friend thrive.
1. When’s the best time to transplant a Venus flytrap?Early spring or late winter (February–April) is ideal, as the plant is waking from dormancy. Avoid transplanting during summer heat or winter dormancy—stress levels spike, and recovery slows. A healthy, actively growing plant handles the move best!
Nope! Regular soil contains minerals and nutrients that’ll kill your plant. Stick to a mix of 1:1 peat moss (or sphagnum moss) and perlite/sand. Avoid fertilizers, compost, or garden soil—they’re toxic to carnivorous plants.
3. My Venus flytrap looks wilted after transplanting—did I kill it?Don’t panic! Mild wilting is normal for 1–2 weeks as roots adjust. Keep the soil damp (not soggy), provide bright indirect light, and avoid triggering traps. If leaves blacken or mushy, check for root rot or overwatering.
4. Do I need to repot my Venus flytrap every year?Not necessarily! Repot every 1–2 years or when roots outgrow the pot. Frequent repotting stresses the plant. If the soil stays fresh and roots look healthy, hold off—just refresh the top layer of moss annually.
5. Can I divide my Venus flytrap while transplanting?Yes! If your plant has multiple growth points (like a clump), gently separate them with clean scissors or fingers. Each division needs at least one rhizome and a few leaves. Pot divisions separately and keep humidity high for faster recovery.
