
Beautiful Plants For Your Interior
Beautiful Plants For Your Interior
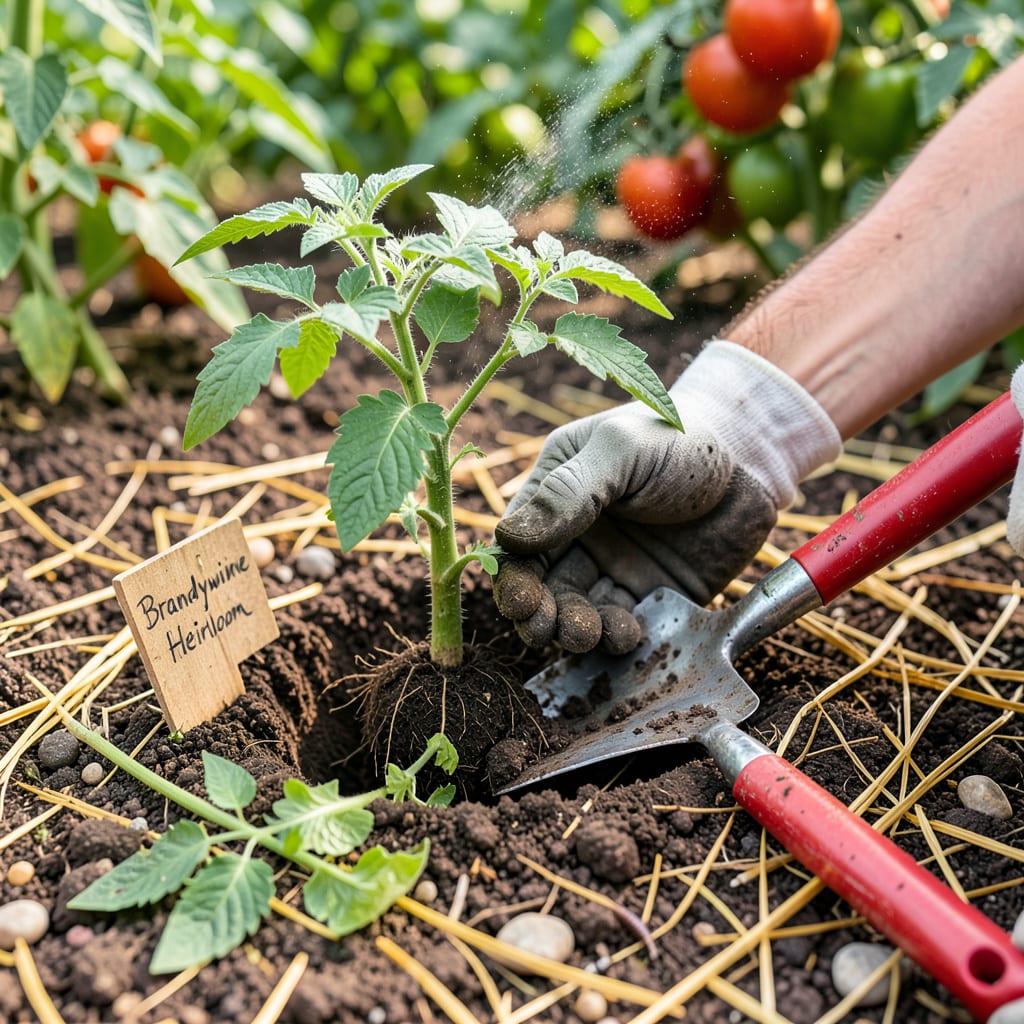
That first transplant can feel like moving day for your tomato seedlings—stressful if you don’t prepare, but life-changing when done right. I’ve moved hundreds of tomato plants over the years, and the ones transplanted at the perfect stage (when they’ve got 6-8 true leaves and sturdy stems) always outperform the rest. The difference? Roots that spread like wildfire instead of plants that just survive.
Here’s the thing—this isn’t about just digging a hole and hoping for the best. We’re talking about setting up your plants to double their root system overnight by burying stems deep, avoiding the shock that stunts growth for weeks, and getting them established before summer heat hits. Do it right, and you’ll see new growth within 3-5 days instead of wilting sadness.
📚 In This Guide
This simple process transforms your seedlings into productive plants—just follow these key steps at the right time.
Wait until your seedlings are 6-8 inches tall with 3-4 sets of true leaves—not just the initial cotyledons. I check the stems too; they should be about pencil-thick at the base. Transplanting too early shocks delicate roots, while waiting too long risks root-bound plants.
Time your move for late afternoon or an overcast day. The softer light reduces transplant shock. Avoid doing this in temperatures above 85°F or when soil is dry and hard. I always water seedlings thoroughly 24 hours before transplanting to hydrate the root ball.
Dig a hole that’s twice as wide as the root ball but only as deep. For tomatoes, I make mine 12-18 inches wide to encourage outward root growth. Mix a handful of compost into the removed soil—this gives roots immediate nutrients without burning them.
If your tomato is leggy, dig the hole deeper. I bury two-thirds of the stem, leaving just the top 4-6 inches above ground. The buried stem grows extra roots, creating a stronger plant. Water the empty hole first—this prevents dry soil from wicking moisture away from roots.
Gently squeeze the sides of the seedling container to loosen the root ball. If it resists, run a knife around the inside edge. I always handle seedlings by their leaves or root ball—never the stem, which bruises easily. If roots are circling, tease them apart lightly with your fingers.
Place the seedling in the hole, ensuring the remaining stem sits straight. For buried stems, remove the lower leaves first—they’ll rot underground. Fill the hole halfway with soil, then water to settle it. This eliminates air pockets that could dry out roots. Complete filling after the water drains.
Create a 3-4 inch high soil ring around the plant to act as a water basin. I mulch immediately with 1-2 inches of straw to conserve moisture and prevent soil splash on leaves. Water deeply until it pools in your basin—this encourages roots to grow downward.
For the first 3-5 days, provide afternoon shade if temperatures exceed 80°F. I use shade cloth or even an upside-down laundry basket. Watch for wilting in the first week—this is normal as roots establish. Keep soil consistently moist but not soggy during this critical period.
Check plants daily for the first week. You’ll see new growth within 7-10 days if the transplant succeeded. I remove any yellowing lower leaves to improve air circulation. Once you see new leaf growth, you can reduce watering frequency slightly.
Hold off on fertilizing for 10-14 days—transplants need time to establish before processing nutrients. When you do fertilize, use a balanced 10-10-10 formula at half strength. The real test comes when you see new flower clusters forming—that’s your sign the plant has fully recovered from the move.
Transplanting tomatoes can feel intimidating, but these practical insights will help you avoid common pitfalls and set your plants up for success.
Timing Secret: The 24-hour watering window before transplanting is crucial. I’ve found that thoroughly hydrating the root ball exactly 24 hours ahead prevents transplant shock better than watering right before moving. This gives roots time to absorb moisture without becoming waterlogged. Trust me, this simple step makes a noticeable difference in how quickly plants recover.
The Technique That Changed Everything: When burying two-thirds of the stem in Step 2, remove every leaf that will be underground. I learned this the hard way after losing several plants to stem rot. Those buried leaves decompose and create perfect conditions for disease. Use clean scissors to snip them off—don’t just pull them, which can tear the stem.
Temperature Matters: That 85°F threshold in Step 1 isn’t arbitrary. I’ve transplanted in 88°F heat and watched seedlings wilt dramatically within hours, even with shade. The 80°F guideline in Step 4 for afternoon protection is equally important—tomatoes can’t establish roots while fighting heat stress. A simple laundry basket as shade works surprisingly well in a pinch.
Watering Wisdom: The soil ring you create in Step 4 should hold water like a shallow bowl. I make mine exactly 4 inches high and test it by pouring water—if it drains immediately, the ring needs more soil. This basin ensures water goes directly to roots during that critical 3-5 day establishment period, not running off. Check it daily; even slight settling can reduce its effectiveness.
Transplant after the last frost when soil temps hit at least 60°F (15°C)—typically 6-8 weeks after sowing. Seedlings should have 2-3 true leaves and sturdy stems. Avoid midday sun; opt for late afternoon or a cloudy day to reduce shock. Hardening off for 7-10 days beforehand is key!
Choose a 5-gallon (or larger) pot with drainage holes. Use well-draining potting mix (add compost for nutrients). Dwarf varieties like ‘Tiny Tim’ thrive in containers, but indeterminate types need stakes or cages for support. Water more frequently—containers dry out faster!
Wilting is often transplant shock. Causes include root damage, underwatering, or sudden temperature changes. Fix it by: 1) Watering deeply at the base, 2) providing temporary shade (use a shade cloth), and 3) avoiding fertilizer for 1-2 weeks. Most plants recover in 3-5 days.
Yes! Trim the bottom 1-2 sets of leaves and bury the stem deeper (up to the remaining leaves). This encourages roots to grow along the buried stem, creating a stronger foundation. Pro tip: Use clean scissors to prevent disease spread!
It’s risky but possible if done carefully. Tomatoes dislike repeated root disturbance, so limit it to once (e.g., from seed tray to pot to garden). If you must, handle roots gently, keep soil intact, and transplant during cool weather to minimize stress.
