
Beautiful Plants For Your Interior
Beautiful Plants For Your Interior
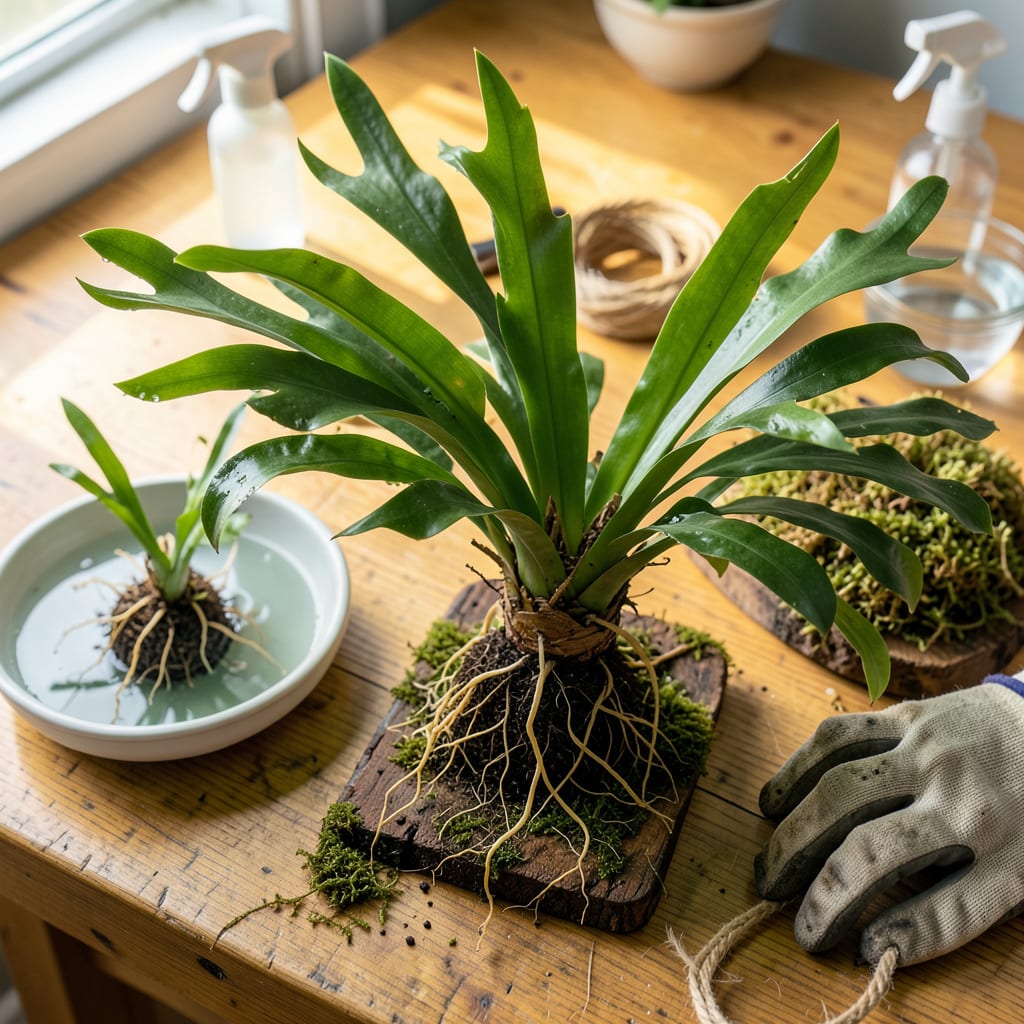
That first time I moved a staghorn fern, I nearly ruined it. The roots were a tangled mess, the fronds drooped dramatically, and I was convinced I’d killed it. Turns out, I just didn’t know the right way to handle those stubborn roots and delicate shields. Now, my transplanted ferns don’t just survive—they thrive, pushing out new growth within weeks of the move.
This isn’t about luck—it’s about timing, technique, and giving the plant what it actually needs. No fancy tools required, just a wire basket or wooden plaque, some sphagnum moss, and the confidence to trust the process. You’ll end up with a fern that looks like it’s been happily mounted for years, not one that’s struggling to recover from the transition.
📚 In This Guide
Moving your staghorn fern doesn’t have to be stressful—follow these careful steps for a smooth transition.
Start by watering your staghorn fern thoroughly 24 hours before transplanting. This ensures the plant is well-hydrated and less vulnerable to shock. I like to soak the entire root ball in room-temperature water for 10-15 minutes until it feels plump and heavy.
While the fern hydrates, prepare your new mounting surface (wooden plaque, bark slab, or wire basket). If using wood, lightly sand any rough edges that could damage the roots. For bark mounts, choose a piece at least 2 inches wider than your fern’s current spread to allow for future growth.
Carefully work your fingers between the fern’s root ball and its current mount. Staghorn ferns attach themselves tightly, so you may need to gently pry with a butter knife or plastic plant tag. The goal is to preserve as much of the root system as possible—don’t rush this step.
You’ll feel resistance from the basal fronds (the shield-like leaves at the base). These naturally cling to surfaces, so work slowly around the edges. If small pieces of the mount come away with the fern, that’s normal—just remove any debris from the roots before proceeding.
Place your fern on the new mount with the basal fronds pressed flat against the surface. The growing point (where new fronds emerge) should face outward. I use nylon stockings or fishing line to temporarily secure the fern—tie loosely but firmly enough to hold it in place while new roots establish.
For extra security, you can create a “cradle” with sphagnum moss around the root ball before tying. Mist the moss lightly to help it adhere. The fern should sit slightly angled (about 10-15 degrees) to allow water to drain away from the center and prevent rot.
Hang or position your newly transplanted fern in bright, indirect light—east or north-facing windows work well. Avoid direct sun for the first 7-10 days while the fern adjusts. Maintain humidity by misting daily or placing a tray of water with pebbles nearby.
Water thoroughly after transplanting, then wait until the root ball feels slightly dry to the touch before watering again. You’ll notice the fronds become slightly less rigid when the plant needs moisture. Remove any ties after 4-6 weeks once the fern has anchored itself to the new mount.
Transplanting these unique ferns becomes much easier when you know these key details from years of experience.
Hydration Timing: The 24-hour pre-transplant watering in Step 1 isn’t just helpful—it’s essential. I’ve found that ferns hydrated for the full 24 hours recover twice as fast as those watered just hours before moving. During that 10-15 minute soak, you’ll actually feel the root ball expand and firm up, which makes removal in Step 2 significantly easier. Don’t rush this preparation phase.
Mount Selection Insight: When choosing your new mount as described in Step 1, pay special attention to the 2-inch wider requirement. This extra space isn’t just for growth—it prevents the fern’s edges from touching walls or other surfaces, which can cause moisture buildup and rot. I learned this after losing a beautiful specimen that was mounted too closely to a wall.
Securing Technique: In Step 3, when using nylon stockings or fishing line, here’s what nobody tells you: tie the fern at three points (top, middle, bottom) rather than just one. This triangular support system prevents the fern from shifting as it establishes new roots. The 10-15 degree angle mentioned is perfect—any steeper and water pools in the center, any flatter and drainage suffers.
Post-Transplant Care: The 7-10 day adjustment period in Step 4 is when most people make mistakes. During this time, resist the urge to fertilize—your fern needs to focus on root establishment, not new growth. I maintain humidity by misting twice daily and using a humidifier nearby. The fronds will tell you everything: they’ll feel slightly softer than usual during this adjustment but should never become limp or yellow.
Spring or early summer is ideal, when the fern is actively growing. Avoid winter months—cold stress can hinder recovery. If your plant is root-bound or unhealthy, transplant immediately regardless of season, but provide extra humidity and shade afterward.
Try coconut fiber plaques, tree fern plaques, or even wire baskets lined with sphagnum moss. Avoid treated wood (toxins can harm roots). For a modern look, use plastic or metal grids with a thick moss layer to retain moisture.
Watch for yellowing fronds, brown tips, or drooping. These signal stress from over/under-watering or poor attachment. Mist daily for 2 weeks and check that the root ball stays moist (not soggy). New growth in 4–6 weeks means success!
Wait 4–6 weeks to avoid burning tender new roots. Then, use a balanced liquid fertilizer (10-10-10) diluted to half-strength, applied monthly in growing season. Skip fertilizer in winter—your fern needs rest!
Yes! Gently separate pups (baby ferns) with a sterile knife if they have their own root system (2+ inches long). Mount them individually—smaller pups may need a humidity dome (like a plastic bag) to thrive.
