
Beautiful Plants For Your Interior
Beautiful Plants For Your Interior
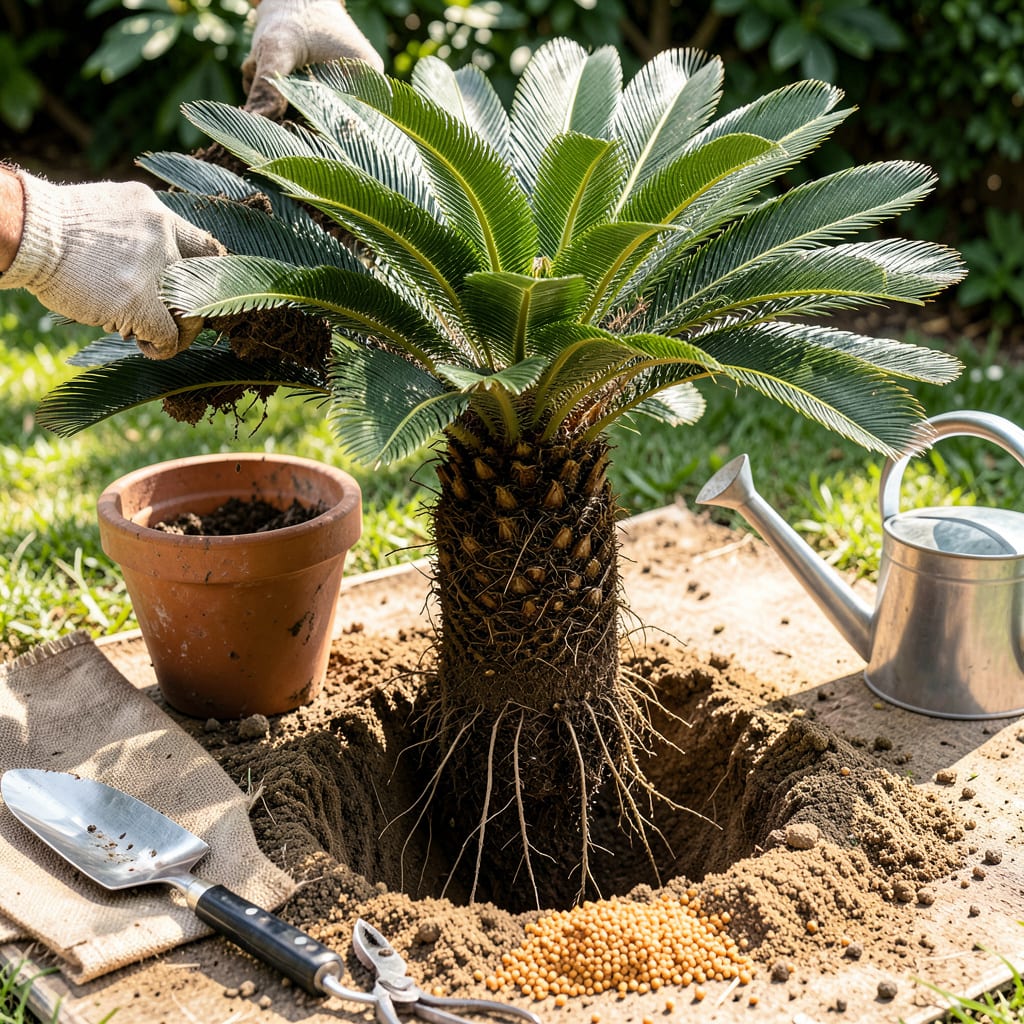
Moving a sago palm feels intimidating—those spiky fronds and deep roots make it seem like a job for professionals. I’ve transplanted three of these ancient-looking plants in my own yard, and the key is timing and preparation. Early spring or fall works best when the plant isn’t actively growing, giving it time to settle before summer heat or winter chill.
You’ll need gloves (the sap irritates skin), a sharp spade, and a well-draining soil mix—sagos hate soggy roots. The real trick? Preserving the root ball and planting at the exact same depth as before. I’ll walk you through each step so your palm doesn’t just survive the move—it thrives in its new spot.
📚 In This Guide
Moving a sago palm doesn’t have to be stressful—follow these proven steps for a smooth transition with minimal shock.
Early spring or late summer is ideal for transplanting, when temperatures stay consistently between 65-85°F. I always pick an overcast day to reduce stress on the plant. The new spot should get partial shade—morning sun with afternoon protection works best for sagos.
Dig the new hole twice as wide as the root ball but only as deep as the current container or planting depth. This gives roots room to spread without sinking the base too low. Test the hole by filling it with water—if it drains within 30 minutes, you’re good to go.
Water the plant deeply 24 hours before moving to hydrate the roots and make removal easier. For potted sagos, lay the container on its side and gently slide the root ball out. If it’s in the ground, use a sharp spade to cut a 12-inch radius around the trunk, going deep enough to preserve the root system.
Here’s the thing—sago roots are tough but brittle. Lift from the base of the trunk, not the leaves, and keep the root ball intact. If any roots break, don’t panic, but try to preserve as much as possible. Wrap the root ball in burlap or a damp towel if you need to transport it any distance.
Place the sago in the new hole so the top of the root ball sits 1-2 inches above the surrounding soil level. This prevents water from pooling around the trunk. I always check the orientation by comparing it to photos I took before digging—sagos grow best when facing the same direction as before.
Backfill with native soil, tamping gently to remove air pockets. Don’t add fertilizer or amendments yet—wait until the plant shows new growth. Create a 3-inch-high water ring around the edge of the hole to help direct moisture to the roots during the first few waterings.
Give the transplanted sago a deep soaking immediately, using 2-3 gallons of water for the first watering. The soil should feel moist but not soggy. For the first 2 weeks, water every 3-4 days, then gradually reduce frequency to weekly waterings.
Real talk: the first month is critical. Watch for yellowing fronds—this is normal transplant stress, not necessarily a problem. However, if you see blackened leaves or a mushy trunk, you’re overwatering. Hold off on fertilizing until you see new growth, which typically appears within 6-8 weeks.
Transplanting a sago palm successfully comes down to timing and technique—here’s what I’ve learned from years of experience.
Timing is Everything: The 24-hour pre-watering in Step 2 isn’t just helpful—it’s critical. Deep watering ensures the root ball stays intact during removal, which dramatically reduces transplant shock. I’ve found that watering in the evening before a morning transplant gives the best results, as the moisture has time to fully penetrate the roots.
Root Ball Protection: When digging that 12-inch radius around the trunk in Step 2, go slowly and use a sharp spade. Sago roots are surprisingly shallow but spread wide. I always keep a spray bottle handy to mist exposed roots if the process takes longer than expected—this prevents them from drying out during the move.
Orientation Matters: The tip in Step 3 about maintaining the plant’s original orientation isn’t just folklore. Sagos are sensitive to directional changes, and facing the same way minimizes stress. I take photos from multiple angles before digging, then use a compass app to match the orientation in the new location. This small step makes a noticeable difference in recovery time.
Watering Wisdom: Those 2-3 gallons of water immediately after planting in Step 4 should be applied slowly. I use a trickle from the hose for about 10 minutes, moving it around the water ring to ensure even saturation. The goal is moist soil down to 12 inches deep—stick your finger in to check. During that first 2-week period, water in the early morning to allow excess moisture to evaporate during the day.
Early spring or late fall is ideal—when temperatures are mild (60–80°F). Avoid extreme heat or cold, as stress can shock the plant. If moving potted sagos indoors, do it before frost hits. Pro tip: Water deeply 2–3 days before transplanting to ease root adjustment.
Plant it at the same depth as its original spot—burying the trunk too deep can cause rot. The top of the root ball should sit slightly above soil level. For potted sagos, leave 1–2 inches of space below the rim for watering.
Pups (offsets) are easier to move and great for propagation. Wait until they’re 4–6 inches tall, then gently separate them from the mother plant with a clean knife. Plant pups in well-draining soil and keep moist (not soggy) for 4–6 weeks.
Yellowing fronds often signal transplant shock (normal for 2–4 weeks) or overwatering. Check soil moisture—let the top 2 inches dry between waterings. If yellowing spreads, trim dead fronds and apply a balanced palm fertilizer (low nitrogen) after 6 weeks.
If the plant is too large or rooted deeply, try root pruning 6 months before moving. Use a sharp spade to cut a trench around the plant, encouraging new root growth within the confined area. For potted sagos, upgrade pot sizes gradually instead of bare-root transplanting.
