
Beautiful Plants For Your Interior
Beautiful Plants For Your Interior
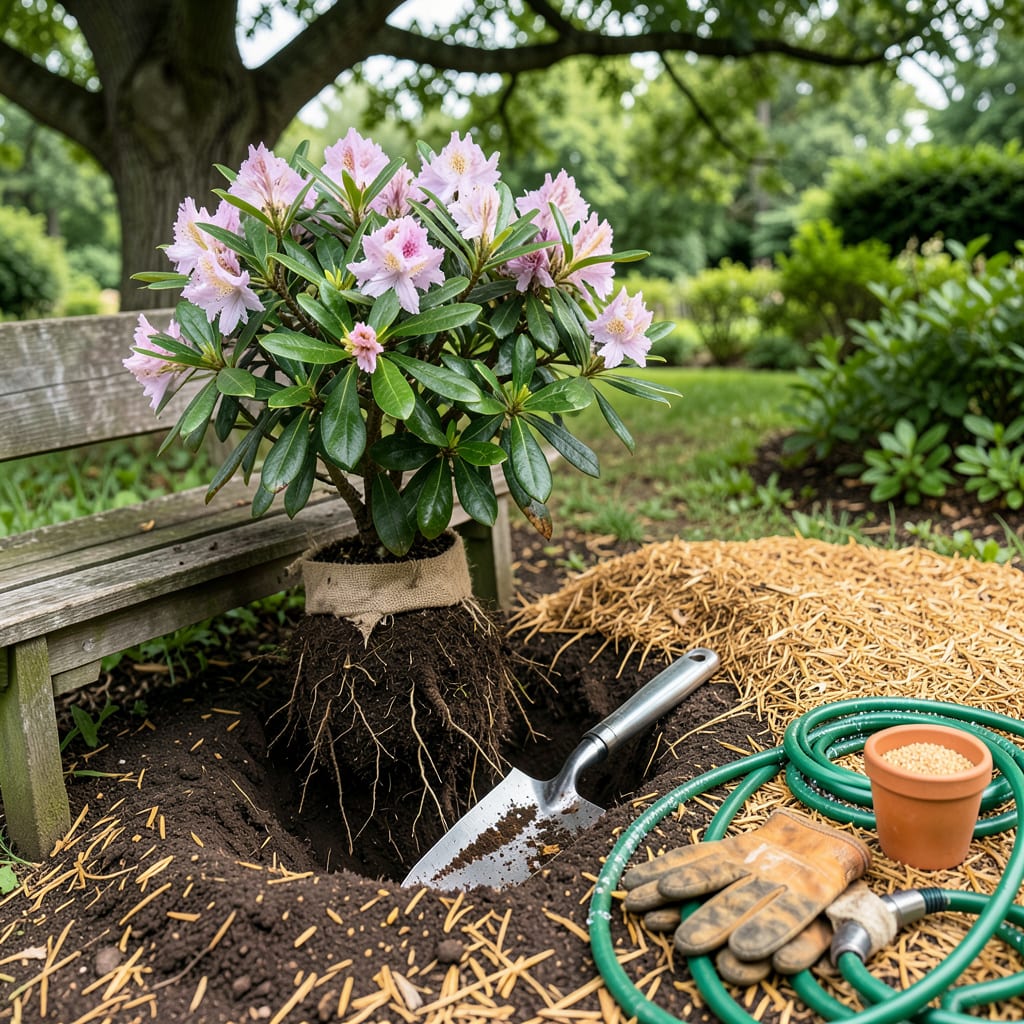
Moving a rhododendron feels intimidating—I get it. That first time I dug up an established bush, I was convinced I’d kill it. But here’s the secret: these plants are tougher than they look when you handle the roots right and time it properly. The payoff is worth it: next spring, you’ll see those same vibrant blooms, just in a better spot.
Timing and soil prep make all the difference. Do this in early fall or late winter when the plant is dormant, and you’ll avoid most transplant shock. I’ve relocated dozens this way, and the key is keeping that root ball intact while giving it acidic, well-draining soil in the new location. You’ll know you nailed it when new growth appears within 4-6 weeks.
📚 In This Guide
Moving an established rhododendron takes patience, but this method ensures healthy recovery and vibrant blooms next year.
Choose a location with partial shade (morning sun and afternoon shade works best) and well-draining, acidic soil (pH 4.5-6.0). Dig a hole twice as wide as the root ball but only as deep. I like to mix in 50% native soil with 50% pine bark fines—this mimics their natural woodland habitat and prevents compaction.
Test the hole’s size by placing the root ball inside before lifting the plant. The top of the root ball should sit 1-2 inches above the surrounding soil level. This prevents water from pooling around the stem. Water the empty hole thoroughly to pre-moisten the soil—this creates a welcoming environment for disturbed roots.
Start by watering the plant deeply 24 hours before moving. This hydrates the roots and helps the soil hold together. Using a sharp spade, dig a trench 12-18 inches out from the trunk, working your way around the plant. Rhododendrons have shallow, wide root systems—expect roots to extend well beyond the drip line.
Once you’ve cut a complete circle, angle the spade underneath to lift the entire root ball intact. For mature plants, you may need help—root balls can weigh 50-100 pounds when properly sized. Wrap the root ball in burlap if you need to transport it any distance to prevent soil from crumbling away.
Place the root ball in the prepared hole, ensuring it sits at the same depth it grew originally. The flare where roots meet trunk should remain visible above soil. Begin backfilling with your soil mixture, gently firming as you go to eliminate air pockets. I use my hands rather than tools—this gives better control over soil density around delicate roots.
Create a 3-4 inch high watering basin around the plant’s perimeter by mounding extra soil. This directs water to the root zone during recovery. Water immediately with 2-3 gallons until moisture reaches 6 inches deep. You’ll see the soil darken uniformly when properly saturated.
Apply 2-3 inches of pine bark mulch around the plant, keeping it 3 inches away from the trunk to prevent rot. Mulch conserves moisture and protects shallow roots from temperature swings. For the first 4-6 weeks, water every 3-4 days unless rain provides 1 inch weekly.
Avoid fertilizing until you see new growth—typically the following spring. Prune only to remove damaged branches, never more than one-third of the plant in a single season. Watch for wilting leaves in the afternoon during the first summer; this indicates the plant needs temporary shade cloth until established.
Transplanting these beautiful shrubs doesn’t have to be stressful—here’s what I’ve learned from years of moving rhododendrons successfully.
Root Ball Preparation: When digging the trench in Step 2, don’t be tempted to cut corners on the 12-18 inch radius. I’ve found that rhododendrons often have roots extending even beyond this range, especially mature specimens. Take your time working the spade around the entire circumference—this extra care prevents root damage that could set back recovery. The 24-hour pre-watering mentioned in the instructions is non-negotiable; it makes the soil cohesive enough to hold the root ball together during lifting.
Soil Mixture Insight: The 50/50 blend of native soil and pine bark fines in Step 1 isn’t just about drainage—it’s crucial for maintaining the acidic conditions rhododendrons crave. I’ve seen transplants struggle when gardeners use regular compost or topsoil instead. If your native soil is particularly heavy or clay-like, consider increasing the pine bark fines to 60% for better aeration around those sensitive roots.
Watering Wisdom: That initial 2-3 gallons of water in Step 3 should be applied slowly, not all at once. I use a trick of watering in stages—pour 1 gallon, let it absorb completely, then add the remaining. This prevents runoff and ensures moisture reaches that critical 6-inch depth. During the first 4-6 weeks mentioned in Step 4, check soil moisture by digging down 2-3 inches with your finger rather than just looking at the surface—rhododendron roots need consistent moisture at depth.
Aftercare Attention: The 3-inch mulch clearance around the trunk in Step 4 isn’t just to prevent rot—it also discourages rodents from nesting against the bark. I’ve had success using shredded pine bark specifically because it breaks down slowly while maintaining acidity. If you notice the 2-3 inches of mulch compressing over time, top it up to maintain that protective layer. And when checking for that 1 inch of weekly rainfall, remember that brief showers often don’t penetrate deeply enough to reach the root zone.
The ideal time is early spring (before new growth starts) or early fall (6+ weeks before frost). Avoid summer heat or winter freezes—these stress the plant. Mild, damp weather helps roots establish faster. If you must move it in summer, water deeply for weeks beforehand and shade it afterward.
It’s risky! Blooming drains the plant’s energy, and transplant shock may drop flowers or buds. If unavoidable, prune off half the blooms to redirect energy to roots. Water thoroughly before/after moving, and avoid fertilizing until next season.
Aim for a root ball 12–18 inches wide for small shrubs, 24+ inches for mature plants. Depth should match the plant’s current root zone (usually 8–12 inches). Use a sharp spade to cut cleanly around the drip line (outer branches) to preserve feeder roots.
Wilting is normal for 1–2 weeks! Keep soil consistently moist (not soggy) and mulch with 2–3 inches of pine bark. Avoid direct sun with shade cloth if needed. If wilting persists beyond 3 weeks, check for root damage or poor drainage—trim dead roots and replant slightly higher.
Most rhododendrons don’t divide well—they have shallow, fibrous roots. Instead, propagate from cuttings or layering. If you must split a large clump, use a saw for clean cuts, ensure each section has roots, and plant immediately. Success rates are lower than with other shrubs.
