
Beautiful Plants For Your Interior
Beautiful Plants For Your Interior
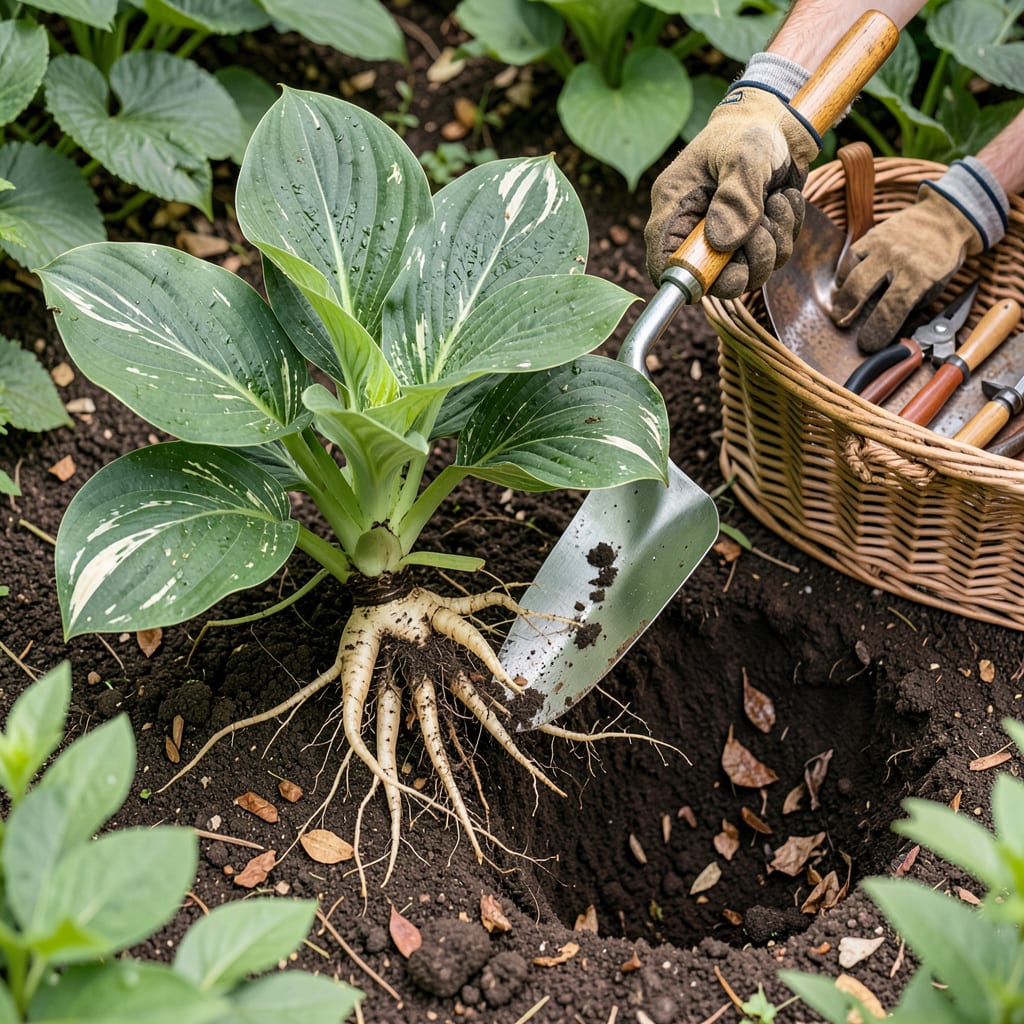
Moving hostas doesn’t have to be stressful—it’s actually the secret to reviving tired plants and multiplying your garden’s beauty. I’ve transplanted dozens over the years, and the ones that get relocated always come back stronger the next season. The key is timing: early spring or early fall gives roots time to settle before extreme weather hits.
You’ll need just a few tools—a sharp spade, some compost, and a watering can—and about 30 minutes per plant. What surprises most gardeners is how forgiving hostas are during the move. Even divided clumps bounce back quickly when you handle the roots gently and keep the soil moist. Let’s get them settled into their new home the right way.
📚 In This Guide
Moving hostas doesn’t have to be stressful—follow this method for plants that thrive in their new home.
Early spring or early fall is ideal for transplanting hostas, when temperatures stay between 50-75°F and plants aren’t actively flowering. I always pick an overcast day or late afternoon to minimize transplant shock. The cooler conditions let roots settle in without immediate sun stress.
Dig the new hole first—it should be twice as wide as the hosta’s root ball and just as deep. Mix a handful of compost into the bottom of the hole to give roots immediate nutrients. Water the hole thoroughly and let it drain while you prepare the plant.
Use a sharp spade to dig in a wide circle around the plant, starting 6-8 inches from the base to preserve feeder roots. Work the spade underneath at a 45-degree angle to lift the entire root ball intact. You’ll feel resistance—that’s normal, just go slowly.
Once loosened, lift the plant by grasping the base of the leaves (never pull the stems). Shake off excess soil gently but leave the root ball mostly intact. If dividing, use a clean knife to cut the crown into sections, ensuring each has 3-5 shoots and plenty of roots.
Place the hosta in the new hole so the crown (where roots meet foliage) sits 1-2 inches below the soil surface. This accounts for settling. Backfill with native soil, firming gently with your hands to eliminate air pockets. Don’t tamp too hard—hostas prefer loose soil.
Create a shallow water basin around the plant by mounding soil in a 3-inch-high ring about 8 inches from the base. Fill this basin with water immediately, then add more until the soil is saturated. You’ll see bubbles stop rising—that means water has penetrated deeply.
Keep the soil consistently moist (but not soggy) for the first 2-3 weeks. I check daily by feeling the soil 1 inch deep—if it’s dry, water slowly at the base. Avoid wetting the leaves to prevent fungal issues during this vulnerable period.
Apply 2-3 inches of organic mulch around the plant, keeping it 1 inch away from the stem. This maintains moisture and regulates soil temperature. Don’t fertilize immediately—wait until you see new growth (usually 3-4 weeks), then use a balanced, water-soluble fertilizer.
Watch for wilting in the first week—this is normal as roots reestablish. If leaves remain wilted after 24 hours, the plant needs more water. Yellowing leaves typically indicate overwatering, so let the soil dry slightly between waterings.
After 4-6 weeks, your hosta should show signs of active growth with unfurling leaves. At this point, you can resume normal care. I’ve found that transplanted hostas often grow more vigorously in their second year, as if appreciating their fresh start.
Transplanting hostas successfully comes down to timing and technique—here’s what I’ve learned from moving dozens of these plants.
Timing is Everything: The ideal temperature range of 50-75°F in early spring or fall isn’t just a suggestion—it’s critical. I once tried transplanting during a summer heatwave and lost three mature plants. The cooler conditions mentioned in Step 1 allow roots to establish without the stress of heat or active flowering, which would divert energy from root growth.
Root Ball Preservation: When digging that 6-8 inch circle around the plant in Step 2, go slowly. I ruined my first hosta transplant by rushing and cutting through feeder roots. These delicate roots absorb most of the water and nutrients—losing them sets the plant back weeks. If you hit resistance, work the spade gently side-to-side rather than forcing it.
Watering Wisdom: The water basin technique in Step 3 isn’t just for the first watering—maintain it for the initial 2-3 weeks. I create a slightly larger basin (about 10 inches wide) to ensure water reaches the outer roots as they grow. The bubbles stopping isn’t just a cute detail—it tells you water has saturated the root zone, not just the surface.
The Waiting Game: Those 3-4 weeks before fertilizing in Step 4 feel like forever, but I’ve seen what happens when you rush it. New growth appears when the plant is ready to use nutrients—fertilizing earlier can burn tender new roots. Instead, focus on consistent moisture during this period. I use a chopstick to check moisture at the 1-inch depth—it’s more accurate than your finger.
Early spring (as new shoots emerge) or early fall (4-6 weeks before frost) are ideal. Avoid summer heat or winter dormancy—hostas transplant best when soil is moist and temperatures are mild (50–75°F). Morning or overcast days reduce stress.
It’s risky! Summer’s heat and dry soil shock roots. If absolutely necessary, choose a cool, cloudy day, trim leaves by ⅓ to reduce water loss, and water deeply for 2+ weeks. Mulch heavily to retain moisture.
Match the original depth—bury the crown (where roots meet stems) just below soil level. Too deep causes rot; too shallow dries roots. Press soil gently to eliminate air pockets, then water thoroughly to settle.
Don’t panic! Wilting is normal for 1–2 weeks as roots adjust. Keep soil consistently moist (not soggy) and shade leaves if sun is intense. Trim damaged foliage to redirect energy. New growth means success!
Not required, but it’s a great time to do it! If the clump is overcrowded (3+ years old), divide by slicing between shoots with a sharp spade. Each division needs 3–5 healthy shoots and roots. Replant immediately.
