
Beautiful Plants For Your Interior
Beautiful Plants For Your Interior
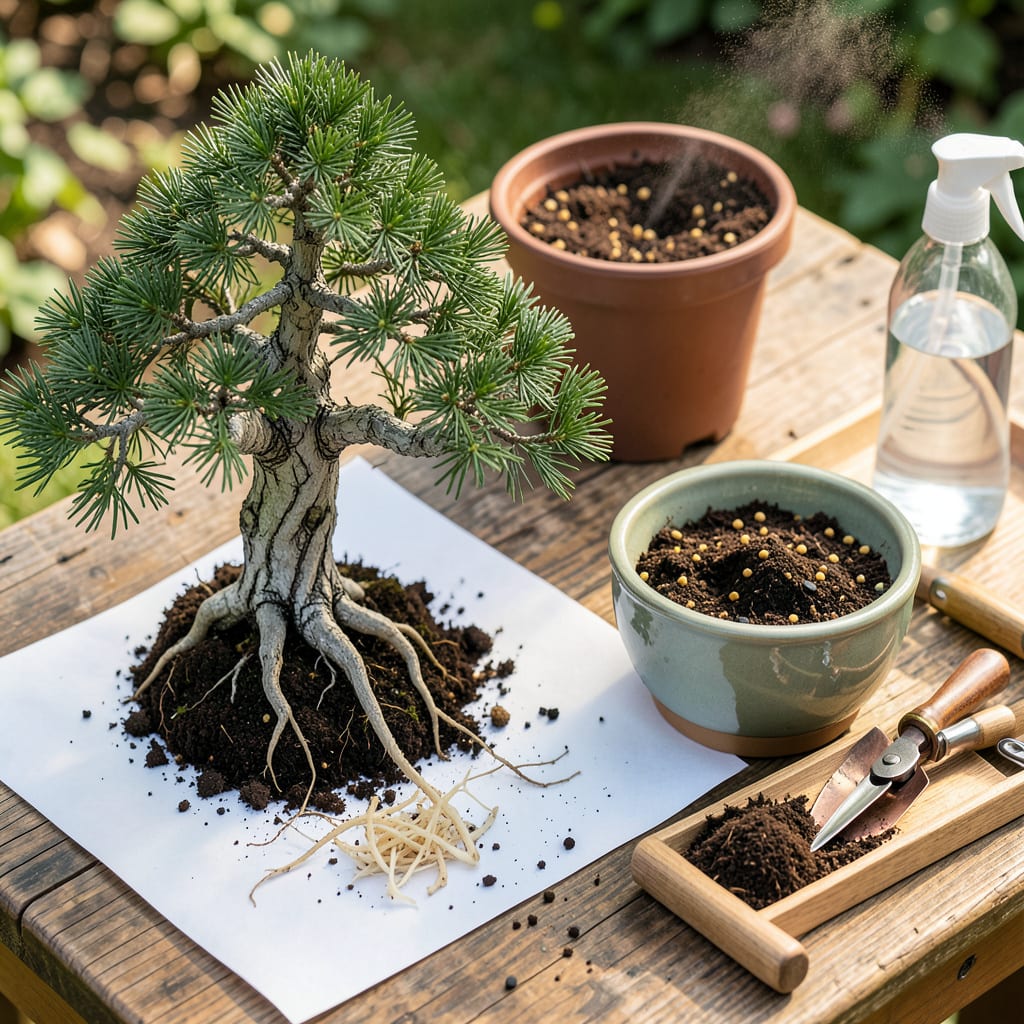
That first time I slid a bonsai from its pot and saw the roots circling like a spiderweb, I panicked. Turns out, transplanting isn’t about luck—it’s about timing and technique. Your tree tells you when it’s ready: roots escaping drainage holes, slow growth, or soil that repels water instead of absorbing it. Spring is ideal, just as buds begin to swell but before leaves fully emerge.
What surprised me most? How forgiving bonsai can be when you follow the rules. You’ll need sharp shears, proper soil, and a pot just slightly larger than the current one—no giant upgrades. The real magic happens in the root pruning, where less actually means more. Within 3-4 weeks, your tree will reward you with fresh growth and stronger structure. No green thumb required, just patience and the right approach.
📚 In This Guide
This careful process ensures your bonsai thrives in its new home with minimal stress.
Select a container that’s slightly larger than the current one—about 1-2 inches wider in diameter works well. Clean it thoroughly with warm water and mild soap to remove any residue. I always check that drainage holes are clear by running water through them before adding soil.
Gather your tools: sharp bonsai scissors, root rake, chopstick (for working soil between roots), and fresh bonsai soil mix. The soil should be slightly damp but not wet—squeeze a handful and it should hold shape briefly before crumbling. This prevents dust while allowing good root contact.
Gently tap the sides of the current pot to loosen the root ball. If the tree resists, slide a flat tool like a butter knife around the inner edges to separate roots from the container walls. The goal is to keep the root ball intact while freeing it completely.
Once loose, carefully lift the tree by grasping the base of the trunk—not the branches—with one hand while supporting the root ball with your other hand. You’ll feel the weight shift as the roots release. If you encounter stubborn roots through drainage holes, snip them cleanly rather than tearing.
Use sharp scissors to trim away any circling or overly long roots. I remove about one-third of the root mass, focusing on the thickest, woodiest roots while preserving fine feeder roots. This encourages new growth and prevents the tree from becoming root-bound in its new container.
Look for signs of pests or rot—healthy roots appear firm and white or tan, while problematic ones feel mushy or smell foul. If you find damaged sections, trim them back to healthy tissue. This is also the moment to gently comb through the roots with a root rake to separate and spread them for better soil contact.
Create a small mound of soil in the new pot and position the tree slightly off-center for visual balance. The base of the trunk should sit just above the pot’s rim—this prevents water from pooling at the trunk. Hold the tree steady while adding soil around the edges, working it in with a chopstick to eliminate air pockets.
Once the pot is filled, use the chopstick to gently press soil around the roots, ensuring they make good contact without compacting too tightly. The tree should feel stable when you lightly tug the trunk. I often water at this stage to help settle the soil further, then add more mix if needed after drainage.
Place the newly potted bonsai in a shaded, wind-protected area for 2-3 weeks to recover. Avoid direct sunlight immediately after transplanting, as this can scorch stressed leaves. Mist the foliage daily to maintain humidity, but don’t water the soil again until the top layer feels dry to the touch.
Resist the urge to fertilize for at least 4-6 weeks—fresh roots are sensitive to salts in fertilizer. Watch for new growth as your sign that the tree has adjusted; this typically appears within 3-4 weeks for healthy specimens. The first watering after transplant should be thorough, with water running freely from the drainage holes to ensure complete soil saturation.
Transplanting bonsai requires patience and attention to detail—here’s what I’ve learned from years of repotting these delicate trees.
Root Pruning Precision: In Step 3, when removing one-third of the root mass, focus on cutting thick, woody roots rather than fine feeder roots. I use curved bonsai scissors for better access to the root ball’s underside. Make clean cuts at a 45-degree angle—this creates more surface area for new root growth while preventing water from pooling on flat cuts.
Soil Contact Technique: During Step 4, don’t just fill the pot with soil—work it carefully between the roots using your chopstick. I gently lift sections of the root system and tuck soil underneath, ensuring no air pockets remain. The soil should feel firm when pressed but not compacted. This direct contact between roots and soil mix is crucial for quick recovery.
Aftercare Environment: The 2-3 week recovery period mentioned in Step 5 is non-negotiable for stress reduction. I create a humidity tent using a clear plastic bag supported by chopsticks over the tree for the first week, removing it for a few hours daily. This maintains moisture without overwatering while protecting from drafts that can shock the transplanted tree.
Watering Wisdom: When checking if the top layer feels dry to the touch (Step 5), use your fingertip rather than just visual inspection. Insert it about half an inch into the soil—if it comes away clean, it’s time to water. I use room-temperature water and pour slowly in a circular motion until it runs from all drainage holes, ensuring even saturation without disturbing the fresh soil.
The ideal time is early spring (just before new growth starts) or early fall (for mild climates). Avoid transplanting during extreme heat, dormancy, or flowering periods—your tree needs energy to recover! For tropical bonsai, repot year-round but avoid peak summer stress.
Young, fast-growing bonsai need repotting every 1–2 years, while mature trees thrive with 3–5 year intervals. Check roots annually: if they circle the pot or drain poorly, it’s time! Deciduous trees often need more frequent repotting than conifers.
No! Regular soil retains too much water and lacks aeration. Use a bonsai-specific mix (e.g., 60% inorganic like akadama/pumice + 40% organic like pine bark). Pro tip: Sift out fine particles to prevent compaction and root rot.
Wilting is normal for 2–4 weeks post-transplant (transplant shock), but if leaves turn crispy or black, check for:
Yes! Trim 1/3 of the root mass to encourage new growth and prevent root-binding. Use sharp, sterilized scissors to cut thick roots and comb out tangled ones. Avoid pruning more than 50%—it can kill the tree. Pair with branch pruning to balance stress.
