
Beautiful Plants For Your Interior
Beautiful Plants For Your Interior
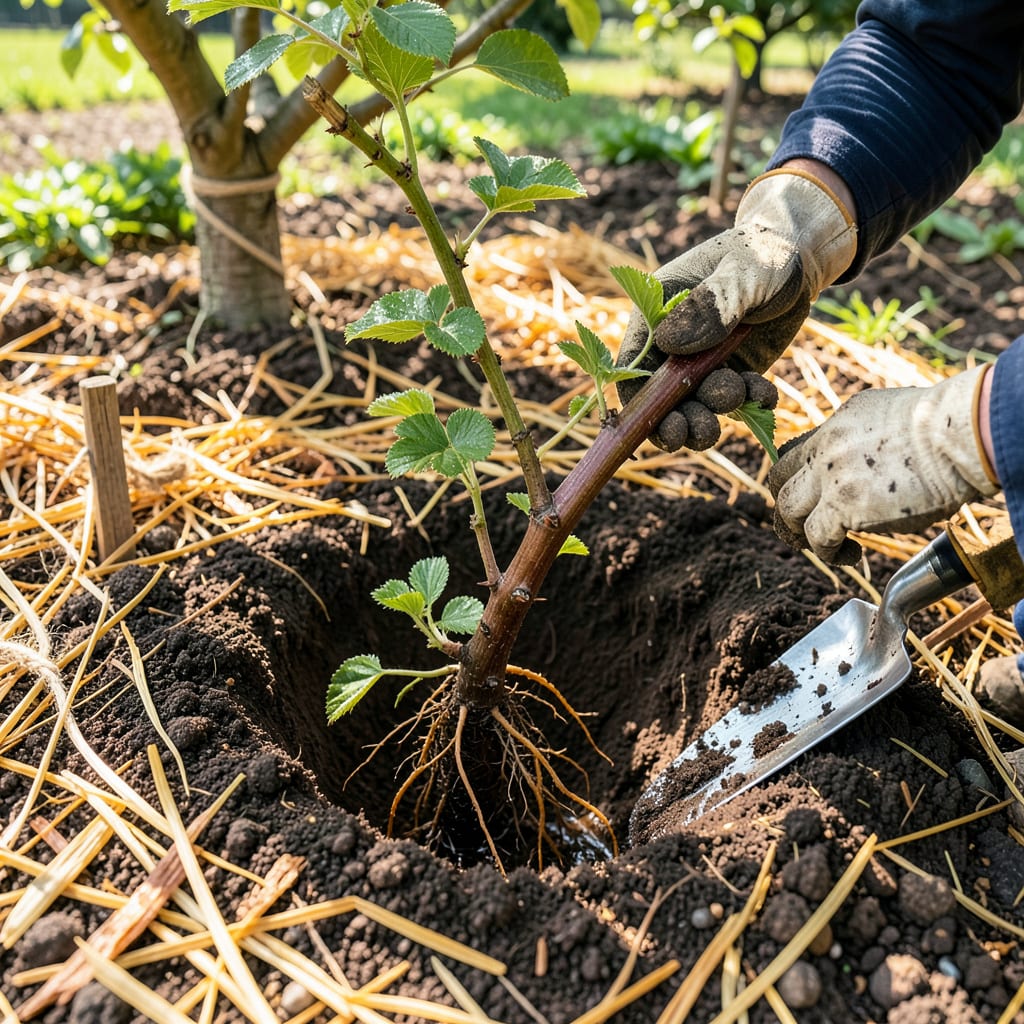
Moving a blackberry bush feels like giving it a second chance at life. I’ve relocated dozens over the years, and the plants that get transplanted properly come back stronger than ever. The key is timing—late winter or early spring, just as the plant starts waking up but before new growth takes off. This gives roots time to settle in before summer heat hits.
You’ll need a sharp spade, pruners, and some compost—nothing fancy. What matters most is keeping that root ball intact when you dig it up and giving it a well-draining new home with plenty of sunlight. I’ve seen bushes that looked half-dead after moving bounce back within weeks when done right. The first year’s harvest might be lighter, but year two? You’ll swear the plant is thanking you.
📚 In This Guide
Moving a blackberry bush doesn’t have to be stressful—follow my method for minimal shock and maximum growth.
Transplant in early spring just as new growth begins, or in late fall after leaves drop but before ground freezes. I’ve found these windows give roots time to establish before summer heat or winter cold. Avoid transplanting during flowering or fruiting—it stresses the plant too much.
Dig the new hole twice as wide and just as deep as the root ball. Mix a shovelful of compost into the removed soil—blackberries thrive in rich, well-draining ground. Test drainage by filling the hole with water; if it doesn’t empty within 30 minutes, choose another spot.
Cut back the canes to 12-18 inches tall using clean pruners. This reduces water loss and makes handling easier. I always disinfect my tools with rubbing alcohol between cuts to prevent disease spread. Remove any dead or diseased wood completely.
Dig a trench around the bush 12 inches from the base, working outward to preserve as many roots as possible. Once you’ve circled the plant, angle your shovel underneath to lift the entire root ball. You’ll feel resistance—that’s normal. Gently rock the plant to loosen it if needed.
Place the bush in the new hole at the same depth it grew before. You can identify the original soil line by looking for color changes on the stem. Backfill with your compost-soil mix, firming gently as you go to eliminate air pockets. Don’t tamp too hard—you want roots to breathe.
Create a 3-inch-high watering basin around the plant by mounding soil in a circle. This directs water straight to the roots where it’s needed most. Water immediately with 2-3 gallons to settle the soil and hydrate the roots. You’ll see the soil level drop slightly—that’s expected.
Spread 2-3 inches of organic mulch (straw or wood chips work well) around the base, keeping it 2 inches away from the stem to prevent rot. Mulch conserves moisture and suppresses weeds that compete with your recovering bush. I check moisture daily for the first week—blackberries need consistent water during transplant recovery.
Install a temporary shade cloth if transplanting during warm weather. Even spring sun can stress a newly moved plant. Watch for wilting in the afternoons—if you see it, increase water slightly. New growth in 2-3 weeks means your transplant succeeded.
These practical insights will help ensure your blackberry bush thrives in its new location with minimal stress.
Timing Secret: The early spring and late fall windows mentioned in Step 1 aren’t just suggestions—they’re critical. I learned this the hard way after losing a bush to summer transplant shock. Early spring gives roots time to establish before heat stress, while late fall allows dormancy to set in naturally. If you must transplant during other seasons, provide extra shade and water.
Root Preservation Technique: When digging that 12-inch trench in Step 2, work slowly and methodically. I use a sharp spade to make clean cuts through roots rather than tearing them. For particularly stubborn roots, gently pry with a garden fork instead of pulling. The more intact roots you preserve, the faster your bush will recover and produce fruit.
Watering Wisdom: Those 2-3 gallons of water in Step 3 aren’t arbitrary—they serve two purposes. First, they eliminate air pockets around roots, and second, they hydrate the entire root ball immediately. I’ve found that watering in stages works best: pour 1 gallon, let it absorb, then add the rest. This prevents runoff and ensures deep penetration to the lower roots.
Post-Transplant Monitoring: The 2-3 weeks mentioned in Step 4 for new growth is your success timeline. During this period, check the plant daily for wilting leaves, which indicates water stress. I keep a spray bottle handy to mist leaves during hot afternoons—the extra humidity helps reduce transplant shock while roots establish.
The ideal time is late fall or early spring (dormant season) when the plant isn’t actively growing. Avoid transplanting during summer heat or freezing winter. In mild climates, fall is often best—it gives roots time to establish before spring growth.
It’s risky! Summer heat stresses plants, and blackberries may struggle to recover. If you must, choose a cool, overcast day, water deeply before/after, and prune back canes to reduce stress. Even then, expect slower growth or potential shock.
Dig a hole twice as wide as the root ball and just as deep. Blackberries have shallow roots—burying the crown (where stems meet roots) too deep can cause rot. Aim to keep the soil line at the same level as the original planting spot.
First, check for over/under-watering (soil should be moist but not soggy). Trim dead canes to redirect energy. Mulch to retain moisture and protect roots. If leaves yellow, test soil pH (ideal: 5.5–6.5). Patience is key—some bushes take weeks to bounce back!
If your bush is healthy, propagating from cuttings (tip layering or hardwood cuttings) can be easier and less risky. Transplanting is best for relocating established plants. Cuttings root faster in early summer, while transplanting suits dormant seasons.
