
Beautiful Plants For Your Interior
Beautiful Plants For Your Interior
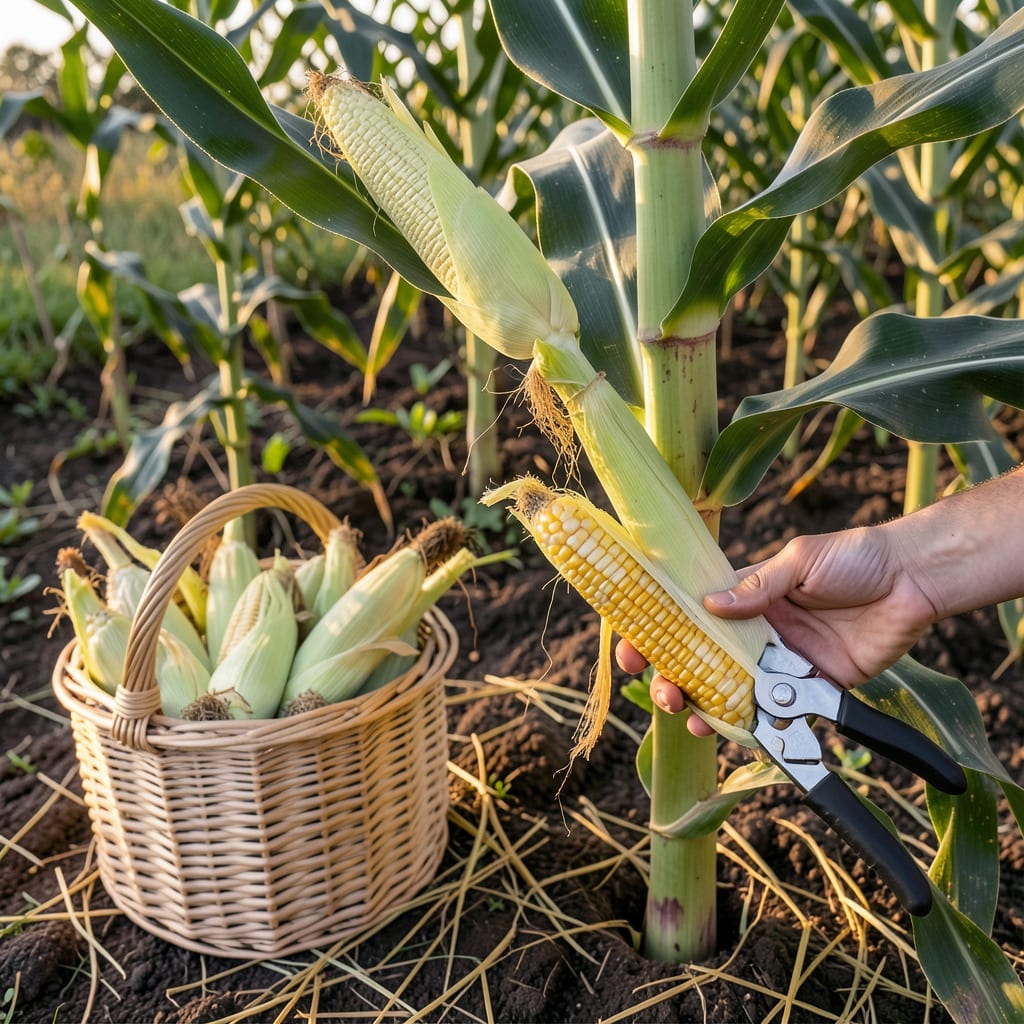
There’s nothing quite like biting into a freshly picked ear of sweet corn—juicy, crisp, and bursting with flavor. But timing is everything. Pick too early, and you’ll get starchy disappointment; wait too long, and the sweetness fades fast.
I’ve spent seasons perfecting the art of harvesting 🌽 at its peak, and the secret lies in a few simple tricks. Whether you’re a first-time gardener or a seasoned pro, I’ll show you exactly how to test for ripeness—no guesswork required. Let’s get started.


If you’ve ever bitten into starchy, tough sweet corn, you know timing is everything. The kernel milk test is my go-to method for nailing that perfect harvest window—when sugars peak and kernels are juicy. It’s foolproof once you know what to look for.
Most gardeners guess based on husk color or ear size, but those clues can mislead. I’ve found the milk test works for all sweet corn varieties, from early-season ‘Sugar Buns’ to late-season ‘Ambrosia’. Here’s how to do it right.
Pro Tip: Perform the test in morning sunlight—liquid color is easiest to see then.
The milk test works because sugar content in kernels peaks just as the liquid turns opaque. I check my corn 20 days after silking begins, testing every 2-3 days until I hit that milky stage. Early varieties may ripen faster, so start testing sooner.
Don’t rely on husk browning alone—some varieties stay green even when ripe. I’ve seen gardeners lose entire crops by waiting for “yellow husks,” which often means overripe corn. The milk test removes the guesswork.
For super-sweet varieties like ‘Peaches & Cream’, the harvest window is tighter. Their higher sugar content means they go from milky to starchy faster. I test these every 24 hours once silks brown.
If you’re growing heirloom corn, note that their milk stage may appear slightly thinner than hybrid varieties. I compare multiple ears to ensure consistency. And always harvest in the morning—kernels are plumpest after cool nights.
What if you pierce a kernel and get no liquid? That’s a sign of severe under-ripeness or drought stress. I’d check soil moisture and retest in 3-4 days. Overwatered corn can also dilute kernel liquid, making tests tricky.
Remember: One ear’s readiness doesn’t mean the whole plant is ready. I’ve had stalks with ripe top ears and unripe lower ears. Test each ear individually, and don’t be afraid to harvest selectively over several days.
After harvesting, I immediately chill ears to slow sugar-to-starch conversion. For best flavor, cook or preserve within 24 hours. That’s when you’ll taste the difference between store-bought and true garden-fresh sweetness! 🌽
While the kernel milk test is my gold standard, I always cross-check with these visual cues to confirm ripeness. Sweet corn gives subtle but telltale signs when it’s ready—if you know where to look. These clues help me avoid unnecessary piercing tests.
First, examine the silk tufts at the ear’s tip. When they turn dark brown and dry, it’s a strong indicator that pollination is complete and kernels are maturing. But don’t stop there—this is just the first piece of the puzzle. 🌽
Warning: Yellow husks often mean you’ve waited too long—test immediately!
I pay special attention to the ear’s shape through the husk. Immature corn feels angular or lumpy, while ripe ears have a smooth, cylindrical profile. Run your fingers along the husk—consistent fullness means plump kernels inside.
The tassel (top of the stalk) offers another clue. When it turns brown and papery, the plant is redirecting energy to the ears. This typically happens 1-2 weeks before harvest, so I start daily milk tests at this stage. Early varieties may tassel and ripen faster.
For bi-color varieties like ‘Peaches & Cream’, I check that both white and yellow kernels show milky liquid. Sometimes one color matures slightly faster. If you’re growing mini corn, the ears will feel firm sooner but still need the milk test for confirmation.
Remember: Morning harvests yield the juiciest corn. I use a sharp knife to cut ears at the base with a quick twist—this prevents stem damage to the plant. Store unshucked ears in the fridge (in a bag) to preserve sweetness for up to 5 days. 🌿
Not all sweet corn ripens on the same schedule. The days to maturity (DTM) listed on seed packets is your first clue, but I’ve learned that local climate and planting dates can shift these windows by a week or more. Early varieties like ‘Sugar Buns’ might be ready in 60 days, while late-season giants like ‘Ambrosia’ can take 90+ days.
I track my corn’s progress by noting the silking date—that’s when the real countdown begins. For most varieties, you’ll want to start testing 18-22 days after silks appear. But here’s where variety matters: super-sweet hybrids often mature faster than heirlooms, so I adjust my testing schedule accordingly.
| Variety Type | Days to Maturity | When to Start Testing | Harvest Window |
|---|---|---|---|
| Early-Season (e.g., ‘Sugar Buns’, ‘Early Sunglow’) |
60-68 days | 16-18 days after silking | 3-5 days |
| Mid-Season (e.g., ‘Bodacious’, ‘Peaches & Cream’) |
70-80 days | 18-20 days after silking | 5-7 days |
| Late-Season (e.g., ‘Ambrosia’, ‘Silver Queen’) |
85-100 days | 20-24 days after silking | 7-10 days |
| Super-Sweet (e.g., ‘Mirai’, ‘Kandy Korn’) |
75-85 days | 18 days after silking | 2-3 days ⚠️ Tight window! |
🌱 Pro Tip: Cool weather slows ripening—add 3-5 extra days to testing if temps dip below 70°F.
Late-season varieties like ‘Silver Queen’ often have a longer harvest window, but I’ve noticed their milk stage lasts shorter once it begins. That’s why I test these every 24-36 hours once silks brown. Early varieties, on the other hand, can sit at peak ripeness for 4-5 days if weather stays cool.
If you’re growing multiple varieties, I recommend color-coding your planting dates on a calendar. I use green for early, yellow for mid, and red for late—it helps me remember which patches to check first. And don’t forget: succession planting every 2 weeks extends your harvest season by months!
For northern gardeners, late-season varieties can be risky. I stop planting anything with >85 DTM after July 1st in my Zone 6 garden. Even with a warm fall, those last ears often get frosted before fully maturing. When in doubt, I choose shorter-season varieties and use row covers to extend warmth.
Remember that stress factors like drought or poor soil can delay maturity. I’ve had ‘Bodacious’ corn take 90 days instead of 75 during dry summers. When this happens, I focus on consistent watering (1-1.5 inches weekly) and watch for silk drying as my cue to start testing. Patience pays off with sweeter kernels! 🌽
Start testing 20 days after silks appear, then check every 2-3 days for standard varieties. Super-sweet types like ‘Mirai’ need daily checks once silks brown. Morning tests give the most accurate results.
Clear liquid means the corn is underripe. Wait 3-4 more days and retest. Check soil moisture too—drought stress can delay kernel development. Patience pays off with sweeter, juicier corn.
Morning harvests are ideal because kernels are plumpest after cool nights. Evening-picked corn may lose sweetness faster. If you must harvest later, chill ears immediately to preserve flavor.
Top ears typically mature 2-3 days earlier than lower ones due to better sunlight exposure. Test each ear individually. Don’t assume all are ready just because one passes the milk test.
Sugars convert to starch quickly—expect best flavor within 24 hours. Store unshucked ears in the fridge (in a bag) to slow this process. For peak sweetness, cook or freeze within 48 hours.
