
Beautiful Plants For Your Interior
Beautiful Plants For Your Interior
That sinking feeling when you unpot your orchid and see limp, discolored roots? I’ve been there—more times than I’d like to admit. Dead orchid roots look dramatically different from healthy ones, and learning to spot the difference saved my collection from becoming compost. The good news is that even mostly-dead orchids can often be revived […]
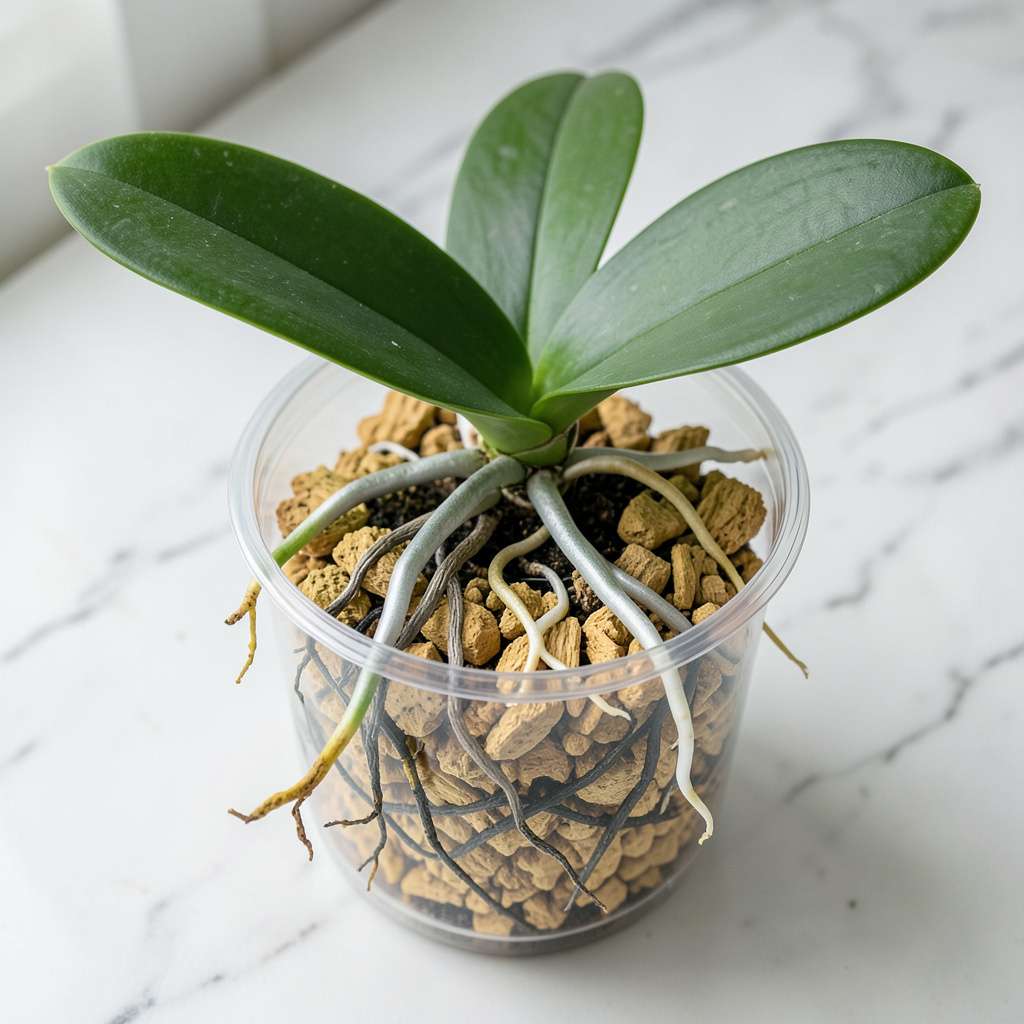
That sinking feeling when you unpot your orchid and see limp, discolored roots? I’ve been there—more times than I’d like to admit. Dead orchid roots look dramatically different from healthy ones, and learning to spot the difference saved my collection from becoming compost. The good news is that even mostly-dead orchids can often be revived with the right approach.
Healthy roots should be firm and silvery-green when dry, turning vibrant green when wet. Dead roots, on the other hand, become mushy, hollow, or turn dark brown/black. There’s also the smell test—healthy roots have no odor, while rotting ones emit a distinct sour, musty scent. I learned this the hard way after losing two phalaenopsis to overwatering before mastering the visual cues.
What most people don’t realize is that even orchids with 80% dead roots can recover. The key is acting fast: trim the dead tissue, treat with hydrogen peroxide, and provide ideal conditions. I’ve brought back orchids that looked completely hopeless using this method, with new roots emerging within 4-6 weeks.
This isn’t just about saving plants—it’s about understanding what your orchid is telling you. Brown tips might mean underwatering, while black spots often signal bacterial rot. Once you know what to look for, you’ll catch problems early and keep your collection thriving for years. The recovery process is simpler than you think.
📚 In This Guide
Let me show you exactly how to examine your orchid’s roots—no guesswork, just clear signs to look for.
Start by watering your orchid lightly if the roots are dry—this makes them more flexible and less likely to break. Hold the base of the plant firmly and gently squeeze the sides of the pot to loosen the root ball. If the pot is plastic, you can flex it to help release the roots without pulling.
Never yank the plant out by its leaves or stems. If it resists, run a clean, dull knife around the inner edge of the pot to separate the roots from the container walls. You should see the entire root system clearly once it’s free.
Healthy orchid roots are firm and green or silvery-green when dry, turning bright green when wet. Dead roots appear brown, black, or mushy—sometimes they’ll even fall apart when touched. Run your fingers along the roots to check for firmness; healthy roots feel plump, while dead ones feel hollow or slimy.
Don’t confuse dehydrated roots with dead ones—dry roots can look shriveled and gray but will plump up after soaking. If you’re unsure, trim one questionable root and check the center: green or white inside means it’s alive, while brown or black indicates rot.
Fill a bowl with room-temperature water and submerge the roots for 5-10 minutes. Healthy roots will absorb water and turn bright green, while dead roots either stay brown or turn darker. Watch for bubbles or a foul smell—both indicate rot that’s spreading.
After soaking, gently squeeze the roots between your fingers. Live roots feel solid and springy, while dead ones collapse or ooze liquid. This test is especially helpful for roots that look borderline—it reveals internal damage you can’t see from the outside.
Look at the base of the plant where new roots emerge. Active root tips are bright green or white and have a fuzzy appearance—this is where growth happens. If you see no new root growth after 2-3 months of proper care, the plant may be struggling due to root loss.
Compare the number of healthy roots to dead ones. An orchid can survive with 30-40% healthy roots, but less than that means it needs immediate intervention. If most roots are dead, you’ll need to trim them and repot the plant in fresh medium to give it a chance to recover.
Checking orchid roots can feel intimidating, but these practical insights will help you assess your plant with confidence.
Gentle Handling Technique: When removing your orchid from its pot in Step 1, I’ve found that soaking the entire pot in room-temperature water for 5 minutes first makes the process even easier. This extra hydration makes roots more pliable and less likely to snap. Just be sure to support the base of the plant with one hand while tilting the pot with the other – this prevents unnecessary stress on the stems.
Color Confidence: The color distinctions in Step 2 can be subtle, especially with variegated orchids. Here’s what nobody tells you – healthy roots often have a slight silvery sheen when dry, almost like they’ve been dusted with frost. If you’re working with a dark-colored pot, place a white paper towel underneath when examining roots – the contrast makes it much easier to spot those telltale green hues versus problematic brown or black areas.
Water Test Wisdom: For the soaking test in Step 3, use filtered or distilled water if possible. The 5-10 minute soak works best when the water isn’t competing with minerals or chemicals that might affect root absorption. I also recommend using a clear glass bowl – this lets you observe the roots from all angles as they rehydrate, and you might notice small bubbles forming around damaged areas that aren’t visible from above.
Growth Pattern Insight: When checking for new growth in Step 4, pay special attention to the direction of emerging roots. Healthy new roots typically grow downward first before curving outward. If you see roots growing straight up or in tight circles, it often indicates the plant is searching for moisture or light – a sign you might need to adjust your care routine before more serious issues develop.
Unfortunately, truly dead roots (mushy, black, or hollow) can’t be revived—trim them with sterilized scissors to prevent rot from spreading. If roots are just dehydrated (silver/gray but firm), soak them in room-temperature water for 30–60 minutes to rehydrate. Always check for green velamen (the spongy outer layer) under dead-looking tissue—it’s a sign of life!
Overwatered roots can start rotting within 1–2 weeks if left in soggy media. Early signs include yellowing leaves and a foul smell. Act fast: remove the orchid from its pot, trim black/mushy roots, and repot in fresh, airy mix. Pro tip: Water only when the top inch of media is completely dry!
Yes! Orchids are resilient. If the stem is still green and firm, you can save it. Try sphagnum moss propagation: place the base in damp moss (not soggy), keep it in bright indirect light, and mist daily. New roots may sprout in 4–12 weeks. Patience is key!
Orchids can bloom even with compromised roots because they store energy in their leaves and pseudobulbs. However, don’t ignore it—check for hidden rot! Gently tug the plant: if it wobbles, roots are likely weak. Focus on reviving them post-bloom with proper watering and airflow.
Dormant roots (common in winter) turn silver or gray but stay firm when squeezed. Dead roots are mushy, black, or hollow. Test by scratching the surface: green underneath means it’s alive! Adjust care seasonally—reduce watering in dormancy to avoid confusing the two.
Spotting dead orchid roots doesn’t have to be stressful! 🌱 By checking for mushy texture, dark/brown color, and lack of green tips, you can quickly diagnose the issue and take action. Remember, even struggling orchids often bounce back with proper care—so don’t give up just yet!
Now that you’ve identified the problem, trim the dead roots with sterilized tools and repot your orchid in fresh, well-draining mix. Need a step-by-step guide? Check out our orchid repotting tutorial to help your plant thrive again! 💚
