
Beautiful Plants For Your Interior
Beautiful Plants For Your Interior
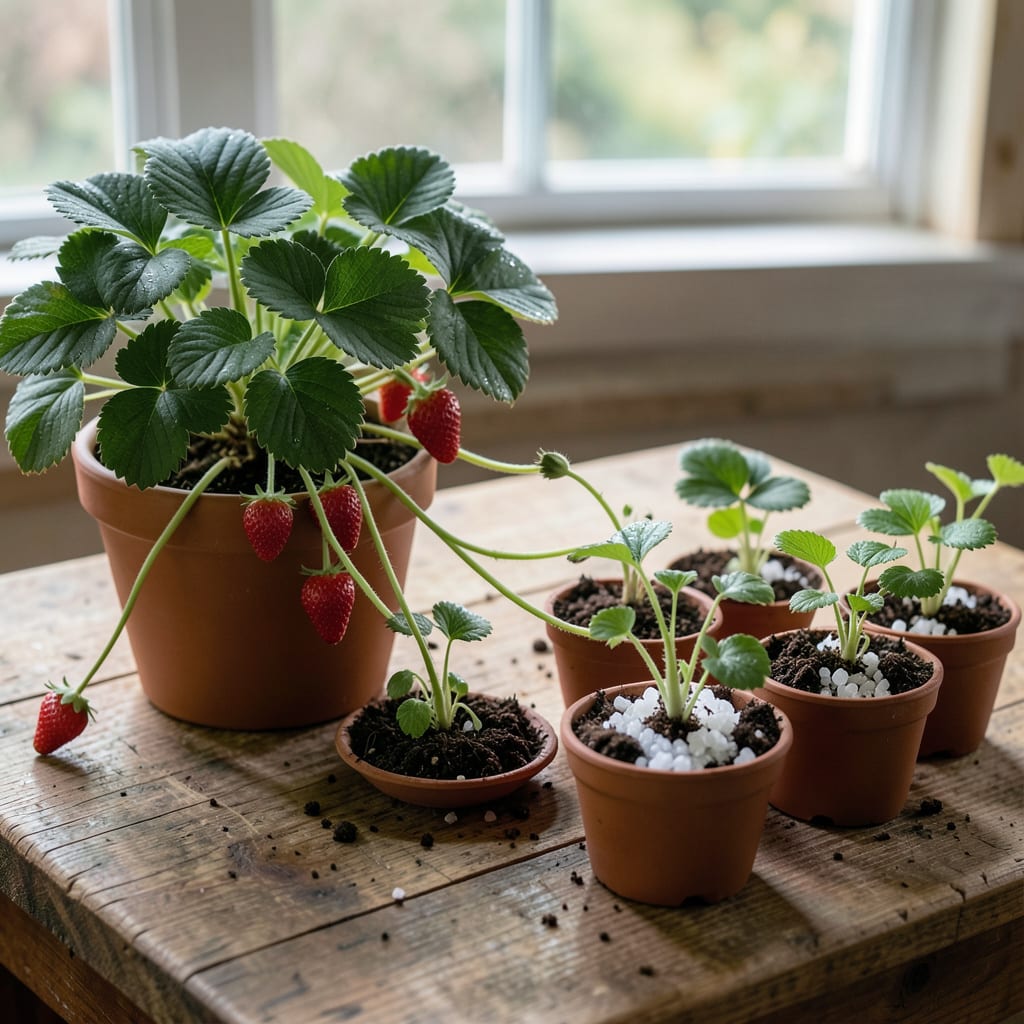
Free strawberry plants from your existing patch? It’s possible with runners. I’ve turned a few mother plants into dozens using this simple technique that requires nothing more than patience and a sharp eye.
Within 3-4 weeks, those runners will root and establish into new plants. The process is nearly foolproof—even for beginners—if you avoid overwatering and give them the right start.
📚 In This Guide
Here’s the method I rely on to propagate strawberries from runners with near-perfect success.
Choose a mother plant that’s vigorous and disease-free, ideally 2-3 years old. Look for runners—long stems extending from the crown with small plantlets at the nodes. These are your future strawberry plants.
Select runners with well-developed plantlets that have formed their own tiny roots. I always pick the first or second runner from the mother plant, as these tend to be the strongest. Avoid any that look wilted or discolored.
This ensures you’re starting with genetically robust material that will establish quickly in its new location.
Fill 3-4 inch deep pots or a seed tray with a mix of 50% potting soil and 50% perlite for excellent drainage. Moisten the mix until it holds together when squeezed but doesn’t drip.
Place the containers near the mother plant so you can easily pin the runners. If working directly in garden soil, choose a spot with loose, well-draining earth and amend with compost.
This creates the ideal environment for root development without risking rot or suffocation.
Gently press each plantlet into the soil, keeping it attached to the mother plant. Use a bent paperclip or a small garden staple to pin the runner stem to the soil, ensuring the plantlet stays in contact with the medium.
Bury the plantlet so the base of its tiny leaves is just above the soil surface. I space them 6-8 inches apart to prevent crowding. Water lightly to settle the soil around the new plant.
This maintains the connection to the mother plant while allowing the baby to establish its own root system.
Keep the soil consistently moist but not soggy—check daily and water when the top ½ inch feels dry. The runner will continue to draw nutrients from the mother plant while developing its own roots.
After 2-3 weeks, gently tug on the plantlet. If it resists, it has rooted successfully. You’ll also see new leaf growth as a confirmation. At this point, you can sever the runner connecting it to the mother plant.
This dual nutrition source gives the new plant the best start possible.
Once rooted, transplant the new strawberry plants to their permanent location, spacing them 12-18 inches apart. If you started them in pots, harden them off for 3-5 days before moving to the garden.
Water deeply after transplanting and keep the soil moist for the first week. I always do this on an overcast day to reduce transplant shock. You’ll see new growth within 7-10 days.
This timing ensures your new plants establish before any stress from heat or drought.
These insights will help you avoid the pitfalls I encountered when first learning to propagate strawberries.
The Mother Plant Factor: In Step 1, selecting a mother plant that’s 2-3 years old is crucial. Younger plants may not produce strong runners, while older ones can be less vigorous. I learned this the hard way when my first attempt with a 1-year-old plant yielded weak, slow-growing offshoots that barely survived transplanting.
Moisture Management: During Step 4, that daily check isn’t just busywork—strawberry runners are goldilocks plants when it comes to moisture. Too dry and the plantlet desiccates, too wet and it rots. I use the finger test religiously: if the top ½ inch feels dry, it’s time to water. A spray bottle works better than a watering can for precise control.
Rooting Confirmation: Don’t rush severing the runner in Step 4. The 2-3 weeks timeline exists because premature separation can shock the plantlet. That gentle tug test is your best indicator—resistance means roots have established. I also look for new leaf growth as secondary confirmation before making the cut.
Transplant Timing: In Step 5, the 3-5 days hardening-off period is non-negotiable if you’ve used pots. I once skipped this and lost half my plantlets to transplant shock. Overcast days are ideal for the actual transplanting, as bright sun can stress the tender new plants before they’ve had a chance to establish.
Most runners form roots within 2–4 weeks if kept in moist soil or water. Speed depends on temperature, humidity, and strawberry variety—warmer conditions (60–75°F) accelerate rooting.
Yes! Place the runner’s nodes in water, ensuring the leaves stay dry. Change the water every 2–3 days to prevent rot, and transplant to soil once roots are 1–2 inches long.
Early spring or late summer (after fruiting) is ideal. Avoid extreme heat or frost. This timing gives new plants time to establish before winter or summer stress.
Common issues: dry soil, poor contact between nodes and soil, or cold temps. Ensure consistent moisture, bury nodes lightly, and use a well-draining mix. Patience helps—some varieties root slower!
