
Beautiful Plants For Your Interior
Beautiful Plants For Your Interior
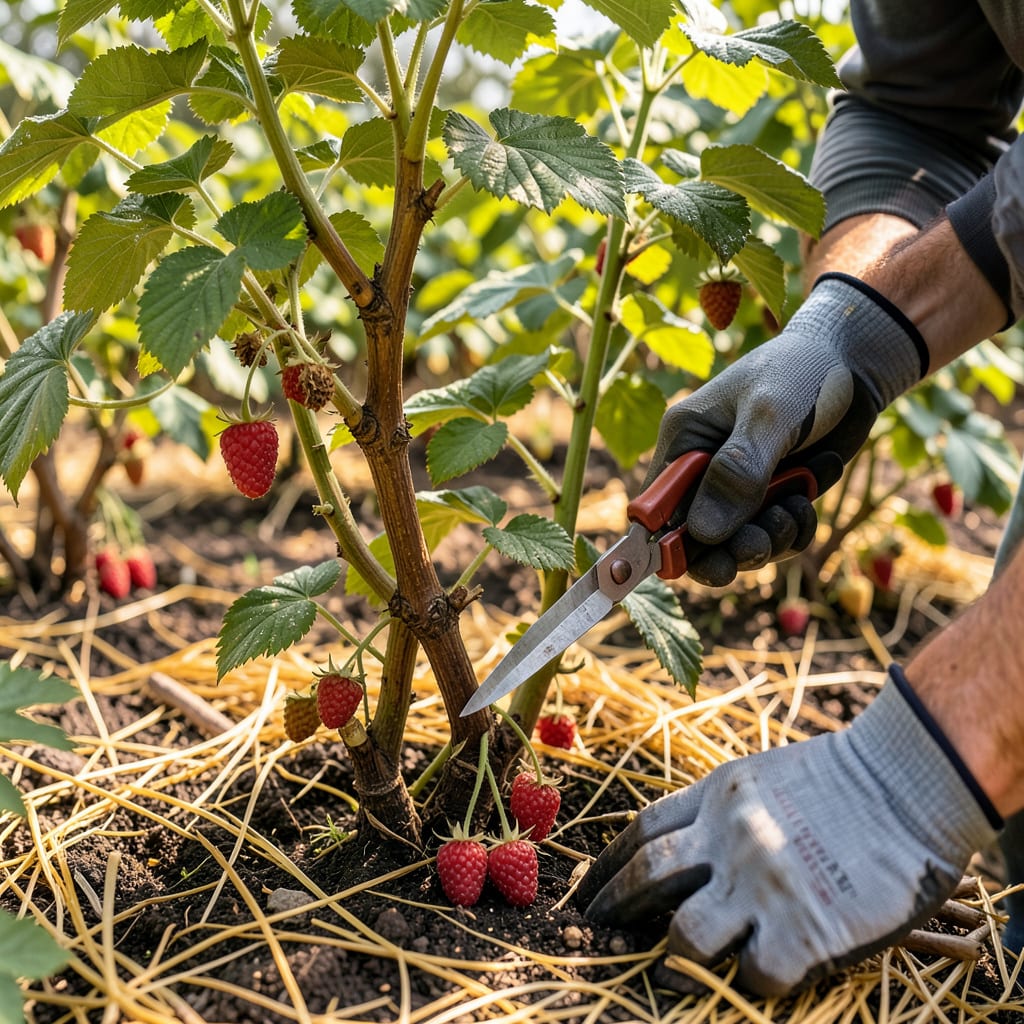
Raspberry canes left unpruned turn into a tangled mess with tiny, disappointing berries. I learned this the hard way after my first patch produced more thorns than fruit. Proper pruning transforms that chaos into orderly rows of productive canes that yield pounds of plump raspberries each season—without the jungle gym of old growth.
The timing and technique differ for summer-bearing and fall-bearing varieties, but both respond dramatically to a good annual trim. You’ll need just sharp pruners, gloves, and about 30 minutes to double next year’s harvest. Here’s how to spot the canes to cut and where to make the cleanest cuts for maximum fruit.
📚 In This Guide
Pruning raspberries correctly is the secret to healthier canes and heavier yields—here’s how to do it with confidence.
First, determine whether you’re growing summer-bearing or fall-bearing (also called everbearing) raspberries, as their pruning needs differ dramatically. Summer-bearing varieties produce fruit on second-year canes (called floricanes), while fall-bearing types fruit on first-year canes (primocanes) in late summer and again on those same canes the following year if left unpruned.
The ideal pruning window is late winter to early spring—just as the buds begin to swell but before new growth emerges. For fall-bearing raspberries, you also have the option of a late-summer pruning after harvest to simplify maintenance. I always mark my calendar for early March in my zone 6 garden, adjusting slightly based on that year’s weather patterns.
Begin by cutting out all dead, diseased, or damaged canes at ground level using clean, sharp pruners. These canes appear gray, brittle, or show signs of fungal infection like black spots or cankers. Next, thin out weak, spindly canes (those thinner than a pencil) as they won’t produce quality fruit and only drain energy from stronger canes.
For summer-bearing raspberries, remove all second-year canes that fruited last season—they’ll be brown and woody compared to the green first-year canes. I find it helpful to wear gloves and run my hand along the cane: if it snaps easily, it’s dead and needs removal. Aim to leave only the healthiest 4-6 canes per linear foot of row for optimal air circulation and fruit production.
For both raspberry types, shorten the remaining canes by about one-quarter of their height. This encourages branching and increases fruit production. Make your cuts just above a healthy bud, angling the cut slightly away from the bud to prevent water from pooling on it. The ideal height after pruning is typically 4-5 feet for summer-bearing and 3-4 feet for fall-bearing varieties.
With fall-bearing raspberries, you have two pruning options: the one-crop system (cut all canes to the ground in late winter for a single fall harvest) or the two-crop system (prune only the portions that fruited last fall, leaving the lower sections to fruit in summer). I prefer the one-crop system for simplicity and larger fall berries, though it means sacrificing the summer crop. The choice depends on your climate and how you plan to use your harvest.
After pruning, immediately remove all cut canes and debris from the garden. Raspberry canes can harbor diseases like anthracnose and spur blight, so I either burn the cuttings or dispose of them in the trash—never in the compost pile. Rake up and remove any fallen leaves or berries from last season, as these can also spread pathogens.
Apply a 2-3 inch layer of mulch around the base of the plants (but not touching the canes) to suppress weeds and maintain consistent soil moisture. I use straw or wood chips, which also help prevent soil-borne diseases from splashing onto the lower leaves during rain. This is also an ideal time to apply a balanced organic fertilizer to support the new growth that will emerge in the coming weeks.
As new canes emerge in spring, begin training them to grow within your designated row. For erect varieties, use a trellis system with wires at 3 and 5 feet to keep canes upright and contained. For trailing varieties, you’ll need a more substantial support system with multiple wires or a fence-like structure.
Throughout the growing season, periodically check for and remove any canes growing outside your designated row. I also thin new canes as they emerge, keeping only the strongest 4-6 canes per linear foot. This might seem aggressive, but it prevents overcrowding and ensures each remaining cane has access to sunlight and air circulation, which are critical for preventing fungal diseases and maximizing fruit quality.
Pruning raspberries doesn’t have to be intimidating—these practical insights will help you avoid common pitfalls and maximize your harvest.
Timing Precision: The late winter to early spring window mentioned in Step 1 is absolutely critical. Pruning too early in winter can leave canes vulnerable to cold damage, while waiting too long risks cutting into new growth. In my zone 6 garden, I’ve found that early March—when buds just begin to swell but haven’t opened—gives the best results. For fall-bearing varieties, that late-summer pruning option after harvest can be a game-changer for disease prevention, as it removes potential overwintering sites for pathogens.
Cane Selection Technique: When implementing Step 2’s instruction to remove weak canes thinner than a pencil, I use this simple test: grasp the cane about halfway up and gently bend it. Healthy canes will flex and spring back, while weak ones will either snap or stay bent. This tactile method helps identify canes that might look healthy but lack the structural integrity to support fruit. Also, when removing second-year canes from summer-bearing varieties, look for the characteristic brown, peeling bark—this visual cue makes identification foolproof.
Cutting Method: The instruction in Step 3 about making cuts just above a healthy bud deserves special attention. I angle my cuts at about 45 degrees, with the higher side away from the bud—this allows water to run off rather than pool on the bud. Using sharp bypass pruners (not anvil-style) creates cleaner cuts that heal faster. For the one-quarter height reduction, I measure by holding my hand at the desired final height and cutting just above a bud at that level, which gives more consistent results than eyeballing.
Disease Prevention Strategy: The cleanup mentioned in Step 4 is where many gardeners cut corners, but I’ve learned that thoroughness here prevents problems all season. After removing cut canes, I use a stiff-bristled broom to sweep the area clean, then follow with a leaf blower to remove any remaining debris from between plants. For the mulch application, I create a 6-inch diameter bare zone around each cane base—this prevents moisture from wicking up the stem and reduces rot risk. The 2-3 inch mulch depth is ideal; too little won’t suppress weeds effectively, while too much can smother emerging canes.
Prune summer-bearing raspberries right after harvest (late summer) and fall-bearing types in late winter or early spring (before new growth starts). Avoid pruning in freezing temps or wet conditions—this stresses plants and spreads disease.
If you remove more than ⅓ of the canes at once, you’re overdoing it! Healthy plants should have 4–6 sturdy canes per foot of row. Weak, spindly growth after pruning means you took too much—leave stronger canes next time.
No! Regular scissors crush stems, inviting disease. Use sharp bypass pruners (cleaned with rubbing alcohol) for clean cuts. For thick canes, try loppers. Dull tools make jagged wounds that heal poorly.
Common culprits: pruning at the wrong time (cutting off next year’s buds), removing all old canes (summer-bearing types fruit on 2nd-year growth), or over-fertilizing (promotes leaves, not fruit). Double-check your variety’s pruning needs!
Red raspberries grow new canes from roots (suckers), while black raspberries sprout from cane tips (arching “primocanes”). Black raspberries need tipping (cutting tops at 3–4 feet) to encourage branching—red types don’t.
