
Beautiful Plants For Your Interior
Beautiful Plants For Your Interior
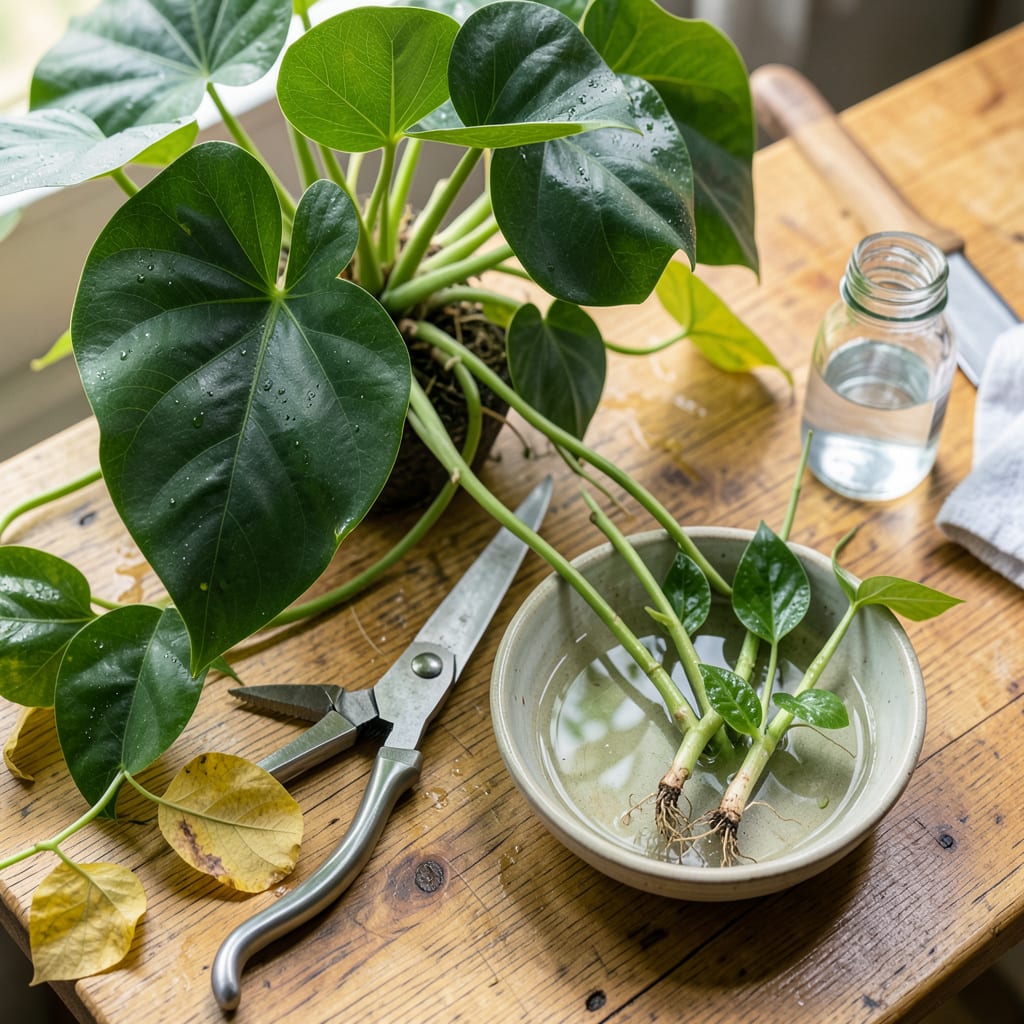
Leggy philodendrons with sparse leaves? I’ve been there—until I learned that strategic pruning transforms these plants from straggly vines into lush, bushy showstoppers. The right cuts at the right time don’t just control size; they trigger explosive new growth from dormant nodes, turning a lackluster plant into something that looks like it belongs in a design magazine.
You don’t need green thumbs or fancy tools—just sharp shears, a little confidence, and the know-how to spot where to cut. I’ll walk you through the exact method that rescued my own philodendrons from the “almost dead” pile, including how to turn those trimmings into free baby plants. No more guessing where to snip or worrying about killing your plant.
📚 In This Guide
Pruning your philodendron is simpler than you think—just follow these clear steps for bushier, healthier growth.
Start by examining your philodendron for long, leggy stems or yellowing leaves. Look for nodes (the small bumps where leaves emerge from the stem)—these are your cutting points. I always target stems that have grown 12-18 inches long with at least 4-5 leaves, as these are mature enough to handle pruning.
Trace the stem back to the base and locate the node closest to where you want new growth to emerge. You’ll notice the node looks like a slight swelling or joint on the stem. Never cut below the lowest leaf on a stem—this can stress the plant and inhibit regrowth.
Using sharp, clean pruning shears or scissors, cut just above the node at a 45-degree angle. This angled cut prevents water from pooling on the stem, which could lead to rot. Make sure your tool is sanitized with rubbing alcohol to avoid spreading disease—this is one step I never skip.
For vining philodendrons, I cut back about one-third of the vine’s length, which encourages branching without shocking the plant. If you’re removing a yellow or damaged leaf, cut the entire leaf stem back to the main vine. You’ll feel a slight resistance when cutting through healthy tissue—this is normal.
After pruning, place your philodendron in bright, indirect light for at least 6-8 hours daily. This helps the plant recover and stimulates new growth at the nodes you’ve exposed. I’ve found that rotating the plant quarter-turn weekly ensures even growth on all sides.
Water the plant lightly after pruning—just enough to moisten the soil—but avoid soaking it. You’ll see new leaves emerging from the nodes within 2-3 weeks. This is when you’ll know your pruning was successful. If the cut stems look dry or blackened after a week, you may have cut too close to the node.
Don’t discard those healthy cuttings! Place them in a glass of water, ensuring at least one node is submerged. I use room-temperature water and change it every 3-4 days to prevent bacterial growth. You’ll see roots beginning to form within 2-3 weeks.
Once the roots reach 2-3 inches long, you can pot them in fresh potting mix. Keep the soil consistently moist (but not soggy) for the first month. I’ve propagated dozens of new philodendrons this way—it’s the plant’s way of rewarding you for good pruning practices!
Pruning philodendrons becomes effortless once you know these key techniques I’ve learned from years of trial and error.
Node Identification: In Step 1, don’t just look for any bump on the stem – the healthiest nodes for cutting are the ones that already have small brown lines or tiny nubs where leaves used to be. These mature nodes will give you the best regrowth results. I always run my finger along the stem to feel for these slightly raised areas before making any cuts.
Tool Preparation: Before starting Step 2, wipe your pruning shears with rubbing alcohol and let them dry completely. I learned this the hard way after losing several cuttings to bacterial rot. The alcohol evaporates quickly, but that brief drying time prevents you from accidentally introducing moisture to your fresh cuts.
Light Management: During the recovery period in Step 3, avoid placing your philodendron in direct sunlight, even if it’s just for those 6-8 hours. The stress of pruning makes leaves more susceptible to sunburn. I use a sheer curtain to filter intense light during this crucial recovery window.
Propagation Timing: When following Step 4, don’t rush to pot your cuttings as soon as you see roots. Wait until the roots are at least 2 inches long and have developed multiple root strands. I’ve found that cuttings with thicker, more established root systems transition to soil much more successfully than those with just a few thin roots.
Winter isn’t ideal for pruning, as growth slows and wounds heal more slowly. Stick to spring or early summer when your plant is actively growing—this helps it recover faster and encourages new shoots. If you must prune in winter, avoid heavy cuts and keep the plant in stable conditions.
Trim just above a leaf node (where leaves meet the stem) to encourage branching. Cut back long, bare stems by one-third to promote fuller growth. Rotate the plant regularly for even light exposure, and fertilize lightly after pruning to support new shoots.
Pruning removes unwanted growth to shape or rejuvenate the plant, while propagating involves cutting stems to grow new plants. You can do both at once! Use healthy trimmings (4–6 inches long with nodes) to propagate in water or soil while pruning.
Yellowing leaves post-pruning usually mean stress from overwatering, poor light, or excessive cuts. Ensure the soil dries slightly between waterings, provide bright indirect light, and avoid removing more than 30% of the foliage at once. Trim only healthy stems to reduce shock.
Regular scissors work for small philodendrons, but sterilized pruning shears (or sharp scissors) are better—they make cleaner cuts and reduce damage. Always wipe blades with rubbing alcohol before use to prevent disease. Dull tools can crush stems, slowing healing.
