
Beautiful Plants For Your Interior
Beautiful Plants For Your Interior
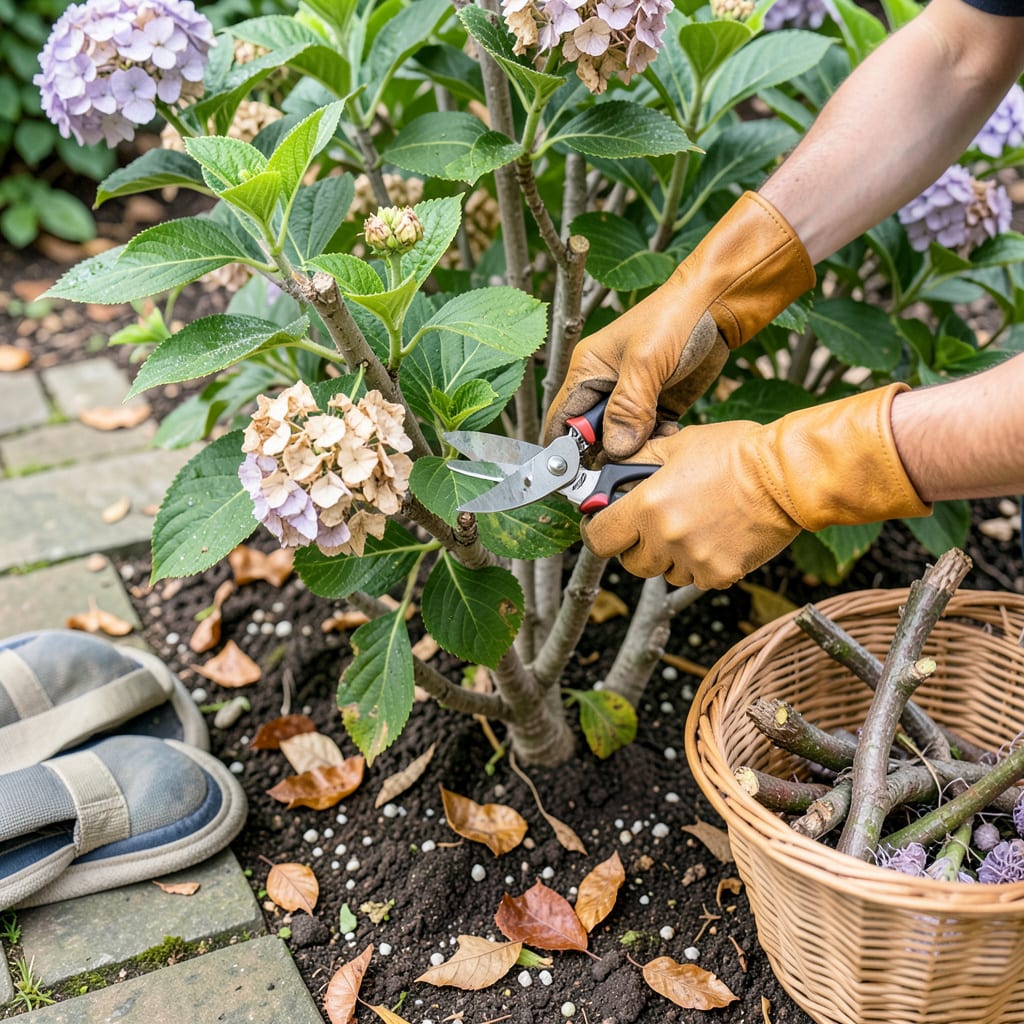
I used to stare at my overgrown hydrangeas every spring, terrified to make the wrong cut. Then I learned the secret: timing and type matter more than technique. Pruning these shrubs isn’t about hacking away—it’s about understanding whether you’re dealing with a bigleaf, panicle, or smooth variety, since each responds differently to the shears.
The payoff is worth the learning curve. A few strategic cuts in late winter or early spring (depending on your type) can double your blooms next season. I’ve turned scrawny, leggy bushes into showstoppers just by following two simple rules: prune at the right time, and never remove more than one-third of the plant. The difference in flower production is shocking.
📚 In This Guide
This method guarantees healthier plants and more vibrant blooms—no guesswork required.
Before making any cuts, determine whether you have an old-wood bloomer (like mophead or lacecap) or a new-wood bloomer (like panicle or smooth hydrangeas). Old-wood varieties set buds on last year’s growth, while new-wood types bloom on current season stems.
Here’s the thing—if you prune old-wood hydrangeas at the wrong time, you’ll cut off next year’s flowers. Check the stems: old-wood types have visible flower buds forming by late summer, while new-wood varieties stay bare until spring.
For old-wood bloomers, prune immediately after flowering—usually mid to late summer. This gives the plant time to develop next year’s buds before winter. I always mark my calendar when the last bloom fades so I don’t forget.
New-wood hydrangeas are more forgiving. Prune them in late winter or early spring before new growth appears. You’ll see the difference when you cut—old stems are brown and woody, while new growth is green and flexible.
Start by removing any dead, damaged, or crossing stems at the base. For old-wood types, cut back about one-third of the oldest stems to encourage new growth. Always cut just above a pair of healthy buds at a 45-degree angle.
With new-wood varieties, you can be more aggressive. Cut back stems to 12-18 inches from the ground. This might feel drastic, but it promotes stronger, bushier growth. I use sharp bypass pruners and wipe the blades with rubbing alcohol between cuts to prevent disease spread.
After removing unwanted growth, step back and assess the plant’s shape. Thin out about one-quarter of the oldest stems to improve air circulation. This prevents fungal diseases and allows light to reach the center of the plant.
Don’t just shear the top—this creates a flat, unnatural look. Instead, make individual cuts at varying heights for a more natural shape. You’ll notice the plant looks more open and balanced immediately, with better airflow through the branches.
Remove all cut material from around the base to prevent pests and diseases. I like to spread a fresh 2-inch layer of mulch around the plant (but not touching the stems) to conserve moisture and protect roots.
Watch for new growth in spring. Healthy pruning stimulates vigorous shoots—you’ll see multiple new stems emerging from each cut. If any stems fail to leaf out by mid-spring, they didn’t survive winter and should be removed completely.
Pruning hydrangeas doesn’t have to be intimidating—these practical insights will help you avoid common pitfalls and set your plants up for spectacular blooms.
The Identification Trick: In Step 1, when determining your hydrangea type, here’s what nobody tells you—scratch the bark gently on older stems. Old-wood varieties like mophead hydrangeas will reveal green tissue just beneath the surface even in winter, while new-wood types like panicle hydrangeas show more pronounced green when scratched in spring. This simple test removes all guesswork about when to prune.
Timing Precision: For old-wood bloomers mentioned in Step 2, don’t wait until all flowers are completely brown to prune. The ideal window is when about 70% of blooms have faded but still retain some color—this usually falls in that mid-to-late summer timeframe. I’ve found that pruning at this stage gives the plant maximum time to develop next year’s buds before dormancy sets in.
Cutting Technique: When making those one-third cuts on old-wood stems in Step 3, look for buds that face outward from the plant’s center. Cutting just above these outward-facing buds (rather than inward-facing ones) encourages growth that expands the plant’s shape rather than creating a crowded center. This small adjustment makes a noticeable difference in the plant’s overall form and airflow.
Tool Maintenance: Between cuts in Step 3, I can’t stress enough how important it is to wipe your pruners with rubbing alcohol. What seems like overkill prevents the spread of fungal spores and bacterial diseases that can linger on plant sap. Keep a small container of alcohol and a rag nearby—it takes two seconds and saves you from potential heartbreak when diseases spread to healthy stems.
The ideal timing depends on the type! Bigleaf and oakleaf hydrangeas bloom on old wood—prune right after flowering (summer). Panicle and smooth hydrangeas bloom on new wood—prune in late winter/early spring before growth starts. Unsure? Check your variety first!
No blooms next season! Pruning old-wood bloomers (like mopheads) in spring removes flower buds. New-wood types (like ‘Limelight’) are more forgiving—you might just delay blooms. If you slip up, focus on light shaping and wait for the correct season next year.
Stick to the “1/3 rule”: never remove more than a third of the plant at once. Use clean, sharp shears to avoid tearing stems, and prune just above a leaf node. Over-pruning stresses the plant, but hydrangeas are resilient—just give them time to recover.
Not always! Mature hydrangeas often thrive with light annual pruning to remove dead wood and shape the plant. Skip pruning if your shrub is healthy and blooming well. Over-pruning can reduce flower size, so prioritize deadheading (removing spent blooms) for tidiness.
Common culprits: Pruning at the wrong time (cutting off buds), over-fertilizing (too much nitrogen = leaves, not flowers), or harsh winter damage. If buds froze, new growth may lack blooms. Try a phosphorus-rich fertilizer (like 10-30-10) to encourage flowering next season.
