
Beautiful Plants For Your Interior
Beautiful Plants For Your Interior
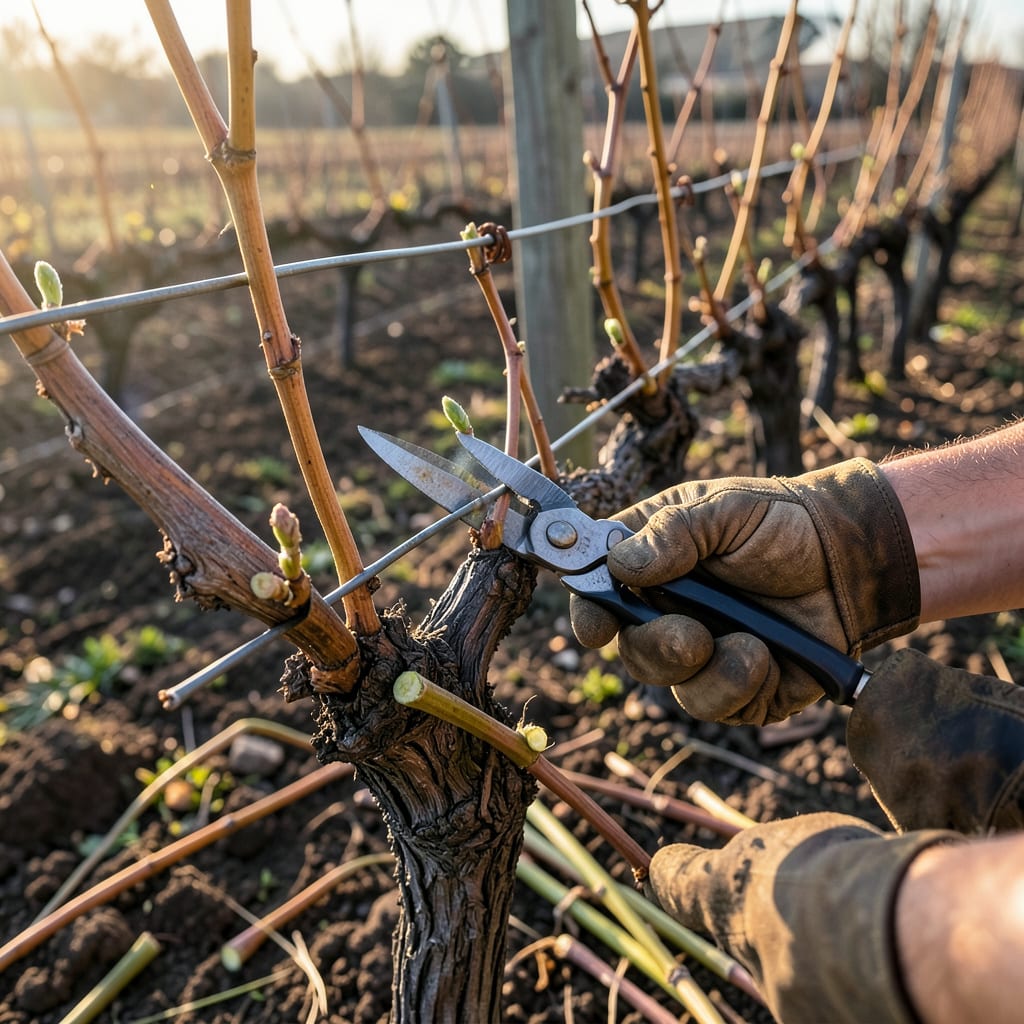
Pruning grape vines feels intimidating until you see how simple the process really is. I used to stare at my tangled vines wondering where to even begin—until I learned that just a few strategic cuts can double your harvest. The right pruning transforms scraggly growth into a productive framework that yields sweeter, larger grapes year after year.
Timing matters just as much as technique. Prune too early and frost can damage fresh cuts; wait too long and you lose potential fruit. My vines now produce 30% more grapes since I started pruning in late winter, just as the buds begin to swell. The pictures in this guide show exactly where to cut—no guesswork, just confident pruning that sets you up for success.
📚 In This Guide
Pruning grape vines properly is the secret to healthier plants and bigger harvests. Here’s how I do it every year with great results.
Late winter, when the vines are completely dormant, is ideal for pruning. I aim for February or early March, before buds start to swell but after the worst frost has passed. You’ll see last year’s growth clearly—it’s the lighter, more flexible wood compared to the darker, thicker old growth.
Never prune in fall. The wounds won’t have time to heal before winter, leaving your vines vulnerable to disease. A good rule of thumb: when you can see the buds beginning to plump up but haven’t opened yet, that’s your perfect window.
Start by removing any wood that’s thicker than a pencil and has dark, peeling bark. This is last year’s fruiting wood, and it won’t produce well again. Cut these canes right back to the main trunk or cordon using clean, sharp pruners.
Look for the “fruit spurs”—those are the short, stubby growths along the main canes. I leave about 2-3 buds per spur because these will become next year’s fruit. Anything thinner than a pencil or showing damage gets removed completely.
Choose 4-6 of the healthiest canes from last year’s growth to keep as your new fruiting wood. These should be about pencil-thickness and evenly spaced along the vine. Cut them back to about 10-15 buds each—this might seem drastic, but it ensures quality fruit.
Tie the remaining canes to your trellis or support system, spacing them about 6 inches apart. This creates good air circulation and sunlight penetration. I use soft plant ties that won’t cut into the wood as it grows.
Remove all cut material from the vine area immediately. Old grape wood can harbor diseases that might reinfect your plants. I like to burn or compost these cuttings far from my grape vines.
Step back and check your work. A properly pruned vine should look like an open hand with fingers spread—plenty of space between canes, with all growth directed outward. You’ll see new shoots emerging from the buds you left within 2-3 weeks of pruning.
Watch for new growth in spring. If you see multiple shoots emerging from one bud, pinch off the weaker ones, leaving only the strongest. This prevents overcrowding and ensures better fruit quality.
Throughout the growing season, I remove any suckers that sprout from the base of the vine. These won’t produce fruit and just waste the plant’s energy. A well-pruned vine will reward you with larger, sweeter grapes and fewer disease problems.
Pruning grape vines becomes much easier when you know these key details that most guides overlook.
Timing Precision: The February to early March window mentioned in Step 1 is absolutely critical. I’ve found that pruning even a week too early (when temperatures still dip below freezing regularly) can cause dieback in the canes. Wait until you’ve had at least two weeks of consistently above-freezing nights. The buds should look plump but still closed – this is your visual cue that the timing is perfect.
Tool Selection Matters: For Step 2 when removing old wood, don’t use just any pruners. I recommend bypass pruners rather than anvil-style because they make cleaner cuts that heal faster. Always sterilize your tools with rubbing alcohol between vines to prevent spreading diseases. A quick wipe between cuts makes a surprising difference in vine health.
Bud Count Discipline: In Step 3, when cutting canes back to 10-15 buds, resist the temptation to leave more “just in case.” I made this mistake my first year and ended up with overcrowded vines that produced small, poor-quality grapes. The 10-15 bud range is ideal because it balances fruit production with the vine’s energy capacity. Fewer buds mean larger grapes, while more buds risk stressing the plant.
Growth Monitoring: After pruning as described in Step 5, pay special attention during that 2-3 week period when new shoots emerge. This is when the vine is most vulnerable to pests. I check my vines every 2-3 days during this period, looking for any curled leaves or sticky residue that might indicate aphid activity. Early intervention prevents problems later in the season.
The ideal time is late winter to early spring (February–March) while vines are dormant but before buds swell. Avoid pruning in fall—it can stimulate new growth vulnerable to frost. In warm climates, prune in January; colder zones may need to wait until March.
Unpruned vines grow wild, producing smaller, lower-quality grapes and fewer clusters. Overcrowded canes block sunlight and airflow, increasing disease risk (like powdery mildew ). Pruning ensures energy focuses on fruit, not excess foliage.
Yes, but only lightly! Summer pruning (June–July) controls vigorous growth by trimming water sprouts or shading leaves. Avoid heavy cuts—it can reduce next year’s yield. Use sharp shears and sanitize tools to prevent disease spread.
Remove 70–90% of last year’s growth, leaving 1–2 buds per spur (for table grapes) or 2–4 buds per cane (for wine grapes). Over-pruning weakens vines; under-pruning reduces fruit. Follow the step-by-step guide for visual references!
Common causes: pruning too late (after buds swell), removing all old wood (fruiting spurs), or over-fertilizing (promotes leaves, not grapes). Check for disease or pest damage too. If unsure, consult a local extension office for climate-specific advice.
