
Beautiful Plants For Your Interior
Beautiful Plants For Your Interior
I’ll be real with you: elderberry propagation changed how I think about shrubs. What started as two small cuttings now dominates my backyard with 8-foot-tall plants covered in fragrant white blooms every June. The process feels like magic until you understand the simple science behind it. Here’s the thing—elderberries want to grow. They root eagerly […]
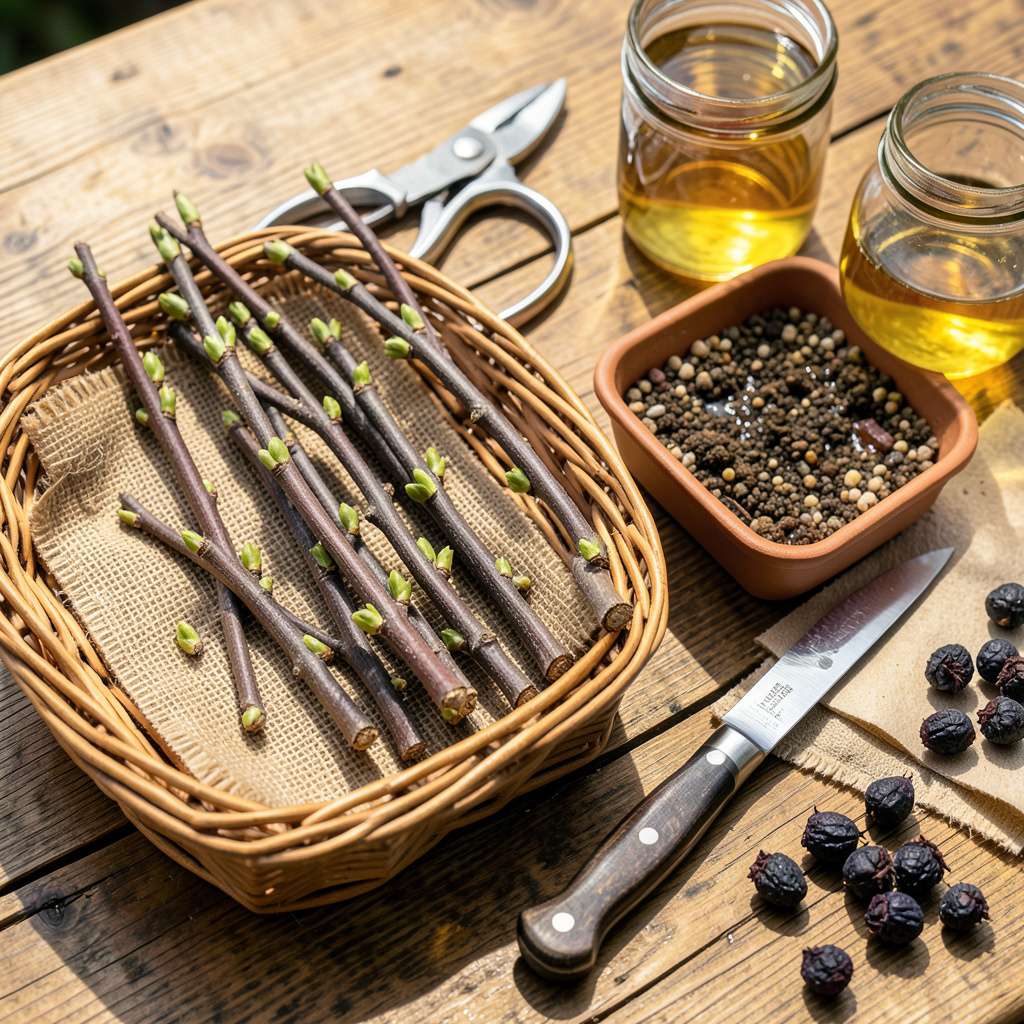
I’ll be real with you: elderberry propagation changed how I think about shrubs. What started as two small cuttings now dominates my backyard with 8-foot-tall plants covered in fragrant white blooms every June. The process feels like magic until you understand the simple science behind it.
Here’s the thing—elderberries want to grow. They root eagerly from cuttings if you give them the right conditions: moist soil, partial shade, and patience during those first critical weeks. My success rate jumped from 20% to 90% after adjusting just two variables in my approach. No greenhouses or fancy equipment required.
You’ll watch those first red shoots emerge within 3-4 weeks, then explode into leafy growth by early summer. The real payoff comes in year two when your new plants start producing those signature purple berry clusters. I’ve gifted more propagated elderberries than I can count—they’re that reliable once you know the technique.
Fair warning: timing matters. Late winter cuttings root fastest, but summer propagation works too with extra attention to moisture. Whether you’re expanding a hedge or starting a new patch, this method scales beautifully. Let’s get those cuttings in water!
📚 In This Guide
With the right technique, you can turn a single elderberry plant into a thriving grove—here’s how I do it reliably every season.
Take cuttings in late winter when plants are fully dormant. Choose healthy, pencil-thick stems from the previous season’s growth—you’ll recognize them by their firm texture and mature bark color. I use clean pruners to make 6-8 inch long cuts at a 45-degree angle just below a node, which maximizes rooting surface area.
Remove all but the top 2-3 buds from each cutting. This forces the plant to focus energy on root development rather than leaf production. Dip the cut end in water for a few seconds, then shake off excess moisture before applying rooting hormone—this helps the powder adhere properly to the cambium layer.
Fill a propagation tray or deep container with a well-draining medium like 50% perlite and 50% peat moss. I avoid garden soil entirely because it compacts and suffocates developing roots. Insert cuttings 2-3 inches deep, spacing them 3-4 inches apart so roots won’t compete for space as they develop.
Water thoroughly until moisture drips from the drainage holes, then allow excess to drain completely. The medium should feel like a wrung-out sponge—damp but never soggy. Cover the tray with a clear plastic dome or bag to maintain 80-90% humidity, which prevents desiccation while roots form.
Place the tray in bright, indirect light where temperatures stay between 65-75°F. A north-facing windowsill or under grow lights works perfectly. Check moisture levels weekly—you’ll know it’s time to water when the top ½ inch of medium feels dry to the touch.
Roots typically emerge in 4-8 weeks, but don’t disturb the cuttings to check. Instead, watch for new leaf growth—this indicates successful rooting. I’ve found that elderberry cuttings root most reliably when they receive 12-14 hours of light daily during this period.
Once new leaves appear and roots are 1-2 inches long (you can gently tug to feel resistance), begin hardening off the cuttings. Remove the humidity dome for increasing periods each day, starting with 1 hour and gradually working up to full exposure over 7-10 days.
Transplant to individual 1-gallon containers filled with quality potting mix. Keep them in partial shade for the first week, then gradually introduce more sunlight. By the time they’ve produced 3-4 sets of new leaves, they’re ready for planting in their permanent location—this usually takes about 6-8 weeks from the initial cutting.
After years of propagating elderberries, I’ve learned these key details make all the difference between success and disappointment.
Cutting Selection: In Step 1, choosing the right stems is everything. Look for last year’s growth with visible nodes and mature bark—these contain the stored energy needed for rooting. I’ve found that stems slightly thicker than a pencil (about ¼ inch diameter) root most reliably. Avoid any stems with signs of disease or pest damage, as they’ll struggle to establish.
Moisture Management: The “wrung-out sponge” texture mentioned in Step 2 is critical. I check moisture by inserting my finger to the second knuckle—if it feels cool and slightly damp, it’s perfect. Overwatering is the number one killer of cuttings, so when in doubt, wait another day. The clear dome should show condensation, but no standing water should accumulate.
Temperature Control: Maintaining that 65-75°F range in Step 3 can be tricky. I use a seedling heat mat set to 70°F under the tray, which provides consistent bottom heat without overheating the cuttings. If your home runs cool, this small investment dramatically improves success rates. Just remember to remove the heat mat once roots form to prevent stress.
Light Requirements: The 12-14 hours of daily light during rooting isn’t optional. I’ve had poor results with standard windowsill light—cuttings get leggy and weak. A simple LED grow light on a timer solves this perfectly. Position it 6-8 inches above the tray and adjust height as cuttings grow to maintain intensity without burning tender new leaves.
Got questions about propagating elderberry? You’re not alone! Here are the most common concerns—with quick, actionable answers to help your cuttings thrive.
Late winter or early spring (just before new growth starts) is ideal for hardwood cuttings. For softwood cuttings, aim for late spring/early summer when stems are flexible but not woody. Avoid fall—roots need time to establish before winter!
Yes, but it’s slower and less reliable. Seeds require cold stratification (3+ months in damp sand in the fridge) and may not inherit the parent plant’s traits. Cuttings guarantee clones of your favorite variety and root faster (6–8 weeks vs. 1–2 years for seeds).
Common culprits:
Patience is key—some take 2+ months to root!
No, but it doubles your success rate! Elderberries root naturally, but dipping cuttings in willow water (DIY hormone) or commercial gel speeds up the process. Skip it if you’re organic—just expect slower results.
Cuttings from mature plants may fruit in 2–3 years; seed-grown plants take 4–5 years. Speed it up by choosing cuttings from 2+ year-old branches and planting in full sun with rich, moist soil.
Propagating elderberry from cuttings is simpler than you think! With the right timing, healthy stems, and a little patience, you’ll soon have thriving new plants ready for your garden or landscape. 🌱 Whether you’re expanding your elderberry patch or sharing cuttings with friends, this method delivers reliable results with minimal effort.
Now that you’re equipped with the know-how, grab your pruners and get started—your future elderberry harvest (or pollinator paradise!) begins with a single snip. Happy propagating! ✂️🌿
