
Beautiful Plants For Your Interior
Beautiful Plants For Your Interior
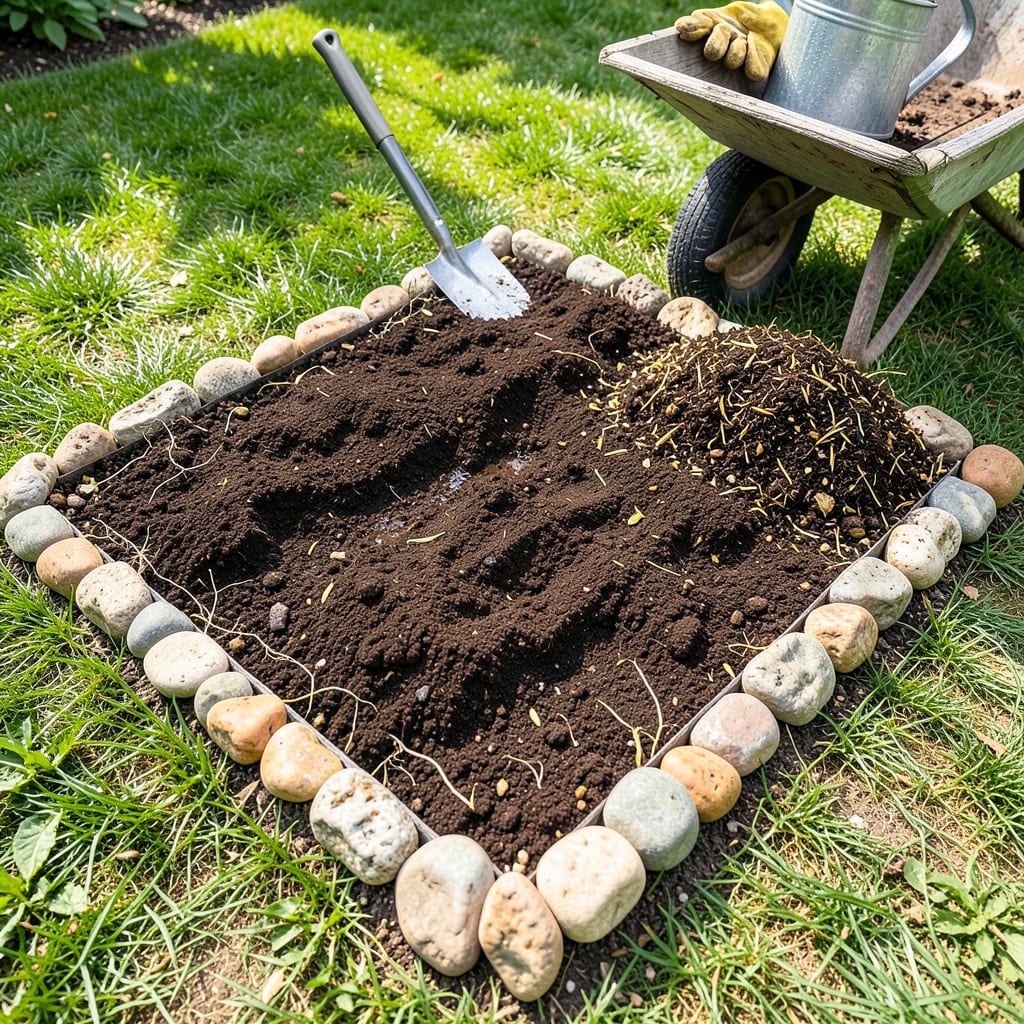
Great flower gardens start from the ground up—literally. I’ve seen more blooms fail from poor soil prep than from any other mistake, but fixing it is simpler than you’d think. The difference between struggling plants and explosive color often comes down to what’s happening beneath the surface. Loosen, nourish, and balance your soil before planting, and your flowers will reward you with stronger roots and brighter blooms all season.
You don’t need fancy tools or a degree in horticulture. A basic spade, some compost, and a little know-how can transform even heavy clay or sandy soil into the perfect home for annuals, perennials, or bulbs. The key is working with your soil’s natural texture, not against it—whether that means breaking up compaction or boosting moisture retention. Skip this step, and you’ll spend the summer fighting problems instead of enjoying your garden.
📚 In This Guide
Here’s my foolproof method for creating the perfect flower bed—your blooms will thank you later.
Start by removing all weeds, rocks, and debris from your planting area. I like to use a garden fork to loosen the top 6-8 inches of soil while pulling out any persistent weeds by their roots. This isn’t just about tidiness—weeds compete with your flowers for nutrients and water right from the start.
Pay special attention to removing grass if you’re converting a lawn area. A flat-edged shovel works well for slicing under the turf. Don’t skip this step—any remaining grass will regrow through your flower bed and create ongoing maintenance headaches.
Grab a handful of soil and squeeze it. If it crumbles easily when you open your hand, you’re in good shape. If it stays in a tight ball or feels overly sandy, you’ll need to amend it. For clay-heavy soil, work in 2-3 inches of compost or well-rotted manure to improve drainage and aeration.
For sandy soil that drains too quickly, mix in organic matter like peat moss or coconut coir to help retain moisture. I always recommend testing your soil’s pH too—most flowers thrive in slightly acidic to neutral soil (pH 6.0-7.0). A simple test kit from your garden center gives you this information in minutes.
Using a garden fork or tiller, loosen the soil to a depth of 12-18 inches. This might seem like overkill, but deep loosening encourages roots to grow downward rather than circling near the surface. Work in small sections, breaking up any large clods as you go.
Avoid working the soil when it’s too wet—it should crumble when squeezed, not stick together. Working wet soil compacts it further and destroys the natural structure. If you can form a mud ball, wait a day or two for it to dry out slightly before continuing.
Spread a 2-3 inch layer of organic matter—compost, leaf mold, or well-aged manure—over your loosened soil. Then work it in thoroughly to the depth you’ve loosened. This isn’t just about adding nutrients; it’s about creating a living soil ecosystem that will support your flowers throughout the growing season.
For extra flowering power, I like to mix in a balanced, slow-release fertilizer according to package directions. This gives your plants steady nutrition without the risk of burning tender roots. Water the area lightly after amending to help the nutrients start breaking down and becoming available to plant roots.
Rake the area smooth, creating a gently sloped surface that allows water to drain away from plant crowns. Use the back of your rake to firm the soil lightly—this prevents newly planted flowers from settling too deeply after watering.
Now’s the time to arrange your plants (still in their pots) on the prepared bed. This lets you experiment with spacing and color combinations before committing. When you’re happy with the layout, you’re ready to plant—your flowers will establish quickly in this perfectly prepared soil.
Here are the key insights I’ve learned from years of preparing flower beds that will save you time and frustration.
Depth Matters: When you’re loosening the soil in Step 3 to that 12-18 inch depth, don’t cut corners. I’ve found that going the full 18 inches makes a dramatic difference in root development, especially for perennials. The deeper roots can grow, the more drought-resistant and long-lived your flowers will be. This is particularly important for heavy feeders like roses or dahlias that need substantial root systems to support their vigorous growth.
Moisture Test Secret: The simple squeeze test mentioned in Step 2 is more powerful than it seems. Here’s what I’ve noticed: if your soil forms a tight ball that doesn’t crumble when poked, you likely have heavy clay. If it won’t hold shape at all, you’re dealing with excessive sand. Both scenarios call for the 2-3 inches of organic matter mentioned in Step 4, but clay needs more compost while sandy soil benefits from peat moss or coconut coir to improve moisture retention.
Timing Your Amendments: I learned this the hard way—don’t add organic matter and plant immediately. After spreading that 2-3 inch layer in Step 4, give it at least a week to start breaking down before planting. This waiting period allows the amendments to begin integrating with your native soil and creates a more stable environment for your flowers’ roots. If you’re in a hurry, water the amended area thoroughly and wait 3-4 days before planting.
Weed Prevention Hack: In Step 1 when clearing the area, here’s a trick that saves me hours of weeding later: after removing all visible weeds, water the area thoroughly and wait 3-4 days. This encourages any remaining weed seeds to sprout, then you can remove these new weeds before they establish. It’s like getting a second chance to create that clean slate before planting your flowers.
Ideally, prepare your soil 2–4 weeks before planting to let amendments (like compost) settle. For annual flowers, refresh the soil each season. Perennials benefit from yearly top-dressing with compost—no full overhaul needed!
You can, but it’s risky! A simple DIY soil test (or store-bought kit) reveals pH and nutrient levels, helping you pick the right amendments. Skip testing, and you might face poor blooms or stunted growth.
Clay soil? Mix in 2–3 inches of compost or gypsum to loosen it.
Add peat moss or coconut coir to retain moisture.
Both fixes take 1–2 weeks to integrate—patience pays off!
Not always! If the mulch is well-decomposed, till it into the soil for extra organic matter. Fresh or chunky mulch? Rake it aside first—it can block water and roots.
Pull weeds by hand (roots and all!) or smother them with cardboard for 2–3 weeks. For pests, try neem oil or beneficial nematodes—avoid harsh chemicals near flowers.
