
Beautiful Plants For Your Interior
Beautiful Plants For Your Interior
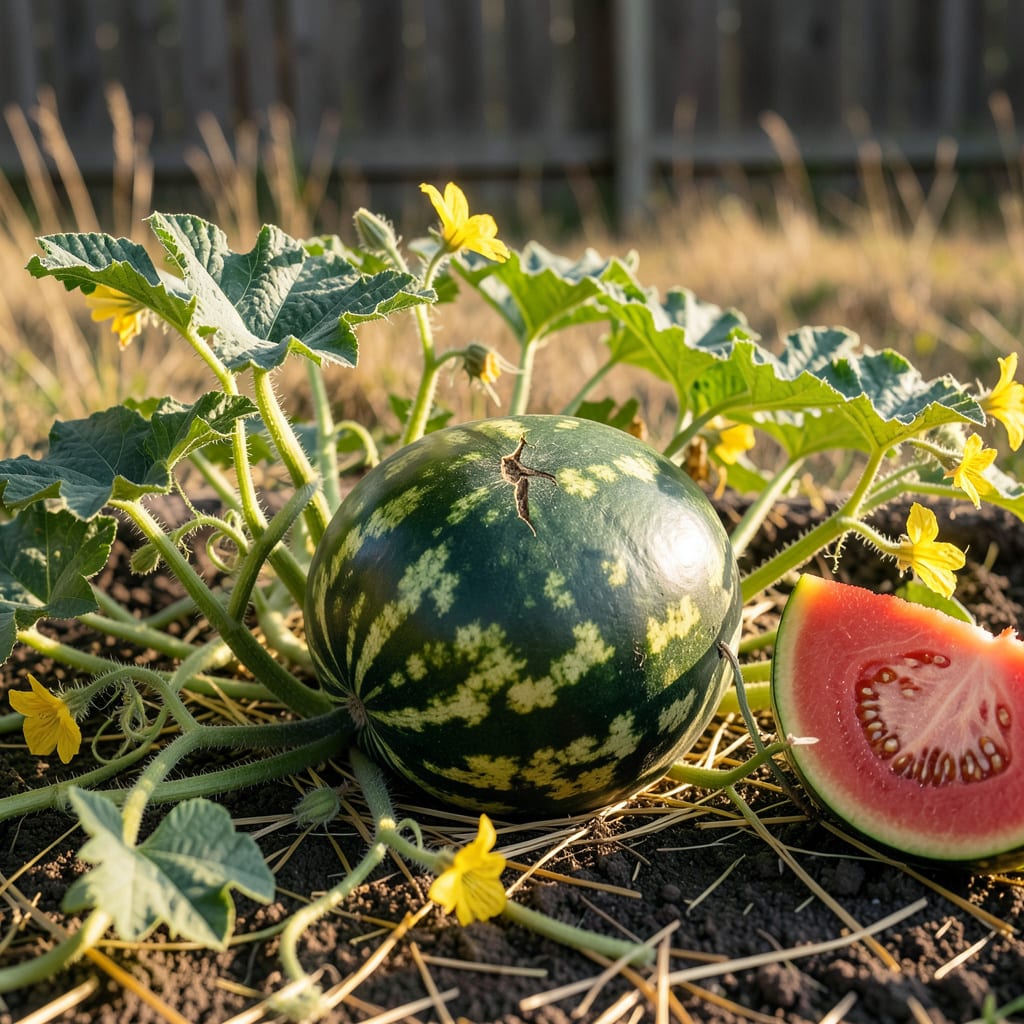
There’s nothing worse than cutting into a watermelon you’ve nurtured for months—only to find it underripe or overripe. That perfect balance of sweetness and crispness? It all comes down to timing.
I’ve learned the hard way that guessing just doesn’t cut it. But with two simple tricks—the tendril curl and the classic tap test—you’ll know exactly when your 🍉 is ready. Let’s break it down so you never second-guess again.


If you’ve ever wondered how to know when your watermelon is ready to pick, the tendril curl method is your best friend. That little curly vine near the stem isn’t just for show—it’s a natural ripeness gauge. When it turns brown and dries up, your watermelon is shouting, “Pick me!” 🌱
This method works because the tendril’s life cycle is directly tied to the fruit’s maturity. As the watermelon ripens, the tendril closest to the stem begins to withdraw nutrients and dries out. It’s not just about color—it’s about texture too. A fully dried, brittle tendril means the fruit has stopped growing and is at peak sweetness. ✂️
| Ripeness Stage | Tendril Appearance | Action Needed |
|---|---|---|
| Not Ready | Green and flexible | Wait 3-5 more days |
| Almost There | Partially brown, still pliable | Check daily |
| Perfect Ripeness | Fully brown and brittle | Harvest immediately |
| Overripe Risk | Tendril detached or missing | Harvest ASAP |
One common mistake I see is gardeners focusing only on the tendril’s color. A green tendril means “not yet,” but a partially brown tendril can be misleading. Always check for brittleness—if it snaps when you bend it, you’re good to go. This method is especially reliable for heirloom varieties, which often have less obvious rind color changes. 🌿
For seedless watermelons, the tendril curl is even more critical. These varieties often lack the classic ground spot color change, so the tendril becomes your primary indicator. I recommend checking tendrils on multiple fruits if you’re growing several—sometimes they ripen at slightly different rates, even on the same vine. 🪴
The science behind this is fascinating. As the watermelon matures, it produces ethylene gas, which triggers the tendril to senesce (a fancy word for “die back”). This is the plant’s way of redirecting energy from growth to ripening. It’s nature’s perfect timing system—no guesswork required! ☀️
Pro tip: If you’re growing in humid climates, tendrils may take longer to dry completely. In this case, combine the tendril check with the ground spot test—look for a creamy yellow color where the melon touches the soil. This dual-check system gives you 99% accuracy in determining ripeness. 💧
Remember that the tendril curl method works best when the watermelon is fully sized. If your fruit is still growing, the tendril won’t dry out properly. Most varieties reach full size about 7-10 days before complete ripeness, so start monitoring tendrils when the melon stops expanding. ⏰
I’ve found this method particularly helpful for first-time growers who might be nervous about picking too early. Unlike the tap test (which we’ll cover next), the tendril curl gives you a visual confirmation that’s hard to misinterpret. It’s like having a built-in ripeness indicator right on the vine! 🌻
For those growing multiple varieties, keep in mind that smaller watermelons (like ‘Sugar Baby’) may show tendril changes sooner than larger types (like ‘Crimson Sweet’). Always refer to your seed packet for the days to maturity range, but let the tendril be your final guide. The combination of timing and tendril condition is unbeatable. 📋
If you’ve ever thumped a watermelon at the grocery store, you already know the basics—but doing it right in your garden takes practice. The tap test is all about listening for that deep, hollow “thud” that signals peak ripeness. A high-pitched “ping” means it’s underripe, while a dull thud suggests overripeness.
Here’s the trick: use your knuckles (not fingertips) and tap near the center of the melon, not the ends. The sound should resonate like a drum. I like to compare it to tapping a basketball—firm but with a little give. Humidity can muffle the sound, so test on a dry day for best results.
Pro tip: Record the sound on your phone to compare melons side-by-side!
I’ve found that larger watermelons (like ‘Crimson Sweet’) produce deeper thuds, while smaller varieties (such as ‘Sugar Baby’) sound slightly higher-pitched even when ripe. If you’re unsure, compare two melons—the riper one will always sound more hollow. This method works best when paired with the tendril check we covered earlier.
Soil type matters too! Sandy soil can make melons sound drier than they are, while clay retains moisture and may muffle the thud. For consistency, I always test in the early morning when temperatures are stable. And remember: practice makes perfect. Your first few attempts might feel awkward, but you’ll develop an ear for it.
Still hesitant? Try the “scratch test” as a backup: run your thumbnail across the rind. If it resists scratching and leaves no mark, the melon is likely ready. Combine this with the tap test, and you’ll rarely pick a dud. The sweetest reward? That first juicy bite of a perfectly timed harvest! 🌱
If your watermelon passes both the tap and tendril tests but the ground spot (where it rests on the soil) is still pale, give it another 2-3 days. That spot should turn a rich creamy yellow or orange when fully ripe. Patience pays off with homegrown flavor you just can’t buy!
Even when the tendril curl and tap test leave you guessing, your watermelon still drops hints. I always check the ground spot first—that’s the area resting on the soil. A ripe melon will have a creamy yellow or even orange-yellow patch, not white or pale green. 🌱
Next, examine the rind’s texture. An unripe watermelon has a glossy sheen, while a ready one looks dull and matte. Run your thumbnail across it—if the rind resists pressure instead of denting, you’re in the sweet zone. This trick works especially well for heirloom varieties with thicker skins. ✂️
For seedless watermelons, I rely more on the stem separation test. Gently twist the fruit—if the stem detaches with minimal resistance, it’s ready. Traditional varieties may need a firmer tug. Remember, overripe melons often have a squishy blossom end, so avoid waiting too long. ☀️
If you’re growing mini watermelons (like ‘Sugar Baby’), their size is a dead giveaway—they’re ready at 6–8 inches in diameter. Larger varieties (e.g., ‘Crimson Sweet’) need 10+ inches. Combine these size cues with the ground spot color for foolproof results. 🌿
Lastly, trust your nose! A ripe watermelon emits a slightly sweet, earthy aroma from the blossom end. No scent? Give it 2–3 more days of sun. This method pairs perfectly with the tap test for extra confidence at harvest time. 🪴
If the tendril is only partially brown or still green, give it 2–3 more days of sun. A fully ripe watermelon will have a completely dried, brittle tendril that curls tightly. Check the ground spot too—if it’s turning yellow, ripeness is close!
Mostly, but seedless varieties often sound slightly different (less hollow, more muted). For these, rely more on the tendril curl and ground spot color. Heirloom types usually give a clearer deep thud when ripe.
Unlike tomatoes, watermelons won’t ripen further once picked. They only sweeten on the vine, so wait until all signs (tendril, tap, ground spot) confirm readiness. Picking early means blah flavor—patience pays off!
A metallic or high-pitched sound means it’s underripe. A ripe melon should produce a deep, hollow thud. If you’re unsure, compare sounds between melons—the dullest thud is usually the ripest. Try tapping with your knuckles for consistency.
Once fully ripe, harvest within 3–5 days to avoid overripening (mushy texture or split rinds). Hot weather speeds this up, so check daily. Store picked melons in a cool, shaded spot until ready to eat.
