
Beautiful Plants For Your Interior
Beautiful Plants For Your Interior
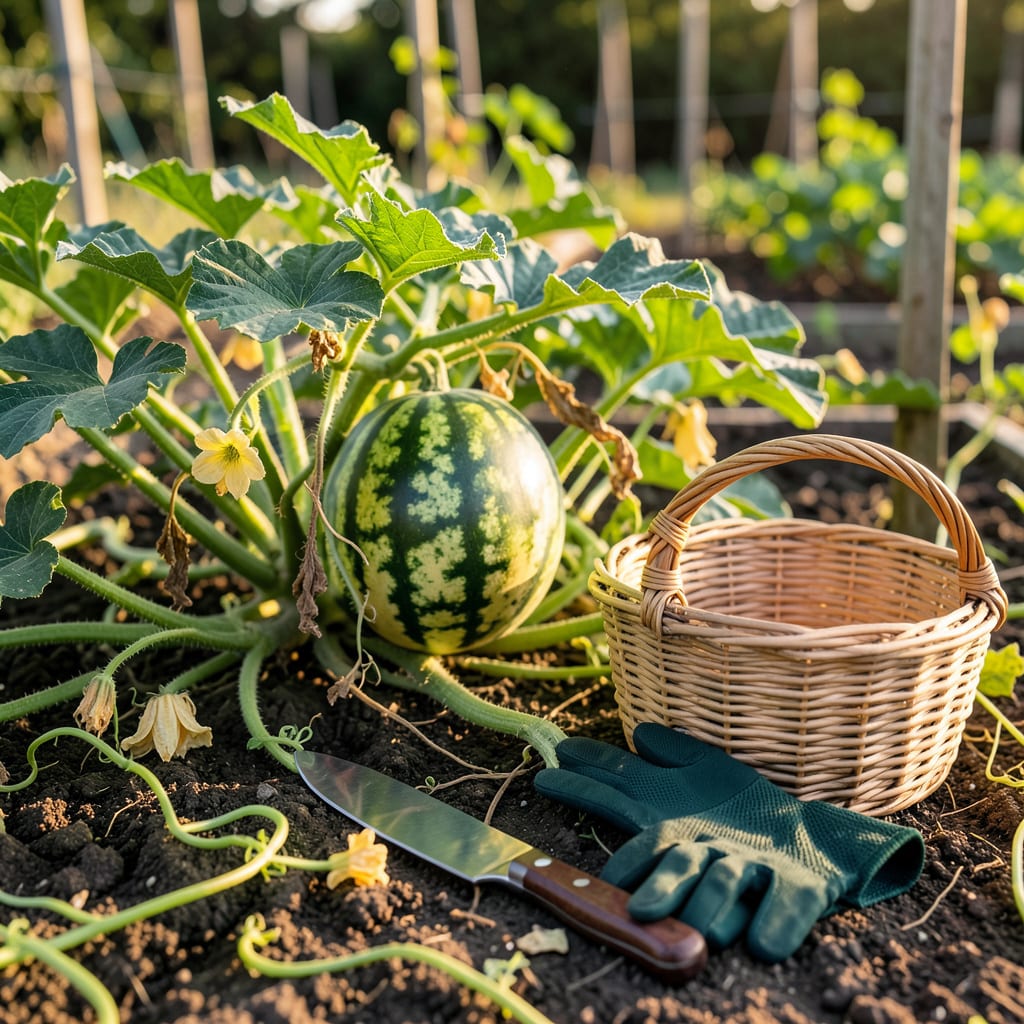
There’s nothing worse than cutting into a watermelon you’ve nurtured for months—only to find it underripe or overripe. I’ve been there, staring at my 🍉 vine wondering, “Is it ready yet?” The good news? You don’t need luck to pick the perfect one.
After years of trial and error (and a few disappointing harvests), I’ve narrowed it down to three foolproof signs. No guesswork, no wasted fruit—just sweet, juicy success. Let’s break it down so you can harvest with confidence this season.


After months of tending your watermelon vines, the moment of truth arrives: determining if your fruit is perfectly ripe. I’ve learned that visual cues are the most reliable indicators—no fancy tools required. These three signs never fail me, whether I’m growing classic ‘Sugar Baby’ or giant ‘Carolina Cross’ varieties.
The first thing I check is the tendril nearest the fruit. This curly vine extension changes from green to brown as the watermelon matures. When it’s completely dried and brittle, that’s your first confirmation. This method works for all varieties, from small icebox types to massive heirlooms.
The ground spot is my second go-to indicator. This is the area where the watermelon rests on the soil. As it ripens, this spot changes from white to a creamy yellow color. For dark-skinned varieties, look for a noticeable contrast between this spot and the rest of the rind.
I always examine the overall rind texture too. An unripe watermelon has a glossy, shiny surface, while a ripe one develops a dull, matte finish. This change is subtle but becomes obvious when you compare multiple fruits. The color may also deepen slightly, though this varies by variety.
For the most accurate assessment, I check all three signs together. A watermelon with a brown tendril, yellow ground spot, and matte rind is almost always ready. These visual cues work regardless of whether you’re growing in raised beds, containers, or traditional garden rows.
Remember that variety matters—some watermelons like ‘Moon and Stars’ have unique patterns that make these signs slightly different. I always research my specific variety’s characteristics at planting time. The days to maturity on your seed packet provides a good timeframe, but these visual signs are the true confirmation.
Weather conditions can affect these indicators. During cool, cloudy periods, ripening may slow down, while heat waves can accelerate the process. That’s why I start checking my watermelons about 5 days before the expected maturity date and monitor them daily.
For container-grown watermelons, these signs work the same way, though the ground spot might be less pronounced. I’ve found that potted melons sometimes ripen slightly faster due to the concentrated heat in containers. Always compare multiple fruits if possible—this gives you the best reference points.
Once you’ve spotted the visual signs of ripeness, it’s time to confirm with hands-on tests. The famous thump test is my go-to method, but there are two other reliable techniques I always use before harvesting. These methods work for all watermelon varieties, from classic ‘Crimson Sweet’ to seedless types.
Start with the weight assessment. A ripe watermelon will feel heavy for its size because it’s filled with juice. Lift a few melons to compare—if one feels noticeably denser, it’s likely ready. This works best when you’ve been monitoring the same fruit’s growth over time in your garden.
The thump test requires practice but becomes intuitive. Tap the watermelon with your knuckles—a deep, hollow sound means it’s ripe, while a metallic or dull thud indicates it needs more time. I recommend testing several melons to compare sounds. Remember, seedless varieties often have a slightly different tone.
Don’t overlook the stem check. The curly tendril where the stem meets the fruit should be completely brown and dry. If it’s still green or flexible, your watermelon needs more time on the vine. This is particularly useful for heirloom varieties that might not follow standard ripening patterns.
For the most accurate results, I combine all three methods. A watermelon that passes the weight test, produces a hollow thump, and has a dry tendril is almost always perfectly ripe. These techniques work equally well for both container-grown and in-ground watermelons.
Timing matters too—test your watermelons in the early morning when temperatures are cooler. The fruits are firmer then, making the thump test more reliable. And always handle melons gently during testing to avoid bruising the delicate rind. With practice, you’ll develop an instinct for that perfect harvest moment.
Remember that weather conditions can affect these tests. After heavy rain, watermelons may absorb extra water and feel heavier than they actually are. In drought conditions, the thump might sound different. That’s why I always recommend using multiple testing methods together for the most accurate results.
Even experienced gardeners sometimes misjudge watermelon ripeness. I’ve made my share of mistakes over the years, from harvesting too early to letting melons sit too long on the vine. The most common error I see is relying solely on size—just because your watermelon looks big doesn’t mean it’s ready.
Another frequent misstep is ignoring weather impacts. During heat waves, watermelons can appear ripe before they’ve fully developed their sugar content. Conversely, cool spells may delay ripening while the visual signs progress normally. I always adjust my harvest expectations based on recent weather patterns.
Don’t make these costly mistakes:
Pro tip: Test multiple melons daily as harvest time approaches!
Many gardeners also harvest too early in the season, especially with first fruits. I’ve learned that the first watermelons often take longer to ripen than later ones. Patience pays off—those extra days on the vine can mean the difference between mediocre and mouthwatering flavor.
The thump test timing trips up many growers. Testing melons when they’re cold (like early morning) gives false results. I always perform my thump tests in the late afternoon when fruits are warm. The sound difference is noticeable and helps prevent premature harvesting.
For container-grown watermelons, the rules change slightly. These melons often ripen faster due to concentrated heat, but their ground spots may be less pronounced. I check container melons more frequently and rely heavier on the tendril method and weight test for these plants.
Remember that seedless varieties have different ripening indicators. Their tendrils may dry differently, and the thump sound isn’t as hollow. I’ve found these types often need an extra 3-5 days beyond when they first appear ripe. Always consult your seed packet for variety-specific guidance.
Most watermelons need 30-50 days from flowering to full ripeness. Smaller varieties like ‘Sugar Baby’ often mature in 70-80 days total, while larger types can take up to 100 days. Always check your seed packet for specific timing.
Unfortunately, no. Unlike tomatoes, watermelons won’t ripen further after picking. They only develop sugar while attached to the vine. An early harvest means bland flavor and poor texture. Always wait for full ripeness signs before cutting.
The thump test is reliable for most, but seedless varieties often sound slightly different. They typically produce a higher-pitched “ping” rather than a deep hollow sound. Practice with multiple melons to learn the subtle differences for your specific variety.
Late afternoon is ideal for testing. Melons are warmest then, making the thump test more accurate. Early morning tests can be misleading since cold fruits sound different. Always handle melons gently during testing to avoid bruising the delicate rind.
Overripe watermelons develop a soft rind and may split open. The flesh becomes mushy and loses its crisp texture. If you notice the vine detaching naturally or the fruit developing an off smell, it’s past its prime.
