
Beautiful Plants For Your Interior
Beautiful Plants For Your Interior
I’ve lost more orchids to soggy potting mix than I care to admit. The turning point came when I realized drainage isn’t just about holes in the pot—it’s about how you handle the mix itself. That simple shift saved my collection and turned struggling plants into thriving ones with stronger roots and more blooms. Orchids […]
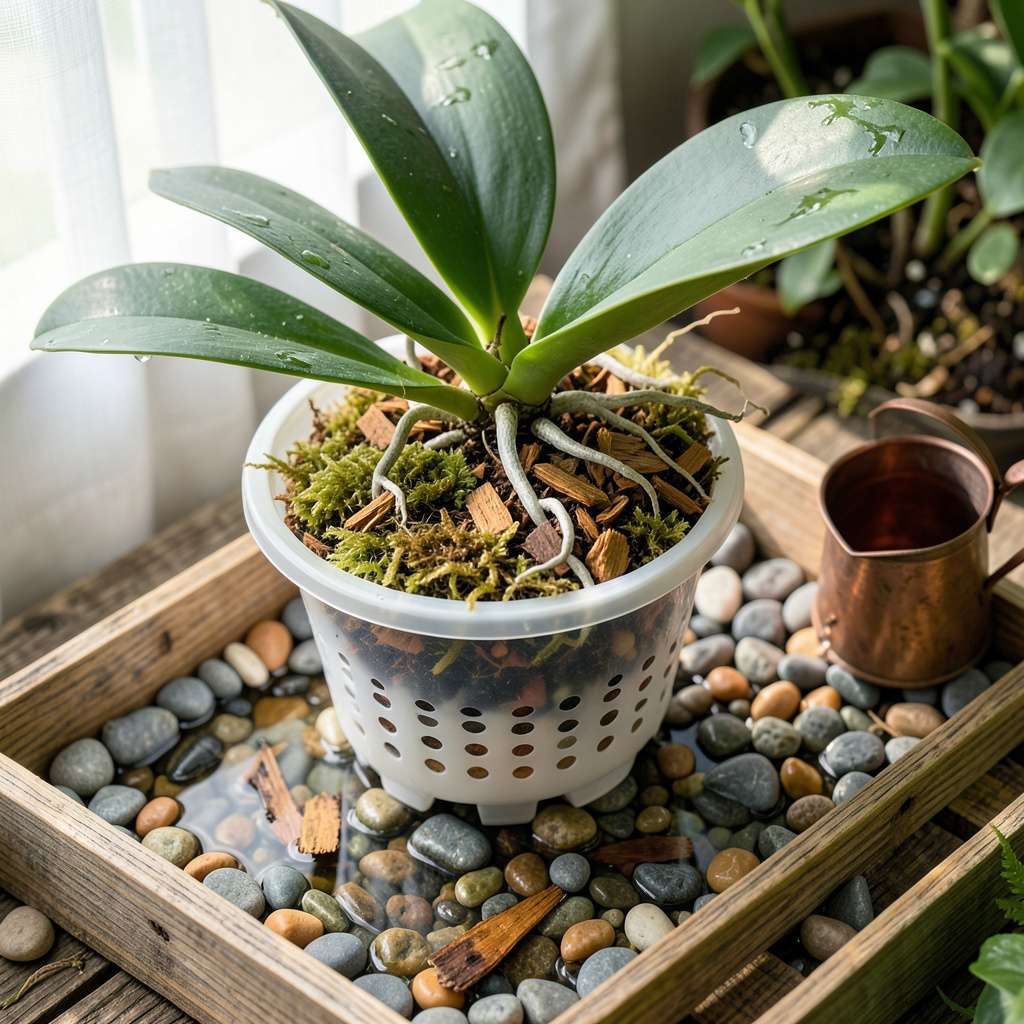
I’ve lost more orchids to soggy potting mix than I care to admit. The turning point came when I realized drainage isn’t just about holes in the pot—it’s about how you handle the mix itself. That simple shift saved my collection and turned struggling plants into thriving ones with stronger roots and more blooms.
Orchids hate wet feet, but most root rot starts long before water pools at the bottom. The real problem is compacted bark that holds moisture like a sponge. After ruining three phalaenopsis this way, I developed a foolproof method that mimics their natural growing conditions—where water flows through quickly, leaving roots perfectly hydrated but never waterlogged.
You’ll notice the difference within weeks: firmer leaves, new root growth, and that telltale silvery-green color that means your orchid’s finally happy. The technique takes less than 5 minutes per plant and works with any potting mix. No special tools required—just a different approach to something you’re already doing.
Whether you’re rescuing a drowning orchid or setting up a new one, this drainage method changes everything. It’s the one step most growers skip—until they’ve lost one too many plants to root rot. Here’s exactly how to do it right from the start.
📚 In This Guide
This simple process ensures your orchids stay healthy by preventing waterlogged roots—no special tools required.
After thoroughly watering your orchid, lift the pot carefully to feel its weight. A properly saturated pot will feel significantly heavier than when dry. This weight difference tells you the potting mix has absorbed enough moisture. Never let orchids sit in standing water for more than 10-15 minutes during soaking.
Gently tilt the pot at a 45-degree angle to allow excess water to begin draining from the bottom holes. I always do this over a sink or bucket to catch the runoff. You’ll notice water streaming out immediately if the mix was fully saturated. Don’t shake or jostle the plant—orchid roots are surprisingly fragile when wet.
Place the orchid pot on a wire rack or elevated surface where air can circulate beneath it. The goal is to let gravity pull all excess water out naturally. This typically takes 15-30 minutes, depending on your potting mix composition. Bark-based mixes drain faster than sphagnum moss blends.
Check the drainage by looking at the bottom of the pot. When water stops dripping entirely and the surface of the mix appears uniformly moist (not soggy), the drainage is complete. I often use this time to inspect the roots visible through clear pots—healthy roots should appear plump and green, not mushy or brown.
After drainage, test the moisture by inserting your finger about 1 inch deep into the potting mix. It should feel evenly damp but not wet—think of a wrung-out sponge. If you squeeze a handful of mix and water streams out, it’s still too wet. The ideal moisture level supports roots without suffocating them.
Watch for these visual cues: the mix surface should look consistently moist, not glistening with water. Orchid roots need access to both air and moisture, so proper drainage creates that crucial balance. If the pot still feels heavy after 30 minutes, give it another 10-15 minutes to drain completely before returning it to its decorative container.
Once fully drained, place your orchid back in its growing location with bright, indirect light. Avoid placing it directly on a solid surface—use a tray with pebbles or a slatted base to maintain airflow underneath. This prevents water from wicking back up into the pot through capillary action.
Monitor your orchid over the next 24-48 hours. The mix should dry slightly between waterings, with the top layer becoming just barely dry to the touch. I’ve found that most orchids thrive when their roots experience this natural wet-dry cycle rather than staying constantly damp. Proper drainage now means fewer problems with root rot later.
Mastering this drainage process makes all the difference in orchid health—here’s what we’ve learned from years of trial and error.
Timing Precision: Those 10-15 minutes of soaking in Step 1 are crucial. We’ve found that exceeding this window leads to waterlogged roots, while cutting it short prevents Vibrant Blooms“>proper hydration. Set a timer—it’s easy to lose track while tending to other plants. The weight test mentioned in Step 1 is your best indicator of when to start draining.
Drainage Surface Matters: For Step 2, don’t underestimate the importance of proper airflow beneath the pot. We always use a wire cooling rack over a baking sheet—this setup provides maximum circulation while catching all runoff. Avoid using solid surfaces like plates, which can create a microclimate of humidity that slows drainage during those critical 15-30 minutes.
Moisture Verification: The 1-inch finger test in Step 3 reveals more than you might think. We check multiple spots in the pot since moisture can distribute unevenly. Pay special attention to the center—this is often the last area to drain properly. If you’re unsure, wait the additional 10-15 minutes mentioned; it’s better to err on the dry side with orchids.
Post-Drainage Care: During the 24-48 hours of monitoring in Step 4, we’ve noticed that clear pots make this process easier. You can observe root color changes and moisture levels at the mix surface simultaneously. Keep your orchid in its drainage location for the full monitoring period—moving it too soon can disrupt the delicate moisture balance you’ve just established.
Drain your orchid’s mix every time you water—typically every 7–10 days. Let excess water flow freely from the pot’s drainage holes for 10–15 seconds to prevent soggy roots. Overwatering is the #1 killer of orchids, so consistency is key!
Avoid reusing orchid runoff—it may contain salts, fertilizers, or pathogens harmful to other plants. If you collect it, dilute with fresh water (1:1 ratio) before using on hardy outdoor plants like ferns or succulents.
No holes? No problem! Use a clear plastic pot with slits (DIY with a soldering iron) or switch to a semi-hydroponic setup with LECA balls. Alternatively, water sparingly (1–2 ice cubes weekly) and tip the pot sideways to drain excess.
Watch for these red flags: Water pools on top for >30 seconds, mix stays damp after 24 hours, or roots look mushy/brown. Fix it by repotting with chunky bark mix (50% bark, 30% perlite, 20% charcoal) for better airflow.
Yes! Tilting the pot at a 45° angle for 5–10 minutes speeds up drainage. For stubborn compacted mix, gently poke holes with a chopstick to create airflow channels—just avoid damaging roots!
Properly draining your orchid’s potting mix is the secret to healthy roots and vibrant blooms! 🌸 By following these simple steps—Choosing the Right Mix for Healthy Growth”>choosing the right mix, ensuring good airflow, and monitoring moisture—you’ll keep root rot at bay and give your orchid the best chance to thrive.
Now that you’ve mastered drainage, why not check your orchid’s watering schedule next? Small adjustments can make a big difference—happy growing! 🌱
