
Beautiful Plants For Your Interior
Beautiful Plants For Your Interior
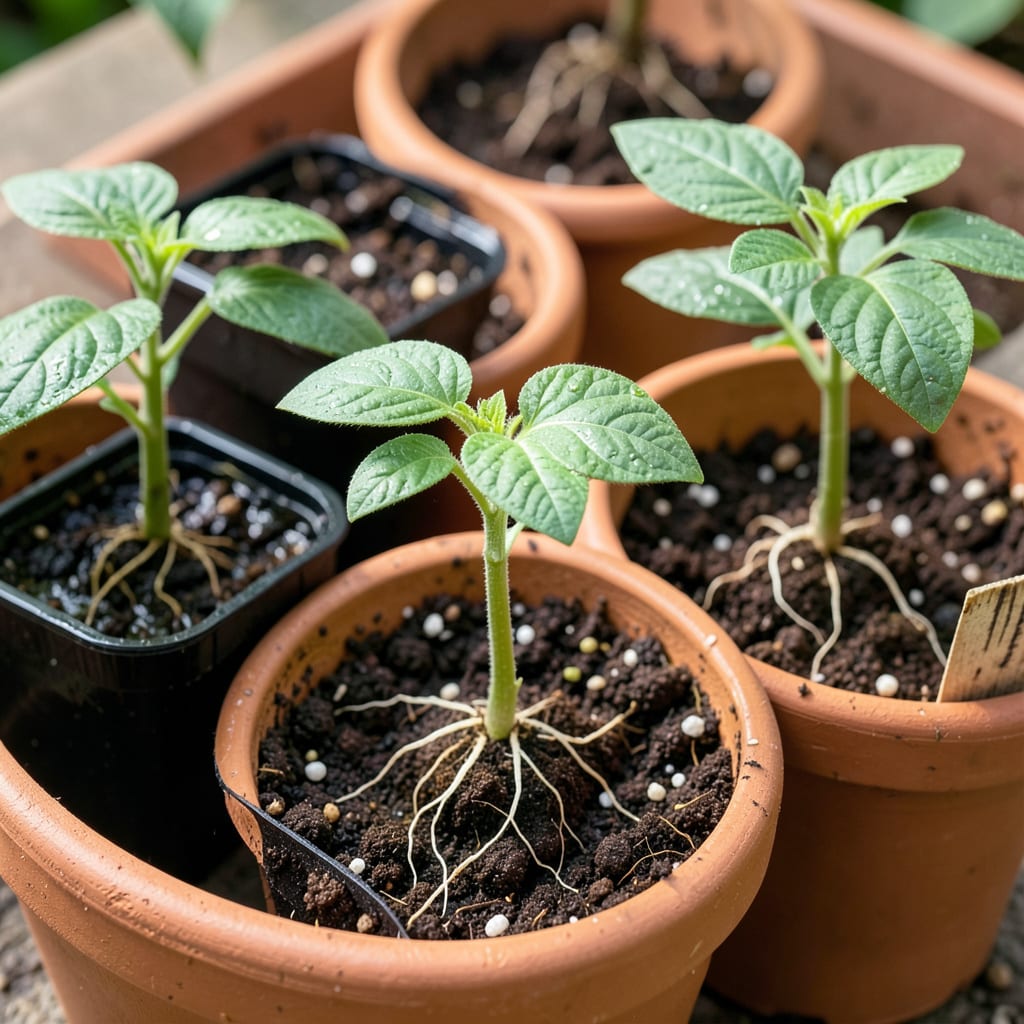
That moment when you move pepper seedlings from cozy trays to the big garden feels like sending kids off to college. Too shallow, and they flop over at the first breeze. Too deep, and you risk rot or stunted growth. After burying (and losing) my first batch of jalapeños, I learned the sweet spot: just deep enough to cover the root ball while leaving the first true leaves exposed.
Here’s the thing—peppers aren’t like tomatoes that love being buried up to their necks. They need stability without suffocation. Get this right, and you’ll see thicker stems and faster recovery from transplant shock. My plants now establish in half the time since I stopped guessing and started measuring. Grab your trowel—let’s do this properly.
📚 In This Guide
Here’s the method I’ve used for seasons to get sturdy pepper plants that thrive after transplanting.
Start with healthy seedlings that have 3-4 true leaves and are about 3-4 inches tall. This size ensures they’re strong enough to handle transplanting but not so large they’ll experience shock. Water your seedlings thoroughly 1-2 hours before transplanting—this helps the root ball hold together when you move them.
Choose containers that are at least 1-2 inches wider than the current pots. For most pepper varieties, a 1-gallon container works well for the next growth stage. Clean the new containers with a mild bleach solution (1 part bleach to 9 parts water) to prevent disease, then rinse well. Fill them with pre-moistened potting mix, leaving about 2 inches of space at the top for proper watering.
Gently squeeze the sides of the current container to loosen the root ball. Turn it upside down with your hand supporting the stem and soil, then tap the bottom if needed. The seedling should slide out intact. If roots are circling the bottom, gently tease them apart with your fingers to encourage outward growth in the new container.
Handle seedlings only by their leaves or root ball—never by the stem, which can crush easily. If a seedling resists coming out, run a butter knife around the inside edge of the pot to free it. I’ve found that working quickly but gently at this stage prevents the roots from drying out, which is critical for pepper plants that dislike root disturbance.
Here’s the key step: bury the stem deeper than it was before. Create a hole in the new container that’s deep enough so you can plant the seedling with about 1 inch of the stem below the soil line. This might seem counterintuitive, but peppers will develop additional roots along the buried stem, creating a stronger, more drought-resistant plant.
Hold the seedling by its leaves and place it in the hole. The soil should come up to just below the lowest set of leaves. Fill in around the stem with potting mix, pressing gently to eliminate air pockets. Don’t pack the soil too tightly—you want the roots to breathe. Water immediately after transplanting until you see moisture coming from the drainage holes, which helps settle the soil around the roots.
After transplanting, place the peppers in bright, indirect light for 24-48 hours to reduce stress. Avoid direct sunlight immediately after transplanting, as this can shock the plants when they’re most vulnerable. Maintain temperatures between 70-80°F during the day and no lower than 60°F at night—peppers hate cold and will stunt if chilled.
Resist the urge to fertilize immediately. Wait 7-10 days before applying any fertilizer to allow the roots to establish. During this recovery period, keep the soil consistently moist but not soggy. You’ll know the plants have recovered when you see new leaf growth, typically within 5-7 days if conditions are right.
After the initial recovery period, begin moving the plants into morning sun only for 2-3 days. Morning light is gentler and helps the plants adjust without burning. Watch for signs of stress like wilting or leaf curling—if you see these, move the plants back to indirect light for another day.
By the end of the first week, your pepper seedlings should be ready for full sun exposure (at least 6-8 hours daily). You’ll notice the stems thickening and leaves darkening as they adapt. This gradual process, called hardening off, is crucial for developing the strong cell structure that will support heavy fruit production later in the season.
Transplanting pepper seedlings is more art than science—here’s what I’ve learned from years of trial and error.
The Depth Secret: In Step 3, when you bury that 1 inch of stem below the soil line, you’re actually triggering the plant to grow additional roots along the buried portion. This creates a more robust root system that can access water and nutrients more efficiently. I’ve found that seedlings planted at this depth recover faster and ultimately produce more peppers than those planted at their original depth.
Timing Matters: The 1-2 hours of pre-watering in Step 1 isn’t just about keeping plants hydrated—it’s about preserving the delicate root structure. When soil is properly moistened, it holds together better during transplanting, reducing root damage. I always set a timer to ensure I don’t skip this crucial preparation step.
Temperature Control: Maintaining that 70-80°F daytime temperature range mentioned in Step 4 is absolutely critical. I learned this the hard way when I lost an entire batch of seedlings to a cold snap. If your growing area tends to be cooler, consider using a seedling heat mat to maintain consistent warmth during the recovery period.
Light Transition: The gradual light acclimation in Step 5 isn’t optional—it’s essential for preventing sunburn on tender leaves. When moving plants to morning sun, I recommend starting with just 1-2 hours the first day, then gradually increasing exposure. Watch for any leaf curling or lightening in color, which are signs you need to slow down the transition.
Here are the most common questions gardeners ask about transplanting pepper seedlings at the right depth:
Bury seedlings slightly deeper than their original pot—about ¼ to ½ inch deeper. This encourages stronger root growth. Avoid covering the stem’s first true leaves, as this can cause rot.
Yes! Bury leggy seedlings up to their first set of leaves (not the cotyledons). The buried stem will grow new roots, stabilizing the plant. Just avoid piling soil against the leaves.
Transplant in the late afternoon or evening to reduce shock. Cooler temps and less sun help seedlings recover overnight. Water thoroughly after planting!
Wilting is often from transplant shock (too much sun, dry roots, or improper depth). Shade them for 2–3 days, keep soil moist, and ensure they’re not buried too deep or shallow.
Wait 1–2 weeks before fertilizing! Freshly transplanted seedlings need time to establish roots. A gentle seaweed solution can help reduce stress, but avoid strong fertilizers.
