
Beautiful Plants For Your Interior
Beautiful Plants For Your Interior
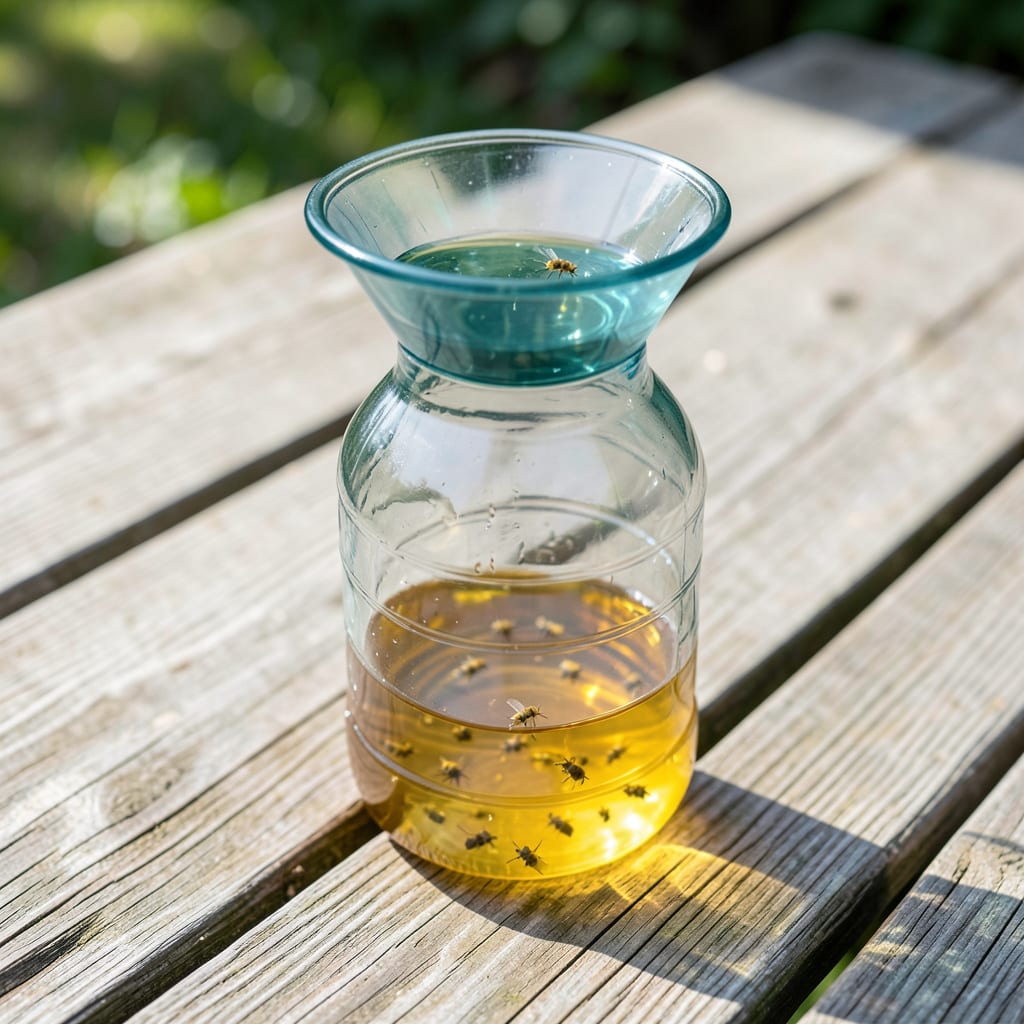
Yellow jackets ruined my summer picnics last year until I built this simple trap. Non-toxic and effective, it keeps them away from plants and people without harsh chemicals.
You’ll use basic household items to create a bait that lures them in but doesn’t let them out. Works in 24-48 hours and costs pennies compared to store-bought options.
📚 In This Guide
This method uses household items to create a safe, chemical-free solution that targets wasps without harming beneficial pollinators.
Choose a clean, sturdy 2-liter plastic bottle with a narrow neck. I prefer clear bottles because they allow you to monitor the trap’s effectiveness without opening it. Remove the label and rinse thoroughly to eliminate any residue that might deter yellow jackets.
Cut the bottle about 4-5 inches from the top, where the neck begins to widen. Keep both the top funnel and the base—you’ll use both parts. Sand any sharp edges with fine-grit sandpaper to prevent injury when handling.
Invert the top funnel and place it into the base so the neck points downward, forming a cone. Secure it with duct tape or staples to ensure yellow jackets can enter but struggle to escape. The narrow opening forces them to crawl downward, where they’ll drown in the liquid.
Punch 4-6 small holes around the upper sides of the base, just below where the funnel sits. These holes allow the scent of the bait to disperse while keeping larger insects out. Use a nail or screwdriver heated slightly for clean, precise holes.
Mix a bait solution using 1 cup of water, ½ cup of sugar, and 1 tablespoon of apple cider vinegar. The sugar attracts the wasps, while the vinegar helps mask human scents that might otherwise deter them. Stir until the sugar dissolves completely.
Pour the mixture into the base of the bottle until it reaches just below the holes. The liquid level should be deep enough to drown yellow jackets but shallow enough to allow the scent to waft upward. Avoid overfilling—this reduces the trap’s efficiency.
Hang the trap using wire or string from a tree branch, porch railing, or other elevated location at least 20 feet away from human activity. Yellow jackets are less aggressive when the trap is placed away from high-traffic areas, reducing the risk of stings.
Check the trap every 2-3 days and replace the bait when it becomes cloudy or filled with insects. You’ll see a noticeable drop in yellow jacket activity around your yard within 1-2 weeks. Empty and rinse the bottle weekly to maintain effectiveness.
Small details make the difference between a trap that works and one that doesn’t.
Container Selection: Clear 2-liter bottles aren’t just for visibility—they allow you to monitor the trap’s effectiveness without disturbing it. I’ve found that bottles with slightly wider necks create a more effective funnel, as they give yellow jackets just enough space to enter but make escape nearly impossible.
Hole Placement Precision: Those 4-6 small holes in Step 2 need to be positioned just below where the funnel sits. If you place them too high, the bait scent won’t disperse properly; too low, and yellow jackets might avoid entering. Use a heated nail for clean edges that won’t deter the wasps.
Bait Level Matters: In Step 3, filling the liquid just below the holes is critical. Too much liquid and the scent won’t carry; too little and the wasps won’t drown. The 1 cup water, ½ cup sugar, and 1 tablespoon apple cider vinegar ratio creates the perfect attraction without overwhelming the trap’s design.
Placement Strategy: The 20 feet distance mentioned in Step 4 isn’t arbitrary. Yellow jackets are territorial, and placing the trap too close to your activity areas can actually increase aggression. Elevated positions also help the scent disperse more effectively, attracting wasps from a wider area.
Use a 2-liter plastic bottle, cut the top off, invert it into the base, and secure with tape. Fill with a sweet bait like fruit juice, soda, or jam mixed with water and a drop of dish soap to break surface tension.
Place traps in late summer or early fall when yellow jackets are most active. Set them up in the morning or late afternoon for optimal effectiveness.
Great alternatives include overripe fruit, meat, or fruit juice. Yellow jackets are attracted to protein and sugar, so these work well too!
Check the bait—it may be too old or not sweet/protein-rich enough. Also, ensure the trap is placed away from human activity and in areas where you’ve seen yellow jackets.
