
Beautiful Plants For Your Interior
Beautiful Plants For Your Interior
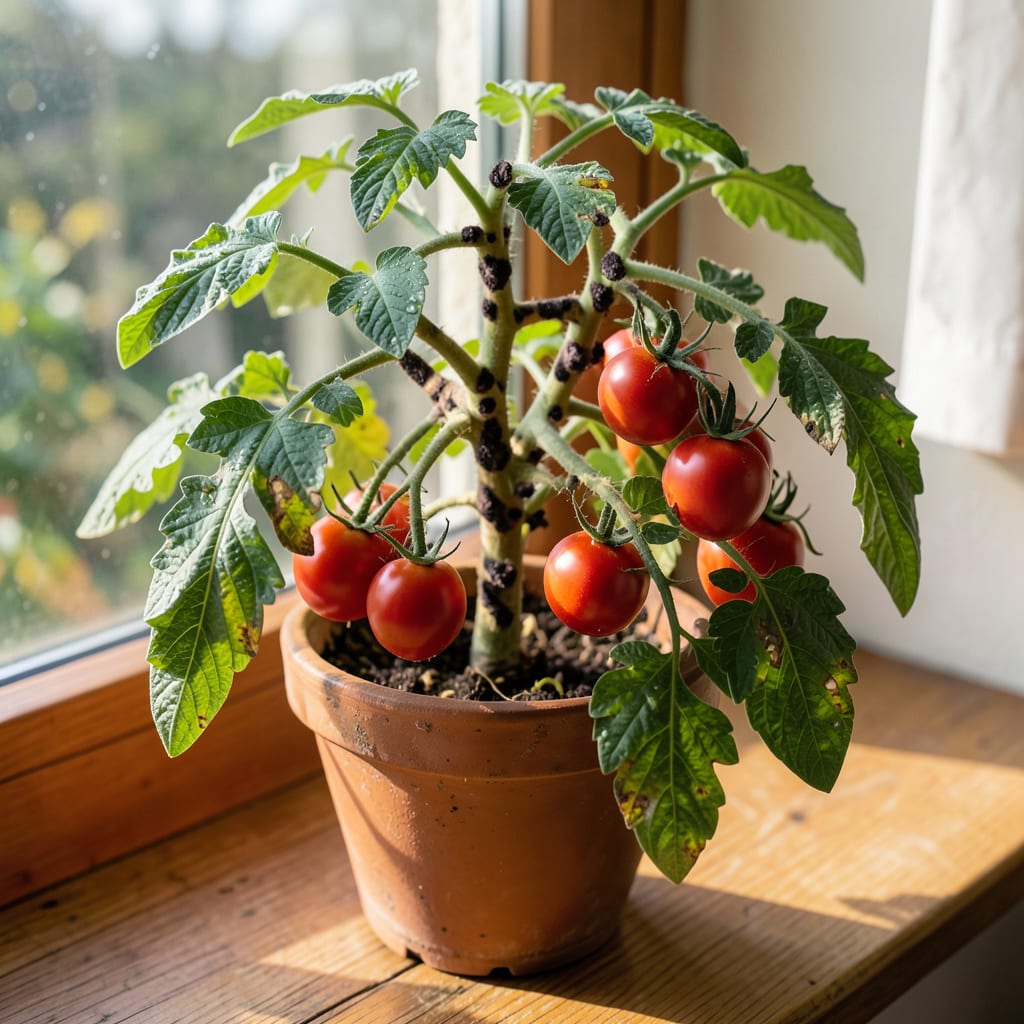
Those black spots on your tomato stems aren’t just ugly—they’re a warning. 🌱 I’ve seen early blight and bacterial canker start exactly like this, and ignoring them means losing plants within 2-3 weeks. The good news? Caught early, you can stop the spread.
Most cases clear up with copper fungicide or a baking soda spray. Remove affected leaves immediately, water at the base, and space plants for airflow. Prevention is easier than treatment, so start checking stems daily once temperatures hit 80°F.
📚 In This Guide
Here’s my go-to method for catching and correcting this issue before it spreads to your entire crop.
First, I move any tomato plants showing black spots on stems away from healthy ones. This prevents potential fungal or bacterial spread through water splash or air movement. Use clean hands or tools to avoid contaminating other plants.
Examine the stems closely for additional signs: sunken lesions, oozing spots, or black streaks. Note whether the spots appear only on stems or if they’ve spread to leaves. Early morning is the best time for this inspection when plants are still damp from dew.
Using sterilized pruning shears (I wipe mine with rubbing alcohol between cuts), remove all stem sections showing black spots. Cut at least 2-3 inches below the visible damage to ensure you’ve removed all infected tissue. Make clean cuts at a 45-degree angle.
Destroy the infected plant material—don’t compost it. This could reintroduce the pathogen to your garden. Between each cut, sterilize your tools again. I keep a small spray bottle of alcohol handy for this exact reason.
Most stem spot problems thrive in wet conditions. Switch to drip irrigation or water at the base only, keeping foliage and stems dry. If you must use overhead watering, do it in the early morning so plants dry quickly in the sun.
Improve air circulation by spacing plants 18-24 inches apart and pruning some lower leaves. I’ve found that a small fan on low setting for 30 minutes daily works wonders in greenhouses or sheltered areas. This simple change often stops the spread completely.
For fungal issues, I apply a copper-based fungicide at the first sign of trouble, following label instructions exactly. For organic gardens, a baking soda solution (1 tsp per quart of water with a drop of dish soap) can help when applied every 5-7 days.
Always treat in the late afternoon to prevent leaf burn. Cover both upper and lower stem surfaces thoroughly. Repeat applications after rain or overhead watering, as these can wash away protection.
Weak plants are more susceptible to diseases that cause black stems. Apply a balanced fertilizer (10-10-10) to support overall plant health. I’ve seen remarkable recovery when combining this with 1 inch of compost worked into the soil surface.
Avoid high-nitrogen fertilizers, as they promote lush growth that’s more vulnerable to fungal attacks. Instead, focus on building strong cell walls with calcium supplements like crushed eggshells worked into the soil at planting time.
These quick insights will help you tackle the problem efficiently and prevent future outbreaks.
The Inspection Timing: Early morning is ideal for Step 1 inspection because dew makes symptoms more visible. I’ve found that checking plants right after sunrise reveals spots that might be missed later in the day when stems dry out.
Pruning Precision: In Step 2, cutting at least 2-3 inches below the damage is non-negotiable. Confession: I once trimmed too close to the spots, and the infection returned within a week. Always sterilize tools between cuts to avoid spreading pathogens.
Airflow Hack: For Step 3, that 30 minutes daily with a fan might seem like overkill, but it’s a game-changer in humid climates. I learned this the hard way after losing half my crop to a fungal outbreak in a still, damp greenhouse. Position the fan to circulate air gently without blowing directly on plants.
Treatment Timing: Applying treatments in Step 4 during late afternoon prevents leaf burn from the sun’s intensity. If you’re using the baking soda solution, consistency is key—stick to the 5-7 days schedule, especially after rain, to maintain protection.
Black spots often result from fungal diseases like early blight or bacterial infections such as bacterial canker. Poor air circulation, overwatering, or contaminated soil can also contribute.
Remove infected parts immediately and apply a copper-based fungicide or neem oil. Improve airflow around plants and avoid overhead watering to prevent further spread.
Yes, if the fruit itself is unblemished and healthy. However, avoid eating tomatoes with visible signs of disease, and always wash them thoroughly before consumption.
Use disease-resistant varieties, rotate crops yearly, and keep the garden clean. Water at the base of the plant, and consider mulching to reduce soil splash.
Inspect plants weekly, especially during humid or rainy weather. Early detection is key—treat spots as soon as they appear to prevent spreading.
