
Beautiful Plants For Your Interior
Beautiful Plants For Your Interior
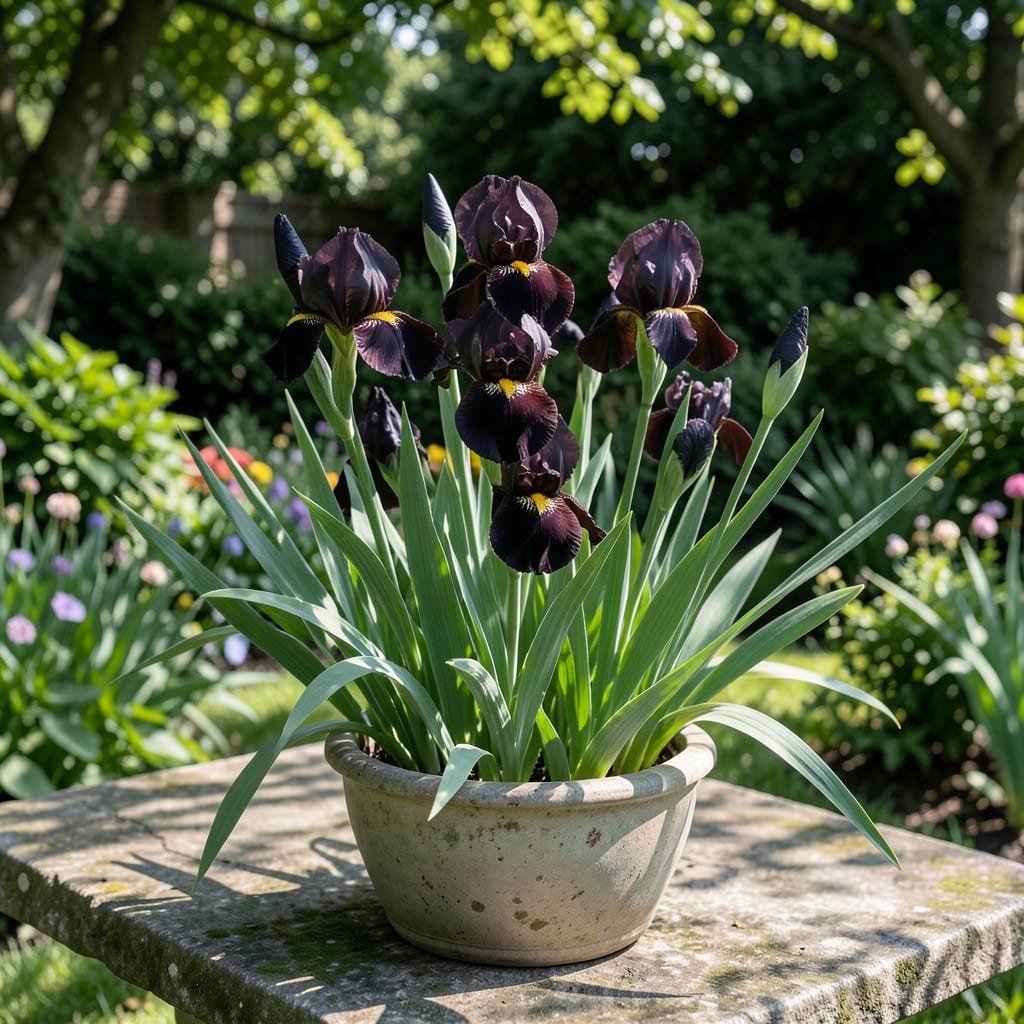
Black Joker Siberian iris stops people in their tracks. Those deep purple-black blooms hovering over sword-like foliage create dramatic contrast that looks like a professional landscape designer moved in overnight.
I planted mine along the edge of my small pond and now get 6 weeks of striking color every spring. This tough plant thrives in consistently moist soil and handles partial shade better than most iris varieties.
📚 In This Guide
This elegant iris thrives in moist soil and rewards you with deep purple blooms season after season.
Choose a spot with full sun to partial shade—at least 6 hours of direct sunlight daily produces the most vibrant flowers. These irises prefer consistently moist soil, making them perfect for bog gardens, pond edges, or any area that retains water without becoming stagnant.
Test your soil by digging a 1-foot deep hole and filling it with water. If it drains within 2-3 hours, the location may be too dry. Ideal spots hold moisture for 4-6 hours while still allowing excess water to eventually drain away.
Avoid low areas that collect standing water after rain, as this can rot the rhizomes. The soil should be rich in organic matter—amend clay or sandy soil with compost before planting to improve both drainage and moisture retention.
Work the soil to a depth of 12-15 inches, removing any weeds, rocks, or debris. Siberian irises perform best in slightly acidic to neutral soil with a pH between 6.0 and 7.0. A soil test kit provides precise readings—adjust with lime to raise pH or sulfur to lower it if needed.
Incorporate a 2-3 inch layer of well-aged compost or leaf mold into the planting area. This improves soil structure while providing essential nutrients. I also mix in a handful of bone meal per plant to encourage strong root development, as these irises establish slowly in their first year.
Dig planting holes 4 inches deep and space them 18-24 inches apart to allow for mature growth. Place the rhizome horizontally in the hole with the top just barely covered by soil—planting too deep prevents proper blooming.
Each rhizome should have its fan of leaves pointing outward from the center of the group. This arrangement creates a natural, circular display as the clump expands. Firm the soil gently around each plant, ensuring no air pockets remain around the roots.
Water thoroughly after planting to settle the soil and eliminate air gaps. The soil should be moist but not waterlogged. You’ll know it’s right when the surface looks damp but doesn’t form puddles when pressed.
Maintain consistently moist soil during the first growing season, watering 2-3 times weekly in the absence of rain. Use a soaker hose or drip irrigation to keep foliage dry and prevent disease. The goal is soil that feels damp 1-2 inches down at all times.
Once established, Black Joker Siberian iris tolerates brief dry periods but performs best with regular moisture. Mulch with a 2-inch layer of organic material like shredded bark to retain soil moisture and suppress weeds. Keep mulch 1 inch away from the base of the plant to prevent rot.
Reduce watering in late summer after blooming has finished. This allows the plant to prepare for dormancy. You’ll notice the leaves beginning to yellow and die back naturally as the season progresses.
Fertilize lightly in early spring with a balanced 10-10-10 or 5-10-10 fertilizer, applying 1 tablespoon per plant and working it into the soil surface. Avoid high-nitrogen fertilizers, which promote leaf growth at the expense of flowers.
Remove spent flower stalks after blooming to maintain tidiness and prevent seed formation, which can reduce next year’s blooms. However, leave the foliage intact until it naturally dies back in fall—the leaves continue photosynthesizing to nourish the rhizome for next year.
Divide clumps every 3-4 years in early spring or fall when you notice reduced blooming. Dig up the entire clump, separate the rhizomes with a sharp knife, and replant the healthiest sections with at least 3 fans of leaves each.
These insights will help you create the perfect growing conditions for vibrant blooms.
Sunlight and Soil Testing: For the best results, ensure your planting location gets at least 6 hours of direct sunlight daily. When testing soil moisture retention in Step 1, remember that ideal spots hold water for 4-6 hours—sites draining in 2-3 hours are too dry for these moisture-loving plants.
Planting Depth Matters: In Step 3, dig holes exactly 4 inches deep and space them 18-24 inches apart. Planting rhizomes too deeply is a common mistake that prevents blooming—keep the top just barely covered with soil.
Watering Wisdom: During the first growing season, maintain that 1-2 inches of moisture depth mentioned in Step 4 by watering 2-3 times weekly without rain. Use your finger to test soil moisture at that depth rather than relying on surface appearance alone.
Maintenance Timing: For Step 5, mark your calendar to divide clumps every 3-4 years—this prevents overcrowding and ensures consistent blooming. Always divide in early spring or fall when the plant is dormant.
Plant in early spring or fall for best results. This allows roots to establish before extreme heat or frost. Avoid summer planting, as stress can hinder growth.
This iris thrives in full sun to partial shade (6+ hours of sunlight daily). Too much shade may reduce blooming, while full sun ensures vibrant purple flowers.
Try ‘Caesar’s Brother’ or ‘Ruffled Velvet’ Siberian irises for similar deep purple blooms. Both are hardy, low-maintenance, and perfect for water gardens.
Lack of sunlight, poor soil drainage, or overcrowding may be the issue. Divide clumps every 3-4 years and ensure rich, moist soil for optimal blooms.
