
Beautiful Plants For Your Interior
Beautiful Plants For Your Interior
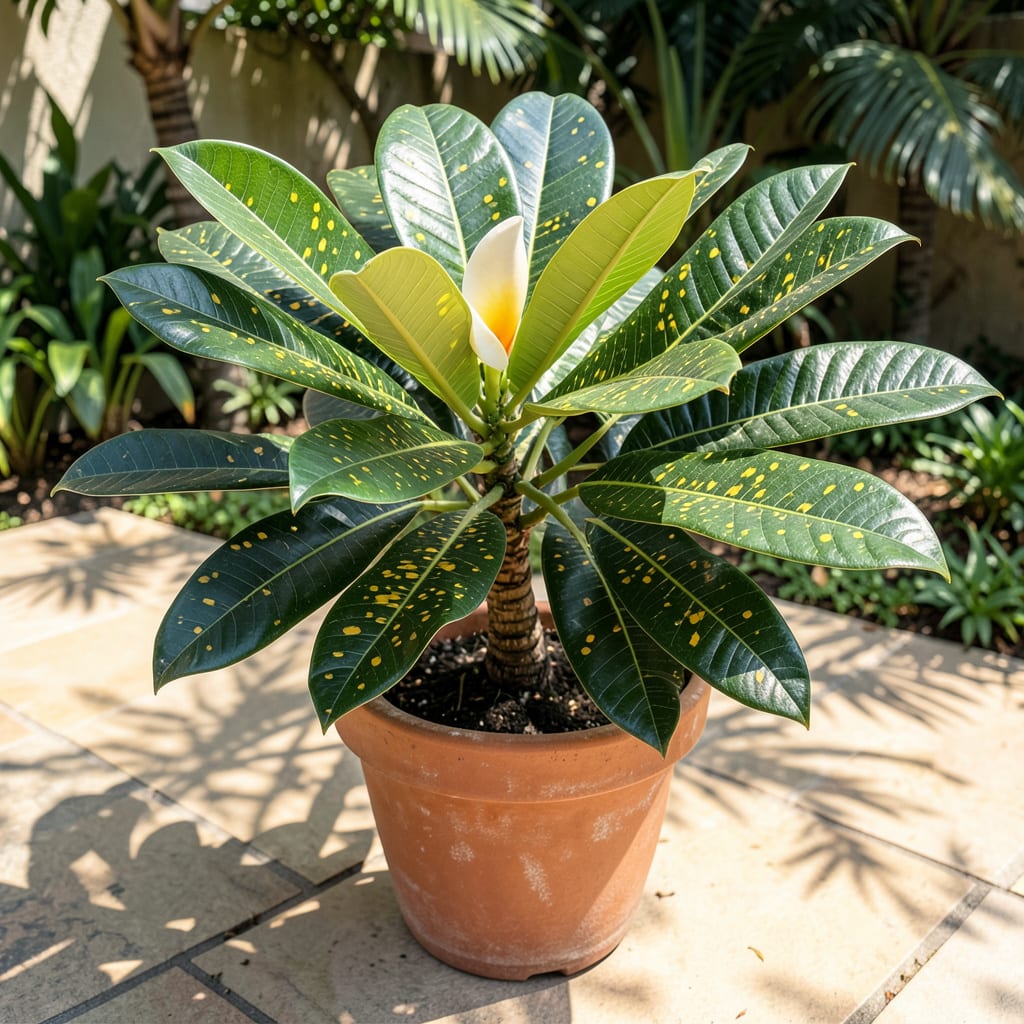
Those yellow spots on your plumeria aren’t just unsightly—they’re a cry for help. I’ve seen this pattern before, and the good news is it’s usually fixable with the right approach.
Most cases trace back to 3 common culprits: fungal infections, nutrient deficiencies, or pest damage. Each leaves a slightly different mark, so the first step is playing detective with your leaves.
Once identified, targeted solutions work fast. I’ve rescued plants with simple adjustments to watering, feeding, or a well-timed fungicide application. The key is acting before the spots spread.
Your plumeria can bounce back stronger than ever. The fix might be simpler than you think.
Yellow spots on plumeria leaves often signal underlying issues that disrupt the plant’s health. Below are the most common causes, explained with actionable insights to help you diagnose and address the problem.
Fungi like Alternaria or Cercospora thrive in humid, poorly ventilated conditions, causing circular or irregular yellow spots. These pathogens spread through water splashes or contaminated tools. Preventive measures: Improve airflow, avoid overhead watering, and apply copper-based fungicides at the first sign of infection.
Sap-sucking pests such as spider mites, aphids, or scale insects weaken leaves, leading to yellow discoloration. Their feeding disrupts chlorophyll production, creating stippled or mottled spots. Solution: Inspect leaf undersides regularly and treat with neem oil or insecticidal soap to eliminate infestations early.
Lack of essential nutrients—particularly magnesium, iron, or nitrogen—can manifest as yellow spots or interveinal chlorosis (yellowing between veins). Plumerias in sandy or alkaline soils are prone to these deficiencies. Action: Conduct a soil test and amend with chelated iron or Epsom salts (for magnesium) to restore balance.
Excessive sunlight, sudden temperature drops, or waterlogged roots can stress plumerias, triggering yellow spots. Sunburn appears as bleached patches, while overwatering causes root rot, starving leaves of nutrients. Fix: Provide afternoon shade in scorching climates and ensure well-draining soil to prevent water stress.
Bacteria like Xanthomonas create water-soaked yellow spots that may turn brown or black. These spread via rain, contaminated pruners, or splashing water. Control: Remove infected leaves immediately, disinfect tools, and apply copper bactericides to halt progression.
Addressing yellow spots on plumeria leaves starts with identifying the root cause. Below are targeted solutions for common issues, along with prevention tips to keep your plumeria thriving.
If the spots are accompanied by a slimy texture or dark rings, a fungal or bacterial infection may be the culprit. Remove affected leaves immediately to prevent spread. Apply a copper-based fungicide or neem oil spray every 7–10 days until the issue resolves. Prevention tip: 💡 Avoid overhead watering and ensure good air circulation around the plant. Space container plumerias at least 2 feet apart.
Yellow spots with green veins often signal a magnesium or iron deficiency. Use a balanced, water-soluble fertilizer (e.g., 10-30-10) every 2–4 weeks during the growing season. For iron, apply chelated iron foliar spray. Prevention tip: ✨ Test your soil annually and amend with compost or organic matter to improve nutrient availability.
Soggy soil leads to root rot, which manifests as yellowing leaves with brown spots. Stop watering immediately and let the soil dry out. Repot the plant in well-draining soil (mix 50% cactus/succulent soil with 50% perlite). Prevention tip: 🎯 Water only when the top 1–2 inches of soil are dry. Use pots with drainage holes.
Check the undersides of leaves for spider mites, aphids, or scale. Blast pests off with water or wipe leaves with insecticidal soap. For severe cases, use horticultural oil. Prevention tip: ⏰ Inspect leaves weekly and introduce beneficial insects like ladybugs to deter pests naturally.
With consistent care and quick action, your plumeria can recover its vibrant, healthy foliage!
Fungal spots often have defined edges or rings, while pest damage appears as tiny dots or stippling. Check leaf undersides for pests like spider mites or aphids.
Yes, remove heavily spotted leaves immediately and dispose of them. This prevents fungi or bacteria from spreading to healthy foliage.
Root rot from soggy soil starves leaves of nutrients, creating yellow patches. Let soil dry between waterings.
Neem oil works well for fungal issues and pests like mites or aphids. For bacterial infections, use a copper-based treatment instead.
