
Beautiful Plants For Your Interior
Beautiful Plants For Your Interior
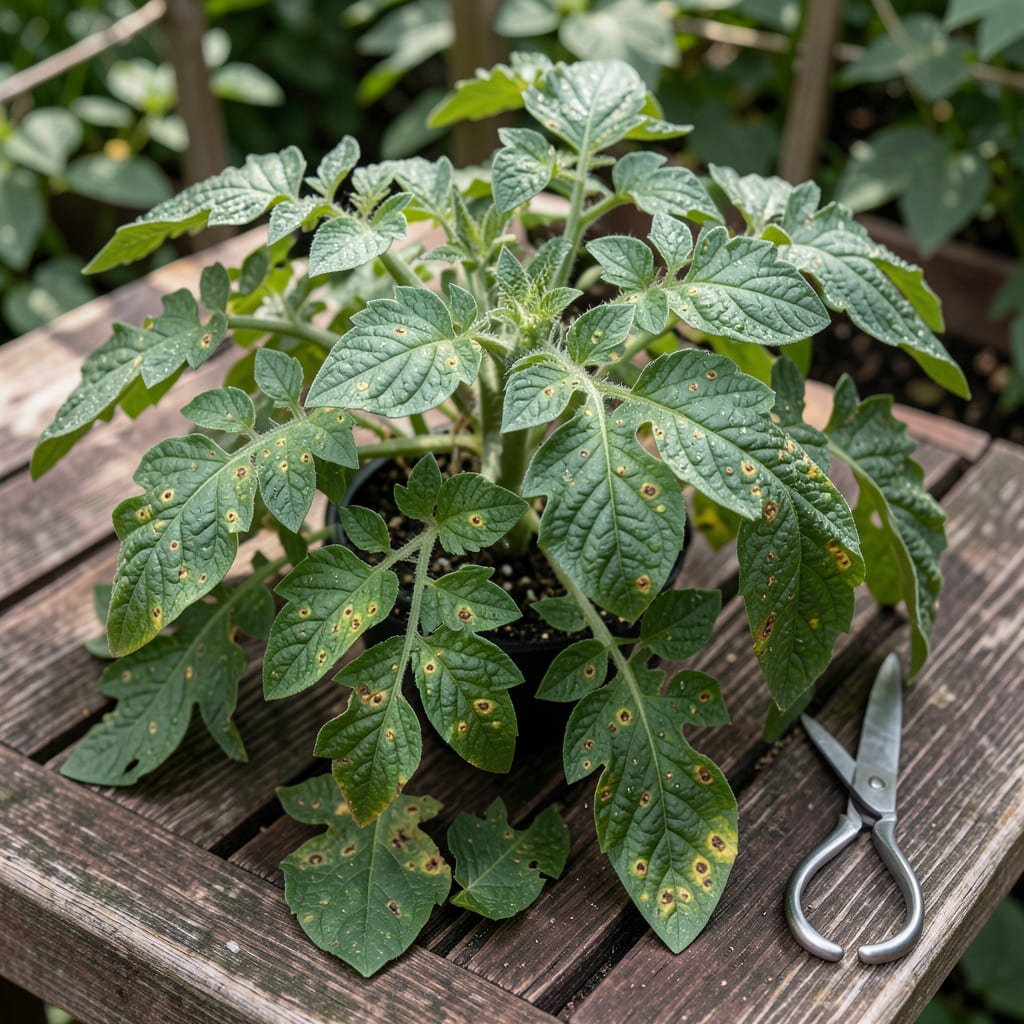
Those tiny brown spots on your tomato leaves aren’t just ugly—they’re a warning. I’ve seen this pattern before, and it usually means fungal trouble is brewing in your garden.
Catching it early makes all the difference. With the right approach, you can stop the spread and save your plants before the whole crop is at risk.
📚 In This Guide
Here’s what I do the moment I notice those first worrying spots—it stops the problem before it spreads.
Start by examining both sides of the leaves, particularly the lower ones where fungal spores often first appear. Use a hand lens if available to check for tiny brown spots with yellow halos—this pattern is classic for early blight or septoria leaf spot.
Look for spots that are 1/8 to 1/4 inch in diameter and slightly sunken. Check stems and fruit as well, though leaves usually show symptoms first. I always wear gloves during inspection to avoid spreading potential pathogens to other plants.
Note the location: spots concentrated on lower leaves suggest soil-borne fungi, while random distribution points to airborne spores. This observation helps determine your next steps.
Using clean, sharp scissors, cut off any leaves showing spots, making the cut at the base of the leaf stem. Do not compost these leaves—fungal spores will survive and reinfect your garden. Seal them in a plastic bag and dispose with household trash.
I remove up to one-third of the plant’s foliage if needed, focusing on the lowest, oldest leaves first. Never remove more than this at once, as it stresses the plant. Sterilize your scissors between cuts with rubbing alcohol to prevent spreading the disease.
After pruning, avoid overhead watering for 48 hours to let the wounds callous over. This reduces the chance of new spores entering through fresh cuts.
Fungal diseases thrive in wet, stagnant conditions. Thin out dense foliage by removing a few inner leaves to allow better airflow. I aim for at least 12-18 inches of space between tomato plants to ensure good circulation.
Water at the base of the plant using a soaker hose or drip irrigation, keeping leaves dry. If you must use a sprinkler, water early in the morning so foliage dries quickly in the sun. Never water in the evening, as damp leaves overnight create perfect conditions for fungal growth.
Consider staking or caging your plants to lift foliage off the ground. Tomatoes touching soil are more susceptible to soil-borne fungi. I’ve found that pruning suckers (the shoots that grow in the crotch between the stem and a branch) also improves airflow significantly.
Mix 1 tablespoon of baking soda and 1 teaspoon of mild liquid soap in 1 gallon of water for a simple, effective spray. Apply this to both sides of the leaves, focusing on the remaining healthy foliage and stems.
I spray in the early morning or late afternoon to avoid leaf burn from the sun. Reapply every 7-10 days or after rain, as the solution washes off easily. For more severe cases, I use a copper-based fungicide, following the package instructions carefully.
Always test your spray on a small area first to check for plant sensitivity. Some tomato varieties may react poorly to certain treatments, so it’s better to be cautious.
Switch to a regular drip irrigation system if you haven’t already. This keeps water off the leaves entirely, which is the most effective way to prevent fungal issues. I’ve reduced my fungal problems by 80% since making this change.
Rotate your tomato plants to a different spot in the garden each year. Fungal spores can survive in the soil for years, so never plant tomatoes or related crops (peppers, potatoes, eggplants) in the same location more than once every 3-4 years.
Finally, choose resistant varieties for next season. Look for tomatoes labeled with codes like VFN (resistant to Verticillium, Fusarium, and Nematodes) or EB (Early Blight resistant). While no variety is completely immune, resistant plants give you a significant head start.
The details that separate a quick fix from a recurring problem.
The Inspection Trick: In Step 1, don’t just look at the top of leaves—flip them over. Fungal spores often start on the undersides where moisture lingers longer. I use a small flashlight to better spot those 1/8 to 1/4 inch diameter spots with yellow halos, especially on lower leaves where early blight typically begins.
Pruning Precaution: When removing affected foliage in Step 2, work from the bottom up and always sterilize your scissors between cuts. I learned the hard way that skipping this step can spread the fungus to healthy leaves. And remember, never remove more than one-third of the plant’s foliage at once, as it shocks the plant and weakens its defenses.
Timing Matters: After pruning, that 48-hour window without overhead watering is crucial. It gives the wounds time to callous over, preventing new spores from entering through fresh cuts. I set a reminder to avoid accidental watering during this period.
Prevention Mindset: In Step 5, the 3-4 year rotation rule for tomatoes and related crops isn’t just advice—it’s essential. Fungal spores can linger in the soil for years, so planting tomatoes in the same spot too soon almost guarantees reinfection. I keep a garden map to track my rotations.
Not always! While fungi like early blight often cause them, other culprits include bacterial speck, pest damage, or even environmental stress like water splashing on leaves. Check for additional symptoms (e.g., yellow halos) to pinpoint the cause.
Start by removing affected leaves and improving air circulation. Apply a copper-based fungicide or neem oil for fungal issues. Bacterial problems may require copper sprays. Always water at the base to keep foliage dry!
Act at the first sign! Early intervention prevents spread. If spots appear in early summer, treat immediately—fungal diseases thrive in warm, wet conditions. Don’t wait for leaves to yellow or drop.
Yes, if the fruit itself looks healthy! Fungal/bacterial leaf issues usually don’t affect the tomatoes. However, wash them thoroughly and avoid eating any fruit with visible spots or rot.
Rotate crops, use mulch to reduce soil splashing, and space plants for airflow. Choose disease-resistant tomato varieties, and avoid overhead watering. Clean up garden debris in fall to remove hiding spores.
