
Beautiful Plants For Your Interior
Beautiful Plants For Your Interior
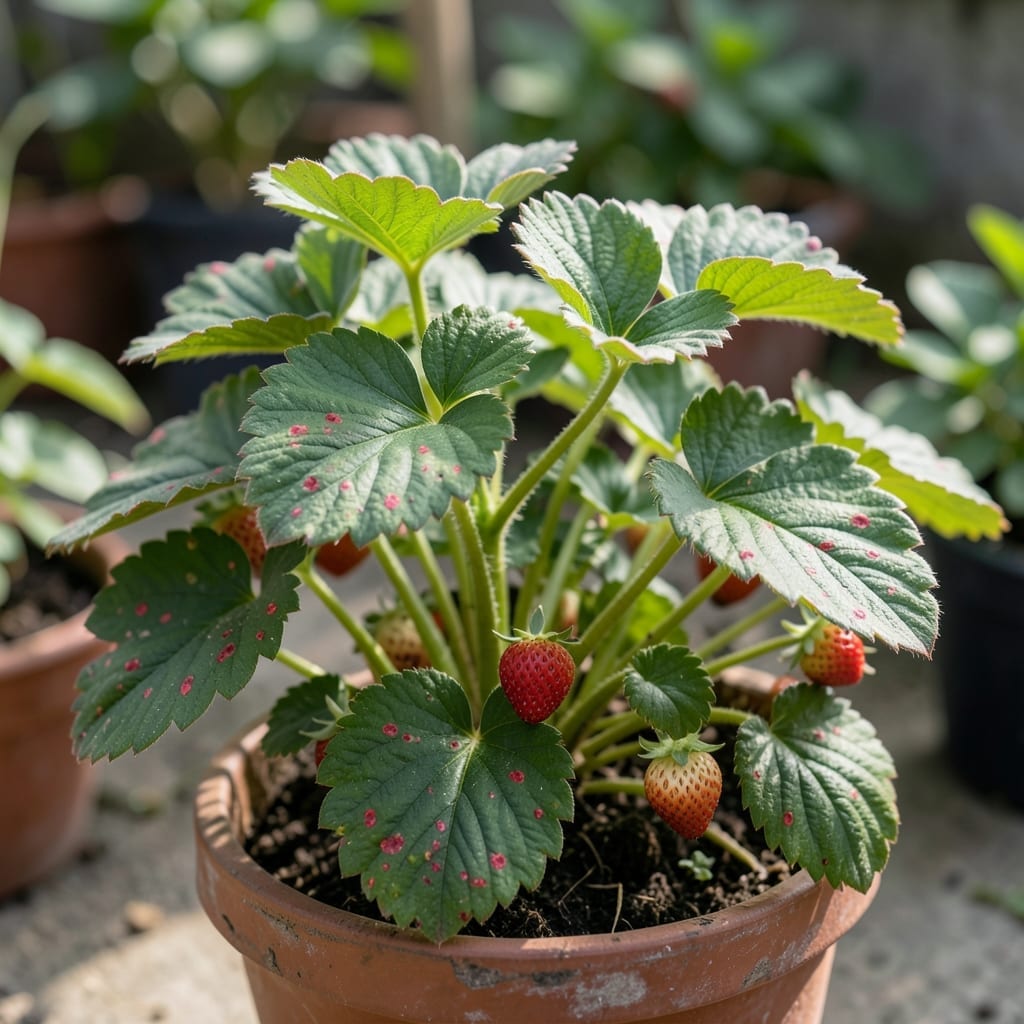
Red spots on your strawberry leaves can send any gardener into a panic. I’ve been there, staring at those unsightly marks, wondering if my plants were doomed.
Here’s the thing—it’s usually fungal, and the fix is simpler than you think. With a few tweaks, your plants can bounce back and keep producing sweet, juicy berries all season long.
Short list. Big impact. Most of these are garden staples anyway.
| Ingredient | Amount | Notes |
|---|---|---|
| Neem Oil 🌿 | 1 piece | Cold-pressed organic |
| Spray Bottle 💦 | 1 piece | Adjustable nozzle preferred |
| Copper Fungicide 🪴 | 1 piece | Liquid concentrate form |
| Pruning Shears ✂️ | 1 piece | Disinfect between cuts |
| Watering Can 💧 | 1 piece | For targeted watering |
| Mulch 🪵 | 2 bags | Straw or pine needles |
| Compost 🌾 | 1 bag | Well-aged organic |
| Garden Gloves 🧤 | 1 piece | Nitrile for chemical handling |
| pH Test Kit 🌡️ | 1 piece | For soil acidity check |
[recipe_ingredient_scaler]
Neem oil is your first line of defense—cold-pressed organic works best. Grab it at Home Depot or any garden center (the good stuff, not the diluted versions). Copper fungicide is pricier but hits stubborn infections hard. I keep both on hand for persistent issues.
No neem oil? Baking soda spray (1 tbsp per gallon of water) works in a pinch (trust me on this). Pruning shears can be any sharp pair, but disinfecting between cuts prevents spreading spores. Mulch can be straw or pine needles (or whatever you’ve got).
Store neem oil and copper fungicide in a cool, dry shed. Both last 2-3 years unopened. Gloves and pruners stay ready for next season. I label my spray bottles so I’m not guessing what’s inside six months later.
Here’s the method I use to tackle leaf spots and restore plant health quickly.
Put on the garden gloves and use the pruning shears to carefully remove all leaves showing red or brown spots. Disinfect the shears with rubbing alcohol between each cut to prevent spreading pathogens. I cut at the base of the leaf stem, not through the middle, to remove the entire infected surface.
Place the removed foliage in a sealed bag and dispose of it—never compost diseased plant material. If the infection is widespread, isolate the affected strawberry plants from healthy ones to contain the spread. This immediate action prevents the fungus from overwintering in garden debris.
Mix the copper fungicide according to package instructions in the spray bottle. Early morning is the best time to apply, as this allows the solution to dry before the heat of the day. I wear my garden gloves for this step since copper can be a skin irritant.
Spray all surfaces of the remaining leaves, including the undersides where fungi often hide. Apply until the leaves are thoroughly wet but not dripping. Reapply every 7-10 days or after rain, as the protective barrier breaks down under moisture.
Three days after the copper fungicide application, mix 1 tablespoon of neem oil with 1 gallon of water and a few drops of mild soap in the spray bottle. Neem oil disrupts the fungal life cycle without harming beneficial insects when used properly.
Spray the entire strawberry plant, focusing on new growth where fungi are most likely to take hold. I apply this in the evening to avoid leaf burn from the sun. Repeat this treatment every 7-14 days throughout the growing season as a preventive measure.
Use the pH test kit to check your soil acidity—strawberries thrive in slightly acidic soil with a pH of 5.5-6.5. If your soil is too alkaline, work the bag of compost into the top 2-3 inches of soil around the plants to improve both pH and organic content.
Spread the 2 bags of mulch around the base of the plants, keeping it 1 inch away from the stems to prevent rot. I prefer straw mulch as it allows air circulation while retaining moisture. This creates an unfavorable environment for fungal spores that cause leaf spots.
Use the watering can to deliver water directly to the soil at the base of the plants, keeping the leaves dry. Morning watering gives foliage time to dry during the day, which is crucial since wet leaves for 6+ hours invite fungal growth.
I water deeply but less frequently—about 1-1.5 inches per week—rather than shallow daily watering. This encourages deep root growth and reduces surface moisture that fungi need to thrive. Always check that the top inch of soil feels dry before watering again.
Start by inspecting your strawberry plants for early signs of red spots on leaves. 7 days prior to treatment, remove any visibly infected leaves or debris around the base to prevent fungal spread. Pro tip 💡: Sterilize your pruning tools with rubbing alcohol between cuts to avoid cross-contamination. Gather organic fungicides like neem oil or copper sprays, which can take time to source.
Prepare your treatment mix the day before application. For a natural remedy, combine 1 tablespoon of baking soda, 1 teaspoon of dish soap, and 1 gallon of water. Let it sit overnight to ensure the ingredients fully integrate. If using commercial fungicides, read the label for any pre-mixing instructions. Also, check the weather forecast—avoid applying treatments if rain is expected within 24 hours.
Apply your treatment early in the morning when leaves are dry and temperatures are cooler. This reduces the risk of leaf burn and allows the solution to adhere better. Use a spray bottle for even coverage, focusing on the undersides of leaves where fungal spores often hide. Pro tip 🎯: Wear gloves and a mask if handling chemical fungicides for safety.
After treatment, monitor plants for 2-3 hours to ensure no adverse reactions like wilting or discoloration. Remove any new fallen leaves or debris to keep the area clean. Water plants at the base—not the leaves—to avoid washing off the treatment. Repeat the process every 7-10 days until red spots disappear.