
Beautiful Plants For Your Interior
Beautiful Plants For Your Interior
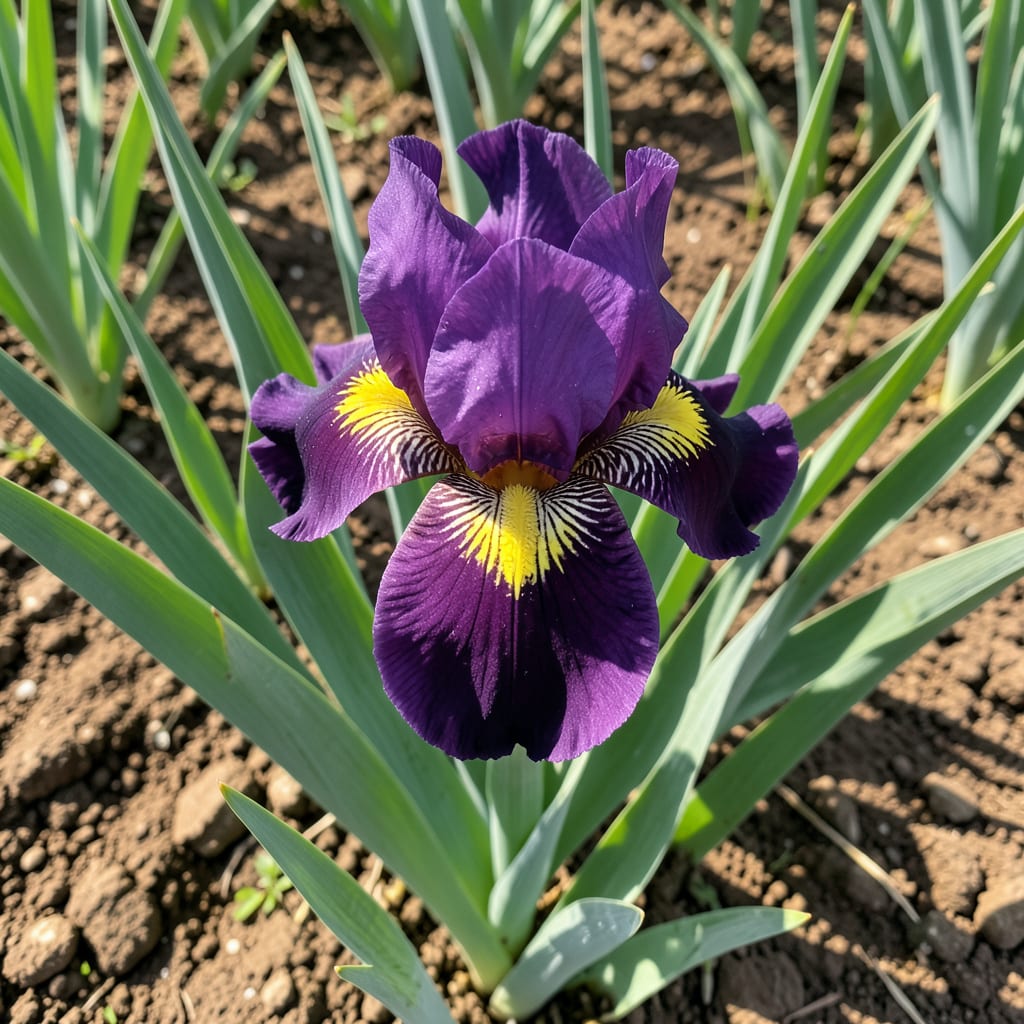
Those purple and yellow blooms hit different every spring. I planted my first bicolor iris five years ago, and they’ve become the showstoppers of my late-season garden without demanding much from me.
They thrive in well-draining soil with full sun, and once established, they’ll reward you with reliable color year after year. The contrast between deep purple falls and bright yellow standards never fails to draw attention.
📚 In This Guide
This method ensures vibrant bicolor blooms that return year after year with minimal effort.
Select a site with full sun to partial shade, as irises thrive with at least 6 hours of direct sunlight daily. The soil should be well-draining—clay or waterlogged areas will rot the rhizomes. I always test drainage by digging a 12-inch hole, filling it with water, and checking if it drains within 2-3 hours.
If your soil is heavy, amend it with compost or sand to improve structure. Avoid low-lying spots where water pools after rain. The ideal pH is 6.8-7.0, slightly alkaline, which enhances the purple and yellow pigmentation in the blooms.
Soak the rhizomes in lukewarm water for 1-2 hours before planting to rehydrate them after storage. Trim any damaged or overly long roots to 6 inches to encourage new growth. I leave the leaf fans intact—cutting them back too aggressively reduces the plant’s ability to photosynthesize and establish itself.
Inspect the rhizomes for soft spots or rot, and discard any that feel mushy. Healthy rhizomes should be firm, with visible growth nodes where new roots and leaves will emerge. This step prevents disease and ensures strong, disease-free plants.
Dig shallow holes 2-3 inches deep and space them 12-24 inches apart, depending on the mature size of your iris variety. Place each rhizome horizontally in the hole, with the top slightly exposed to sunlight—this prevents rot and encourages flowering. I angle the rhizome so the leaf fan faces the direction I want the plant to grow.
Backfill the hole with soil, pressing lightly to remove air pockets, but avoid burying the rhizome completely. Water immediately after planting to settle the soil, but do not overwater—irises prefer slightly dry conditions over soggy roots. You’ll see new growth within 2-3 weeks if conditions are ideal.
Apply a 2-inch layer of low-nitrogen mulch, such as straw or pine bark, around the plants to retain moisture and suppress weeds. Keep mulch 6 inches away from the rhizome to avoid trapping moisture against it. I avoid high-nitrogen mulches like fresh grass clippings, as they can promote leafy growth at the expense of blooms.
Water deeply but infrequently, allowing the top 1-2 inches of soil to dry between waterings. Fertilize lightly in early spring with a 6-10-10 or 8-10-10 balanced fertilizer, but avoid heavy feeding—excess nitrogen produces lush foliage with fewer flowers. By late summer, reduce watering to encourage dormancy and prepare the plants for winter.
When clumps become crowded and blooms diminish, it’s time to divide. Use a sharp knife to split the rhizomes, ensuring each division has at least one healthy fan of leaves and a portion of the root system. I do this in late summer or early fall, 6-8 weeks before the first frost, so the plants have time to establish before winter.
Replant the divisions immediately, following the same depth and spacing guidelines as the initial planting. Discard any old or diseased rhizomes to prevent issues in the new growth. You’ll notice a resurgence in bloom quality the following spring, with more vibrant purple and yellow markings on the petals.
Small adjustments in planting and care make a dramatic difference in bloom vibrancy and plant health.
Sunlight Strategy: The 6 hours of direct sunlight daily requirement is non-negotiable for those striking bicolor blooms. I’ve learned that morning sun with afternoon shade works best in hotter climates, while full sun produces the most vivid purple and yellow pigmentation in cooler areas. Partial shade can work, but expect fewer blooms and potentially muted colors.
Drainage Test: That 12-inch hole drainage test in Step 1 is your best insurance against rot. If water doesn’t drain within 2-3 hours, amend the soil with compost or create raised beds. I once skipped this step and lost an entire planting to rhizome rot—lesson learned the hard way.
Rhizome Preparation: Soaking rhizomes for the full 1-2 hours in Step 2 rehydrates them after storage and kickstarts root growth. Don’t rush this step—rhizomes that skip the soak often struggle to establish. Trim roots to exactly 6 inches as specified; longer roots can tangle, while shorter ones reduce the plant’s ability to anchor and absorb water.
Planting Depth: In Step 3, planting rhizomes 2-3 inches deep with the top slightly exposed prevents rot while allowing the roots to access moisture. I angle each rhizome so the leaf fan faces outward—this small detail encourages the plant to grow in the direction I want, creating a more natural look in the garden.
Plant them in late summer to early fall (August–October) for spring blooms. This gives roots time to establish before winter. Avoid planting in extreme heat or frost.
They thrive in full sun and well-drained soil. Water moderately, and divide clumps every 3–4 years to prevent overcrowding. Deadhead spent blooms to encourage more flowers.
Common causes include too much shade, overcrowding, or poor soil drainage. Ensure they get 6+ hours of sunlight and fertilize lightly in early spring with a balanced feed.
Yes! Try black-eyed Susan (yellow with dark centers) or purple coneflower for a comparable bicolor effect. Both are low-maintenance and pollinator-friendly.
Remove and destroy old foliage in fall to eliminate eggs. Apply a systemic insecticide in early spring if borers are a recurring issue. Healthy, well-spaced plants resist pests better.
