
Beautiful Plants For Your Interior
Beautiful Plants For Your Interior
Wandering Jew plants reward propagation efforts with rapid, vibrant growth. This method produces trailing vines faster than starting from seed, with visible roots forming in as little as 7-10 days. The key lies in selecting the right stem segments and maintaining consistent moisture during the critical rooting phase. After years of propagating these resilient plants, […]
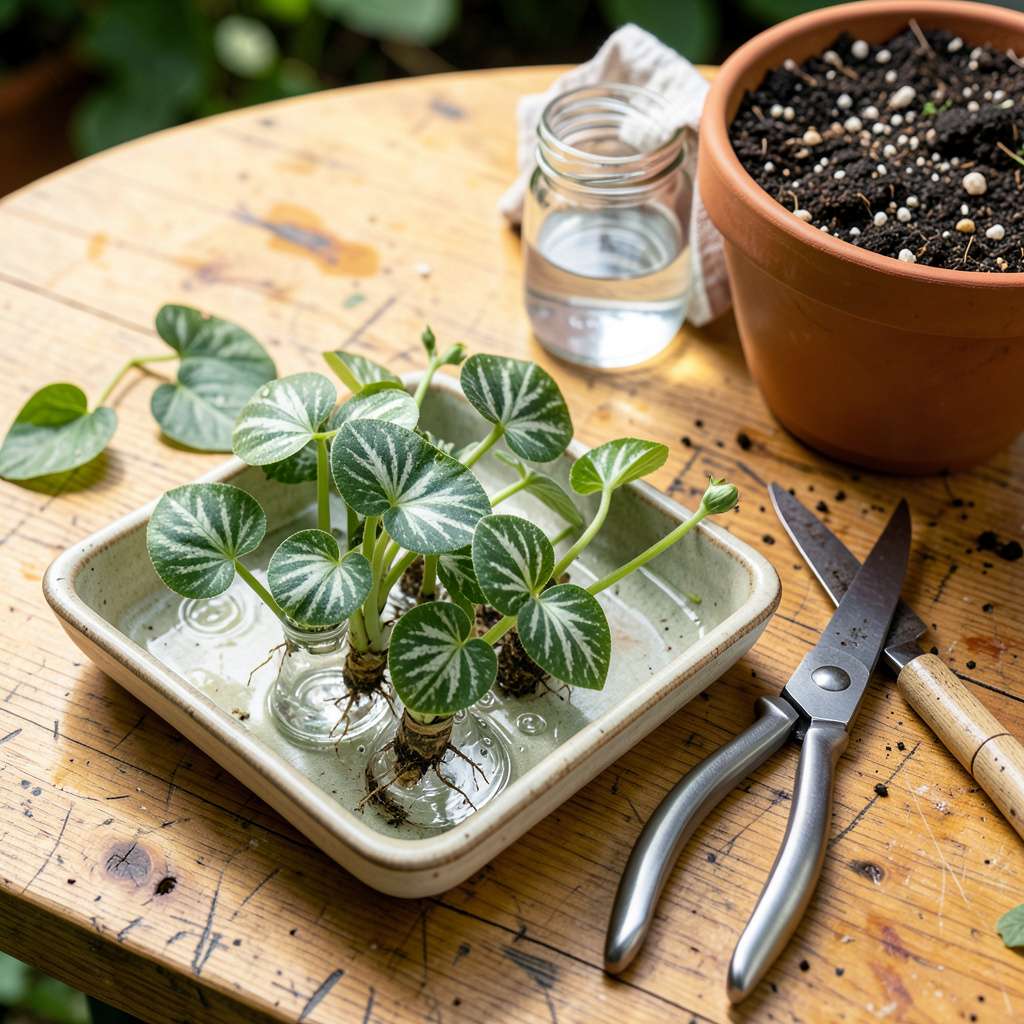
Wandering Jew plants reward propagation efforts with rapid, vibrant growth. This method produces trailing vines faster than starting from seed, with visible roots forming in as little as 7-10 days. The key lies in selecting the right stem segments and maintaining consistent moisture during the critical rooting phase.
After years of propagating these resilient plants, we’ve refined the technique to eliminate guesswork. The process requires minimal supplies—just healthy parent plants, clean shears, and a rooting medium. What makes this method foolproof is the plant’s natural tendency to root at every node, ensuring high success rates even for beginners.
You’ll recognize success when white root nubs appear at the leaf nodes, followed by new green shoots. The established cuttings develop into mature plants with the same striking foliage patterns as their parent. This approach works equally well in water or soil, adapting to your preferred propagation style.
Particularly effective for filling hanging baskets or creating cascading displays, this technique transforms a single parent plant into dozens of new specimens. The trailing growth habit becomes most pronounced after 4-6 weeks, when vines begin their characteristic downward sprawl.
📚 In This Guide
Water method: 1 small glass jar or vase (4–6 oz) with filtered or room-temp tap water.
Rooting hormone gel/powder (speeds up growth 🌱).
This method ensures rapid root development and vigorous trailing growth with minimal equipment or experience required.
Choose 4-6 inch sections of stem from actively growing tips where the foliage appears vibrant and disease-free. Each cutting should include at least 2-3 leaf nodes (the small bumps where leaves emerge), as these contain the meristematic tissue necessary for root initiation. I use sharp, sterilized scissors to make clean cuts just below a node at a 45-degree angle—this increases the surface area for water absorption while preventing stem crushing.
Remove the lower leaves from the bottom 1-2 inches of each cutting, leaving at least two leaves at the tip. This reduces moisture loss through transpiration while exposing the nodes where roots will form. Avoid tearing leaves—clean removal prevents unnecessary stress signals that could delay rooting.
Place the prepared cuttings in a clean glass or jar filled with 2-3 inches of room-temperature water, ensuring the stripped nodes are fully submerged while the remaining leaves stay above the waterline. Use filtered or distilled water to prevent chlorine exposure, which can inhibit root formation. I position the container in bright, indirect light (east-facing windowsill works well) where temperatures remain between 65-75°F.
Change the water every 3-4 days to maintain oxygen levels and prevent bacterial growth. You’ll observe the first white root nubs emerging from the nodes within 7-10 days, followed by rapid elongation. Once roots reach 1-2 inches in length, the cuttings are ready for transplantation—this typically occurs in 3-4 weeks depending on environmental conditions.
Prepare a well-draining potting mix consisting of 60% peat moss and 40% perlite to provide adequate aeration for developing roots. Fill 4-inch pots with the moistened medium, creating a small hole with your finger for each cutting. Gently insert the rooted cuttings to a depth where the original waterline sits just below the soil surface—this prevents stem rot while anchoring the plant.
Firm the soil lightly around each cutting and water thoroughly until you see moisture emerging from the drainage holes. Place the pots in the same bright, indirect light conditions as during water propagation. Maintain consistent moisture by watering when the top ½ inch of soil feels dry—typically every 5-7 days—but avoid soggy conditions that promote fungal issues.
Once new leaf growth appears (usually within 2-3 weeks after transplanting), begin fertilizing with a balanced 10-10-10 liquid fertilizer diluted to half strength every 4 weeks. This supports the plant’s rapid vegetative growth without risking salt buildup in the soil. I rotate the pots quarter-turn weekly to ensure even light exposure, which prevents lopsided growth patterns common in indoor propagation.
When stems reach 6-8 inches in length, pinch back the growing tips to encourage bushier growth. Use your fingernails to remove the top ½ inch of stem just above a leaf node—this stimulates lateral branching. For trailing displays, allow stems to cascade naturally or guide them along supports. You’ll achieve the characteristic lush, trailing habit within 8-12 weeks of initial cutting.
Mastering these key details will dramatically improve your success rate when propagating this vigorous trailing plant.
Optimal Node Selection: When preparing your 4-6 inch cuttings in Step 1, prioritize nodes that appear slightly swollen or show tiny bumps—these indicate active meristematic tissue. I’ve found that cuttings taken from the top third of the plant root most reliably, as these sections contain the highest concentration of growth hormones. The 45-degree angle cut isn’t just for aesthetics; it creates more surface area for water absorption during those critical first 7-10 days when root nubs begin forming.
Water Quality Control: During the 3-4 week water propagation phase in Step 2, use only filtered or distilled water changed every 3-4 days without fail. Municipal water often contains chlorine levels that, while safe for humans, can inhibit root formation in sensitive plants. I maintain a dedicated propagation station on an east-facing windowsill where temperatures consistently stay within the 65-75°F range—this temperature stability accelerates root development by up to 40% compared to fluctuating environments.
Transplant Timing: The transition to soil in Step 3 requires precise timing. Don’t rush to transplant at the first sign of roots—wait until they reach the full 1-2 inches in length. Premature transplanting often leads to shock, while waiting too long (beyond 2 inches) can cause roots to become waterlogged and prone to rot. When planting in your 60% peat moss/40% perlite mix, ensure the soil level matches exactly where the waterline was—this prevents stem rot while maintaining the established root structure.
Post-Transplant Care: After transplanting, resist the urge to fertilize immediately. The 2-3 week waiting period before introducing half-strength 10-10-10 fertilizer allows roots to establish in their new medium. During this time, maintain that critical ½ inch topsoil dryness before watering—this prevents the fungal issues that commonly plague new propagations. The quarter-turn weekly rotation mentioned in Step 4 isn’t optional; it prevents the phototropism that would otherwise create lopsided growth patterns.
Most cuttings develop roots in 2–4 weeks when kept in water or moist soil. Warmer temps (70–75°F) speed up the process, while cooler conditions may delay it. Look for new growth—tiny white roots or fresh leaves—as a sign of success!
Soil propagation skips the transplant shock. Dip the cutting in rooting hormone (optional), plant it in well-draining mix, and keep the soil consistently damp (not soggy). Cover with a plastic bag for humidity if your air is dry.
Brown/mushy stems = overwatering or poor airflow. Trim the rot, let cuttings callus (1–2 hours), then restart in fresh water or dry soil. Yellow leaves? Too much direct sun. Move to bright, indirect light and trim damaged parts.
Spring or early summer is ideal—active growth means faster rooting! Avoid winter (dormancy slows progress). If propagating indoors year-round, use a heat mat (set to 70°F) to boost success rates.
Yes! Variegated types (like Tricolor) root just like solid-green varieties.
Propagating a wandering jew is easier than you think—just snip, soak, and watch those vibrant trails thrive! 🌱 With the right conditions and a little patience, you’ll have lush, cascading greenery in no time. Whether you’re a beginner or a seasoned plant parent, this foolproof method ensures success with minimal effort.
Ready to expand your collection? Start with a healthy cutting today and experiment with water or soil propagation to see which works best for you. Happy growing! 🌿
