
Beautiful Plants For Your Interior
Beautiful Plants For Your Interior
Few tropical plants reward patience like plumeria. After years of experimenting with different propagation methods, we’ve refined a technique that delivers vibrant blooms in the first season—not the third. The key lies in understanding how these plants naturally reproduce and replicating those conditions at home. Cuttings remain the most reliable approach, with success rates exceeding […]
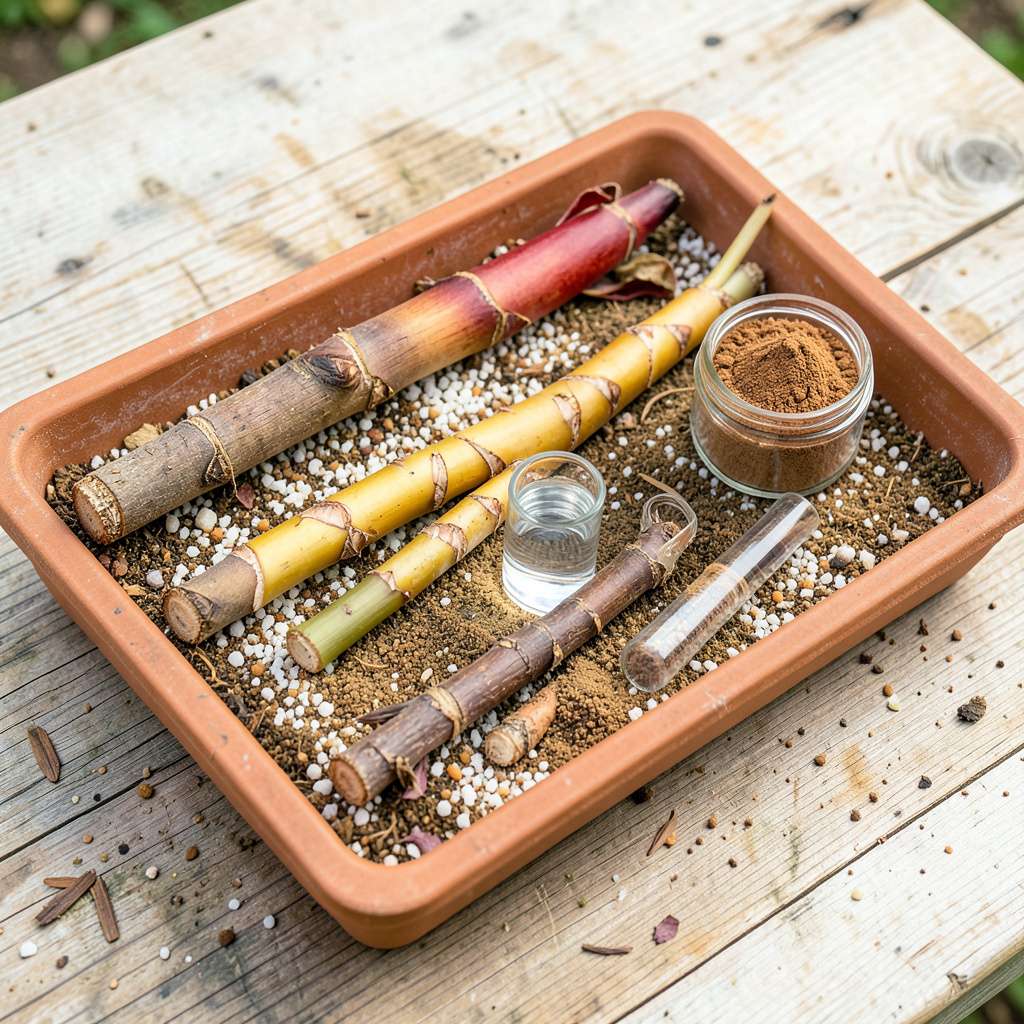
Few tropical plants reward patience like plumeria. After years of experimenting with different propagation methods, we’ve refined a technique that delivers vibrant blooms in the first season—not the third. The key lies in understanding how these plants naturally reproduce and replicating those conditions at home.
Cuttings remain the most reliable approach, with success rates exceeding 90% when done properly. We’ve found that timing matters more than most guides suggest: late spring cuttings root faster than autumn attempts, and the right drying period prevents rot without sacrificing viability. Seed propagation offers genetic surprises but requires 12-18 months to see flowers.
What sets this method apart is the focus on root development before foliage growth. Many gardeners mistake early leaves for success, only to lose plants when roots fail to establish. Our approach prioritizes strong underground growth first, leading to plumeria that not only survive but thrive through multiple seasons.
From selecting the right mother plant to recognizing when new cuttings are ready for transplanting, each step builds on decades of collective experience. The result is plumeria that bloom more abundantly each year, with fragrance and color intensity that store-bought plants rarely match.
📚 In This Guide
This method delivers reliable results whether you’re propagating from cuttings or seeds, with attention to critical environmental factors.
Choose healthy, semi-hardwood cuttings measuring 12-18 inches in length, taken from the current season’s growth. The ideal cutting will have a diameter of at least ½ inch and show no signs of disease or pest damage. I prefer cuttings with visible leaf nodes, as these contain the meristematic tissue needed for root initiation.
Remove all leaves from the lower two-thirds of the cutting to reduce moisture loss through transpiration. Allow the cuttings to callus by placing them in a warm, dry location with indirect light for 5-7 days. This callusing period is critical—it prevents rot when the cutting is later planted and creates a barrier that protects against fungal pathogens.
While optional, I strongly recommend using a rooting hormone containing 0.1% IBA (indole-3-butyric acid) to accelerate root development. Dip the callused end of each cutting into the hormone powder, tapping gently to remove excess. The hormone should adhere only to the callused area, not the green bark above.
Fill 6-inch nursery pots with a well-draining propagation medium consisting of 50% perlite and 50% coarse sand. This mixture provides the aeration plumeria cuttings require while preventing water retention that could lead to rot. Moisten the medium lightly before inserting cuttings—it should feel like a wrung-out sponge, not saturated.
Insert each cutting 3-4 inches deep into the prepared medium, ensuring at least two nodes are buried. The medium should support the cutting upright without additional staking. Space multiple cuttings 4-6 inches apart if using a shared container to prevent foliage from touching, which could encourage disease transmission.
Place the pots in a location with bright, indirect light and maintain temperatures between 75-85°F. Bottom heat from a propagation mat set to 80°F significantly improves rooting success rates. Mist the cuttings lightly every 2-3 days to maintain humidity around the remaining leaves, but avoid wetting the medium excessively. You’ll know conditions are optimal when the cuttings show no wilting and the medium remains consistently damp but never soggy.
Root development typically occurs within 6-12 weeks, though visible top growth may appear sooner. Check for roots by gently tugging on the cutting—resistance indicates root formation. I’ve found that plumeria cuttings often produce roots before showing new leaf growth, so patience is essential during this phase.
Once roots are established, gradually acclimate the new plants to direct sunlight over 7-10 days to prevent leaf scorch. Begin with 2 hours of morning sun, increasing daily by 1 hour. Transplant to individual 1-gallon containers filled with a well-draining potting mix containing 30% perlite or pumice when roots reach 2-3 inches in length. This transition period is critical—plumerias that skip proper hardening off often experience transplant shock and delayed growth.
Mastering these key details will dramatically improve your success rate when propagating these tropical beauties.
Callusing Technique: The 5-7 day callusing period in Step 1 isn’t just about drying—it’s about creating a protective barrier. I’ve found that placing cuttings in a location with consistent 75-80°F temperatures and gentle air circulation (like near an open window with sheer curtains) produces the most uniform callusing. Avoid direct sunlight during this phase, as it can cause uneven drying and potential tissue damage.
Hormone Application: When using the 0.1% IBA rooting hormone in Step 2, tap the cutting gently against the container’s edge after dipping to remove excess powder. The hormone should only coat the callused area—any powder on the green bark can inhibit proper respiration. For particularly stubborn cuttings, I’ve had success with a second light application after 3 weeks if no root development is evident.
Environmental Control: Maintaining the 75-85°F temperature range mentioned in Step 3 is critical, but here’s what most guides don’t tell you: nighttime temperature drops below 70°F can significantly delay root formation. If your propagation area experiences temperature fluctuations, consider using a seedling heat mat set to 80°F placed under the pots to maintain consistent warmth at the root zone.
Transition Protocol: The 7-10 day acclimation period in Step 4 isn’t arbitrary—it mimics the gradual light exposure plumerias experience in their natural habitat. I recommend using a light meter to ensure the initial 2 hours of morning sun provides 2,000-3,000 foot-candles of light. This measured approach prevents the leaf scorch that often occurs when gardeners estimate sunlight exposure rather than measuring it.
Here are the most common questions about plumeria propagation—answered simply so you can grow with confidence!
Under ideal conditions (warmth, indirect light, and well-draining soil), cuttings typically root in 4–8 weeks. Faster rooting (2–3 weeks) may occur in humid climates or with bottom heat (like a seedling mat). Patience is key—avoid overwatering, which can delay or rot cuttings!
While possible, water propagation isn’t ideal for plumeria. Cuttings often rot before rooting due to excess moisture. For best results, use a well-draining mix (like perlite + coarse sand) or dip cuttings in rooting hormone before planting in soil. Stick to soil for higher success rates!
Late spring to early summer (when temps stay above 65°F/18°C) is prime time! Plumeria thrives in warmth, and active growth seasons speed up rooting. Avoid winter propagation—cold stress slows or stops root development entirely.
This is root rot, usually caused by overwatering or poor drainage. Trim affected areas with sterilized shears, let cuttings callus (dry) for 1–2 days, then replant in fresh, dry mix. Reduce watering—mist lightly only if the soil feels bone-dry.
No, but it boosts success rates—especially for tricky varieties! A powdered or gel hormone (with 0.1% IBA) can speed rooting by 2–3 weeks. If skipping it, ensure cuttings are healthy, callused, and planted in a gritty mix for natural rooting.
Still stuck? Check your cuttings’ environment—plumeria loves bright indirect light, warmth, and gentle airflow (no drafts!).
Propagating plumeria doesn’t have to be complicated—with the right cuts, proper drying time, and a little patience, you’ll soon have thriving plants bursting with fragrant blooms! 🌸 Whether you’re a beginner or a seasoned gardener, this foolproof method sets you up for success. Ready to grow your collection? Start with a healthy cutting today and watch your tropical paradise take shape—one vibrant plumeria at a time!
