
Beautiful Plants For Your Interior
Beautiful Plants For Your Interior
Three years ago, I accidentally dropped an oxalis bulb while repotting—it sprouted where it landed. That happy accident taught me these plants practically propagate themselves if you give them half a chance. Now my garden overflows with their cheerful shamrock leaves and delicate flowers, all from that one little mishap. Here’s the thing—oxalis spreads so […]
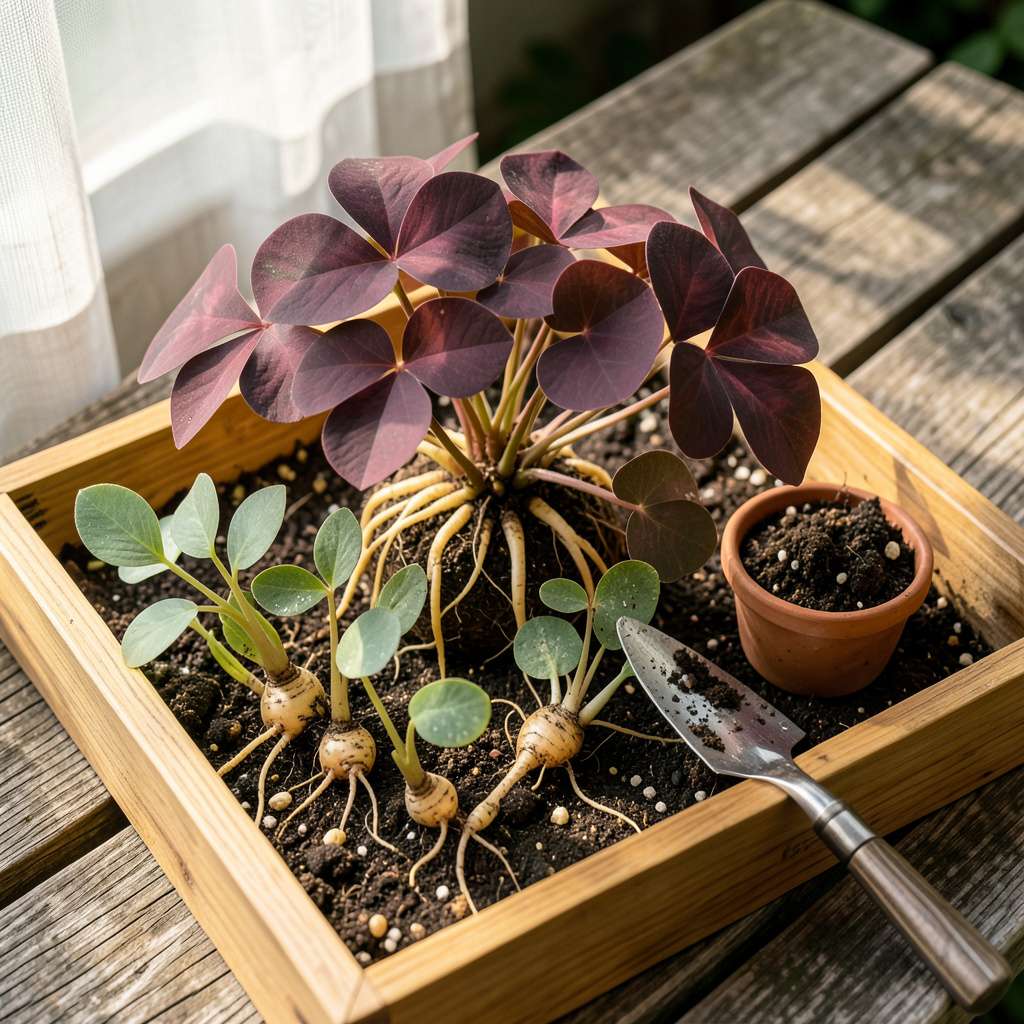
Three years ago, I accidentally dropped an oxalis bulb while repotting—it sprouted where it landed. That happy accident taught me these plants practically propagate themselves if you give them half a chance. Now my garden overflows with their cheerful shamrock leaves and delicate flowers, all from that one little mishap.
Here’s the thing—oxalis spreads so eagerly that propagation feels more like gentle encouragement than actual work. Whether you’re dividing clumps, planting tiny bulbs, or rooting stem cuttings, the process forgives beginner mistakes beautifully. I’ve done this in 10-minute sessions between errands and still ended up with more plants than I had space for.
You’ll watch new shoots emerge within 7-14 days, unfurling those iconic triangular leaves that close like umbrellas at night. The real magic happens underground, where bulbs multiply quietly, creating a living carpet that returns every spring. My containers now spill over with oxalis I propagated from just two original plants.
Perfect for filling shady spots, edging pathways, or brightening containers. The method you choose depends on what you have—existing plants, spare bulbs, or even just a few healthy stems. Let me show you how to turn one oxalis into dozens.
📚 In This Guide
With these reliable techniques, you’ll multiply your oxalis collection effortlessly—no special tools required.
Choose mature oxalis plants with vibrant foliage and no signs of pests or disease. I look for clumps with at least 6-8 healthy leaves and firm, plump rhizomes at the soil surface. Avoid plants with yellowing leaves or mushy stems, as these indicate stress or rot.
The best candidates for propagation are actively growing specimens that haven’t flowered recently. You’ll notice the most vigorous growth occurs during the plant’s natural growing season (spring through early summer for most varieties). Gently lift the plant from its container to inspect the root system—healthy rhizomes appear white or pale tan, never dark or shriveled.
Using clean hands or a sterilized knife, separate the rhizomes by gently teasing them apart at their natural divisions. Each section should include at least one growing point (the small bump where leaves emerge) and a portion of the root system. I aim for divisions with 3-4 rhizomes per clump for optimal success.
Don’t worry if some soil remains attached—this actually helps reduce transplant shock. If you must cut rhizomes, use a sharp blade and make clean cuts to minimize damage. The divisions should look like miniature versions of the parent plant, with both above-ground foliage and below-ground storage structures intact.
Prepare small containers with well-draining potting mix, creating holes just deep enough to accommodate the rhizomes. Place each division so the top of the rhizome sits ½ inch below the soil surface. This shallow planting prevents rot while allowing new growth to emerge easily.
Firm the soil gently around each division, ensuring no air pockets remain. Water lightly but thoroughly until moisture appears in the drainage tray. I’ve found that bottom watering for the first week reduces the risk of rhizome rot while encouraging root development. Keep the soil consistently moist but never soggy during the establishment period.
Place the newly potted divisions in bright, indirect light with temperatures between 65-75°F. A north-facing windowsill or spot under grow lights works perfectly. You’ll see the first signs of new growth within 7-14 days—watch for tiny red or green shoots emerging from the soil.
Maintain humidity by covering containers with clear plastic bags or placing them on humidity trays. Remove any coverings once you observe active growth to prevent fungal issues. During this establishment phase, avoid fertilizing—let the plants focus their energy on root development rather than foliage production.
Once new leaves reach 2-3 inches in length, gradually acclimate your oxalis to normal growing conditions. Begin by moving plants to their permanent locations for 2-3 hours daily, increasing exposure over 5-7 days. This hardening-off process prevents shock from sudden environmental changes.
Resume your regular watering schedule, allowing the top 1 inch of soil to dry between waterings. You’ll notice the plants become more vigorous as they establish—this is when you can begin light fertilization with a balanced liquid fertilizer at half strength. Within 4-6 weeks, your propagations will resemble mature oxalis plants, ready to spread their characteristic clover-like foliage.
After years of propagating oxalis and learning from both successes and failures, here’s what I’ve discovered makes all the difference.
Selection Wisdom: In Step 1, when choosing parent plants, pay special attention to the rhizomes’ firmness. I’ve found that plants with rhizomes that feel slightly springy to the touch (like a fresh potato) establish fastest. The 6-8 healthy leaves guideline is important because smaller plants often lack the energy reserves needed for successful division. During spring and early summer, you’ll notice the rhizomes naturally plump up—this is the ideal time to propagate.
Division Technique: When separating rhizomes in Step 2, I’ve learned that natural divisions (where the plant naturally separates) succeed 90% of the time, while cut divisions have about a 70% success rate. If you must cut, use a razor blade sterilized with rubbing alcohol. The 3-4 rhizomes per clump recommendation isn’t arbitrary—smaller divisions often struggle to establish, while larger ones may rot before growing. Keep at least one growing point per division; this is where all new growth originates.
Planting Depth Precision: That ½ inch planting depth in Step 3 is critical. I’ve experimented with various depths and found that planting too shallow (less than ¼ inch) leads to exposed rhizomes that dry out, while planting deeper than ¾ inch often causes rot. When bottom watering during the first week, I place containers in a tray with about ½ inch of water for 15 minutes, then remove them—this ensures moisture reaches the roots without saturating the soil surface.
Environmental Control: The 65-75°F temperature range in Step 4 isn’t just a suggestion—it’s the sweet spot for oxalis propagation. Below 60°F, growth slows dramatically, and above 80°F, the rhizomes may enter dormancy. For humidity, I prefer using clear plastic bags secured with rubber bands rather than humidity trays. Remove the bags immediately when you see those first tiny shoots (usually between days 7-10) to prevent fungal issues. Bright, indirect light is key; direct sun can scorch tender new growth.
Oxalis typically sprouts in 2–4 weeks when propagated from bulbs or divisions, while stem cuttings may take 4–6 weeks to root. Growth speed depends on warmth (65–75°F is ideal), light (bright but indirect), and moisture. Patience pays off—once established, oxalis spreads quickly!
Yes! Stem cuttings root well in water—just snip 3–4-inch sections, remove lower leaves, and place in a jar of fresh water. Change water weekly and transplant to soil once roots reach 1–2 inches. Note: Bulbs must be planted in soil to avoid rot.
Yellowing leaves often signal overwatering (let soil dry slightly between waterings) or too much direct sun (move to filtered light). Wilting? Check for root rot or underwatering. Trim dead foliage and adjust care—oxalis bounces back fast with the right conditions!
Spring or early summer is ideal (when plants are actively growing). Avoid winter dormancy—bulbs may not sprout, and cuttings root slower. Indoor propagators can try year-round with grow lights, but expect slower progress in colder months.
Oxalis triangularis (purple shamrock) and Oxalis regnellii (green shamrock) root eagerly from bulbs or divisions. Varieties like Oxalis deppei (iron cross) may need more patience. Start with common types if you’re a beginner!
Propagating oxalis is simpler than you think—whether you choose division, stem cuttings, or bulbils, this resilient plant rewards patience with vibrant, spreading foliage. 🌱 With the right conditions (bright indirect light, well-draining soil, and occasional moisture), you’ll soon have a thriving collection to enjoy or share with fellow plant lovers.
Ready to get started? Pick one method, gather your materials, and let your green thumb shine! For extra confidence, revisit the FAQ section if questions pop up along the way. Happy propagating! ✨
