
Beautiful Plants For Your Interior
Beautiful Plants For Your Interior
Plumeria leaves curling or yellowing? I’ve been there—watching those gorgeous tropical blooms suffer from pests is heartbreaking. After losing two plants to spider mites, I discovered neem oil as the game-changer for keeping plumeria healthy without harsh chemicals. The difference was visible in just 3 days of proper treatment. What makes neem oil special for […]
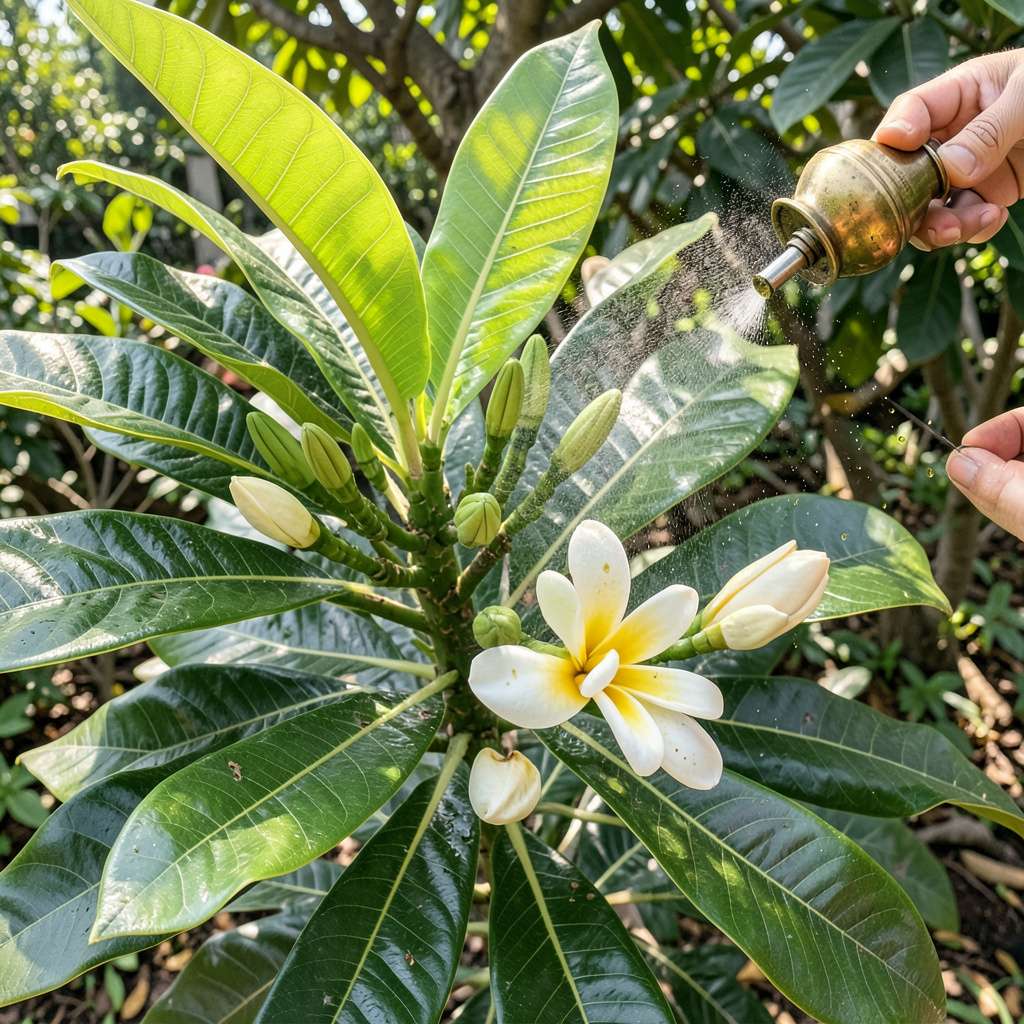
Plumeria leaves curling or yellowing? I’ve been there—watching those gorgeous tropical blooms suffer from pests is heartbreaking. After losing two plants to spider mites, I discovered neem oil as the game-changer for keeping plumeria healthy without harsh chemicals. The difference was visible in just 3 days of proper treatment.
What makes neem oil special for plumeria is how it works on multiple fronts: it disrupts pest life cycles, prevents fungal issues, and even conditions the foliage. My plants now stay lush through humid summers when pests are worst. The key is applying it correctly—timing, dilution, and coverage matter more than you’d think.
You’ll see pests vanish within a week and new growth emerge cleaner and stronger. The blooms come in more vibrant too, since the plant isn’t fighting infestations. I apply mine every 10-14 days during growing season as preventative care—no more emergency treatments.
Works for potted plumeria on patios or in-ground plants in warm climates. Here’s exactly how to mix and apply it for best results, plus the one mistake that can burn your leaves if you’re not careful.
📚 In This Guide
Here’s how I protect my plumeria from pests while keeping those stunning blooms healthy and vibrant.
Apply neem oil in the early morning or late evening when temperatures are below 85°F. Direct sunlight combined with oil can burn plumeria leaves, so avoid midday applications. I always check the forecast first—rain within 24 hours will wash away the treatment before it works.
Look for signs your plant needs treatment: sticky residue on leaves (aphids), white cottony clusters (mealybugs), or tiny webbed areas (spider mites). Even if you don’t see pests, applying neem oil every 2-3 weeks during growing season prevents infestations before they start.
Use cold-pressed neem oil (not cosmetic grade) and mix 1 tablespoon oil + 1 teaspoon mild liquid soap per 1 gallon of water. The soap acts as an emulsifier—without it, oil separates and won’t coat leaves evenly. Shake the mixture vigorously in a spray bottle until it looks like milky water.
Test the solution on one small leaf section first. Wait 24 hours to check for any adverse reaction like leaf curling or spotting. Plumeria leaves are sensitive, so this test prevents damaging your entire plant. If the test spot looks normal, proceed with full application.
Spray the solution until leaves glisten but don’t drip. Focus on undersides of leaves where pests hide and lay eggs. I use a fine mist setting to ensure complete coverage without wasting solution. Don’t forget stems and the soil surface—pests often migrate between these areas.
Work systematically from the top down so any dripping solution coats lower leaves. Reapply every 7-14 days for active infestations, or monthly for maintenance. Always re-mix the solution before each use—neem oil separates quickly when sitting.
Check your plumeria 3 days after application. You should see fewer live pests and possibly some dried exoskeletons. If pests persist, increase frequency to every 5 days until the problem resolves. I keep a gardening journal to track which pests appear when, helping me stay ahead.
Watch for new growth—healthy plumeria will produce fresh green leaves within 2 weeks of effective treatment. If leaves appear stunted or discolored, reduce concentration to 1 teaspoon oil per gallon next time. The goal is protection without stressing your plant.
Combine neem oil treatments with good cultural practices: water at the base to keep leaves dry, remove fallen debris promptly, and fertilize lightly during growing season. I’ve found plumeria treated preventatively with neem oil develop thicker stems and more vibrant blooms over time.
Store unused neem oil in a cool, dark place—it degrades in heat and light. A fresh bottle each season ensures maximum effectiveness. Remember that neem oil works gradually by disrupting pest life cycles, so consistency matters more than heavy applications.
After years of treating plumeria with neem oil, I’ve learned these key details that make all the difference in effectiveness.
Timing Secret: The early morning or late evening application window mentioned in Step 1 is absolutely critical. I once applied neem oil at 10am when temperatures were climbing, and despite being below 85°F, the combination of sun intensity and oil caused slight leaf burn. Now I always wait until after 5pm during summer months to be safe, even if the thermometer reads 82°F.
Mixing Technique: When preparing your solution in Step 2, use warm water instead of cold—it helps the oil and soap emulsify more completely. I’ve found that shaking the spray bottle for a full 30 seconds (not just a few shakes) creates that ideal milky consistency that clings better to leaves. Without proper emulsification, you’ll see oil droplets forming on leaves rather than an even protective coating.
Application Wisdom: For Step 3’s thorough coverage, I recommend using a pump sprayer instead of a trigger bottle for larger plumeria. The continuous spray action lets you maintain that perfect “glistening but not dripping” coverage more easily. Pay special attention to leaf axils (where leaves meet stems)—this is where spider mites love to hide and lay eggs, and it’s easy to miss these spots with a quick spray.
Monitoring Insight: When checking your plant 3 days after application as mentioned in Step 4, don’t just look for pests—examine leaf texture too. Healthy plumeria leaves should feel slightly waxy after treatment. If they feel sticky or tacky, you’ve likely used too much oil in your mix. This excess can actually attract dust and debris, creating new problems.
Apply neem oil every 7–14 days during active pest seasons (spring/summer) or after rain. For prevention, a monthly spray suffices. Always apply in the early morning or late evening to avoid leaf burn from sun exposure. Overuse can harm beneficial insects, so stick to the schedule!
Avoid spraying open blooms directly—neem oil can damage delicate petals and deter pollinators. Focus on leaves, stems, and buds. If pests target flowers, spot-treat only the base or use a soft cloth to wipe infested areas gently.
If pests persist, try insecticidal soap or horticultural oil (like mineral oil). For severe infestations, introduce beneficial insects (ladybugs, lacewings). Always test alternatives on a small area first to check for plant sensitivity.
Yellowing can signal over-application, sunburn (if sprayed midday), or poor dilution. Rinse leaves with water if symptoms appear. Next time, dilute properly (1–2 tbsp Neem Oil Per Gallon of Water: Essential Gardening Tips”>neem oil per gallon of water) and apply during cooler hours. Check for root issues too—neem oil won’t fix waterlogged soil!
Neem oil works best in warm, dry climates (like plumeria’s native habitat). In humid or rainy areas, reapply more frequently (every 5–7 days) as moisture washes it away. Avoid use in extreme heat (above 90°F) to prevent leaf scorch.
Neem oil is a game-changer for keeping your plumeria healthy and pest-free—naturally! 🌿 By using it correctly, you’ll protect those stunning blooms while avoiding harsh chemicals. Whether you’re tackling aphids, mealybugs, or fungal issues, consistency is key to seeing the best results.
Ready to give your plumeria the care it deserves? Start with a small test spray today, and watch your plant thrive! For more tips, check out our guide on seasonal plumeria care to keep those flowers flourishing year-round. Happy gardening! 🌸
