
Beautiful Plants For Your Interior
Beautiful Plants For Your Interior
That first successful Hoya obovata cutting changed everything for me. One tiny stem in water, then roots appearing like magic—now I have plants cascading from shelves and windowsills. This isn’t just propagation; it’s how you turn one prized plant into a collection without spending a dime. Here’s the thing—Hoya obovata roots faster than you’d expect, […]
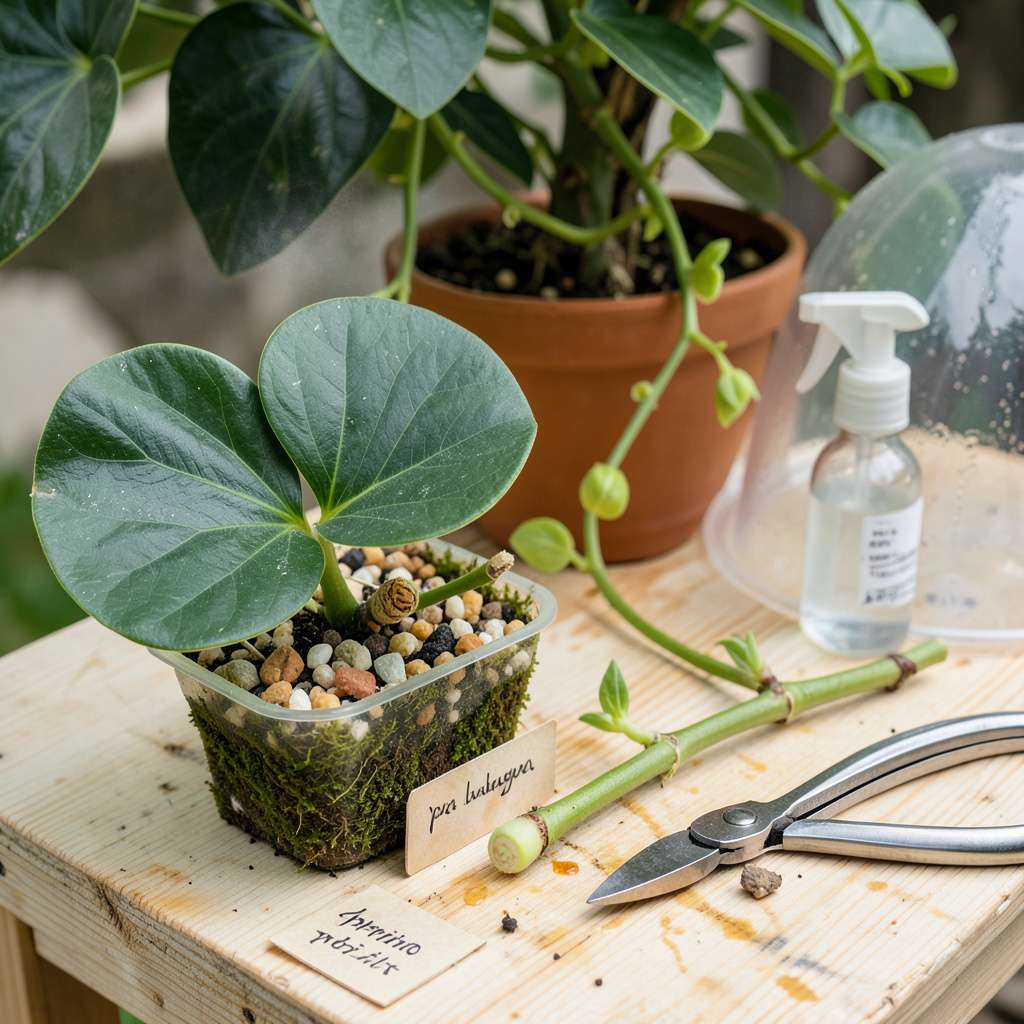
That first successful Hoya obovata cutting changed everything for me. One tiny stem in water, then roots appearing like magic—now I have plants cascading from shelves and windowsills. This isn’t just propagation; it’s how you turn one prized plant into a collection without spending a dime.
Here’s the thing—Hoya obovata roots faster than you’d expect, but only when you get three things right: the cutting spot, the medium, and the patience. I’ve tried both water and soil methods, and each has its place depending on your setup. The key is choosing healthy stems (not the leggy ones) and resisting the urge to fuss over them daily.
Within 3-4 weeks, you’ll see white roots emerging, then leaves unfurling in that perfect heart shape we love. The real payoff comes months later when your new plants start producing those glossy, waxy leaves that make this variety so special. They’ll outgrow their baby pots faster than you think.
Fair warning: The first attempt might fail (mine did), but that’s how you learn which windows get the right light and when to hold back on water. Once you nail the process, you’ll be trading cuttings with friends and filling every sunny spot in your home. Let’s get those scissors ready.
📚 In This Guide
Water – Filtered or distilled (room temperature) in a small glass jar (4–6 oz).
This method delivers healthy new plants every time—just follow these simple, proven steps.
Choose a healthy vine with at least two pairs of mature leaves. Using clean scissors, make a cut just below a node (the bump where leaves and roots emerge). I prefer cuttings 4-6 inches long—long enough to handle easily but not so long they lose moisture too quickly.
Remove the bottom pair of leaves to expose the node where roots will form. This is critical because roots won’t grow from the stem itself, only from the node. Let the cutting callous over for 1-2 hours in a warm, dry spot before planting—this prevents rot when you introduce moisture.
Fill a small container with a well-draining mix—equal parts perlite and peat moss works perfectly. Moisten the mix until it feels like a wrung-out sponge. Too much water suffocates developing roots, while too little causes the cutting to dry out.
Poke a hole in the mix with your finger or a pencil, about 1-2 inches deep. This prevents damaging the calloused end when you insert the cutting. Gently place the cutting in the hole and firm the mix around it just enough to hold it upright—don’t pack it down tightly.
Place the container in bright, indirect light—an east-facing windowsill is perfect. Avoid direct sun, which can scorch the cutting before roots develop. Maintain temperatures between 65-75°F; cooler conditions slow root growth, while heat above 80°F stresses the plant.
Cover the container with a clear plastic bag or propagation dome to retain humidity, but leave a small vent. You want moisture in the air without creating a swampy environment. Mist the cutting lightly every 2-3 days or when the mix surface feels dry to the touch.
Check for root growth after 3-4 weeks by giving the cutting a very gentle tug. Resistance means roots are forming. You’ll also see new leaf growth at the top—a sure sign the cutting has established itself. Don’t rush this process; some cuttings take up to 8 weeks to root fully.
Keep the mix consistently moist but never soggy during this period. If you notice yellowing leaves, you’re likely overwatering. Brown, crispy edges mean the air is too dry—increase humidity by misting more frequently or closing the vent slightly.
Once roots are 1-2 inches long (you can check by carefully removing the cutting), transplant to a slightly larger pot with standard hoyas mix. Water thoroughly after transplanting, then let the top inch of soil dry out between waterings—this encourages strong root development.
Place your new plant in the same bright, indirect light you’d give a mature hoya obovata. Hold off on fertilizing for 4-6 weeks to avoid burning tender new roots. You’ll know your propagation was successful when you see vigorous new growth and the plant begins climbing or trailing naturally.
After propagating hundreds of hoyas, I’ve learned these small details make all the difference between success and disappointment.
The Callousing Step: That 1-2 hour waiting period in Step 1 isn’t just downtime—it’s your insurance against rot. I’ve ruined cuttings by rushing this step. The calloused end creates a protective barrier that prevents bacteria from entering when you plant. Place cuttings in a warm spot (like on top of the fridge) to speed up callousing, but don’t exceed 2 hours or the ends may dry out too much.
Moisture Management: In Step 2, when the instructions say “moisten until it feels like a wrung-out sponge,” here’s how to test it: squeeze a handful of your mix—if a single drop of water comes out, it’s perfect. Too much water at this stage suffocates developing roots, while too little causes the cutting to shrivel before roots can form. I use a spray bottle to add water gradually until I get that perfect sponge-like consistency.
Temperature Control: The 65-75°F range mentioned in Step 3 is critical. I learned this the hard way after losing several cuttings to a heat wave. If your home runs warm, place the container on a tray with pebbles and water underneath—this creates a microclimate that stays cooler through evaporation. Avoid placing near heating vents or drafty windows, which create temperature swings that stress cuttings.
Patience with Roots: When Step 4 mentions checking after 3-4 weeks, resist the urge to pull on your cuttings daily. I check mine by gently wiggling the base—if you feel even slight resistance, roots are forming. The waiting game is hardest during weeks 2-3 when nothing seems to happen, but this is when root primodia are developing underground. Trust the process and maintain consistent care.
Under ideal conditions (warmth, humidity, and bright indirect light), cuttings typically root in 3–6 weeks. Water propagation may show roots sooner (2–3 weeks), while soil propagation takes slightly longer. Patience is key—avoid tugging on cuttings to check progress!
Both methods work! Water propagation lets you monitor root growth (great for beginners), but transitioning to soil can stress the plant. Soil propagation skips the shock and often yields sturdier roots. Try sphagnum moss for a happy middle ground!
Yellowing or mushiness usually signals overwatering (in soil) or stagnant water (in water propagation). Trim affected areas, refresh the water/soil, and ensure good airflow. If using soil, let it dry slightly between mistings. Prevention tip: Use sterile tools to avoid bacterial rot!
Aim for spring or early summer—the plant’s active growing season! Warm temps (65–80°F) and longer daylight hours speed up rooting. Avoid winter propagation; low light and cold slow growth, increasing failure risk. Bonus: A heat mat can help off-season attempts!
This happens when the cutting focuses energy on foliage instead of roots. Solutions:
Be patient—roots will follow!
Propagating Hoya obovata is easier than you think! With just a few simple steps—choosing healthy cuttings, providing the right medium, and maintaining warmth and humidity—you’ll soon have thriving new plants to enjoy or share. 🌱 Whether you’re a beginner or a seasoned plant parent, patience and consistency are your best tools for success.
Now that you’re equipped with the know-how, why not grab your supplies and start propagating today? Your collection (or a friend’s windowsill) will thank you! 😊
