
Beautiful Plants For Your Interior
Beautiful Plants For Your Interior
I used to dread pruning my loropetalum shrubs—until I realized it’s the secret to their vibrant purple foliage and perfect shape. That first time I trimmed them correctly, the difference was shocking: denser growth, brighter colors, and a form that actually looked intentional. Now I mark my calendar every late winter because timing matters more […]
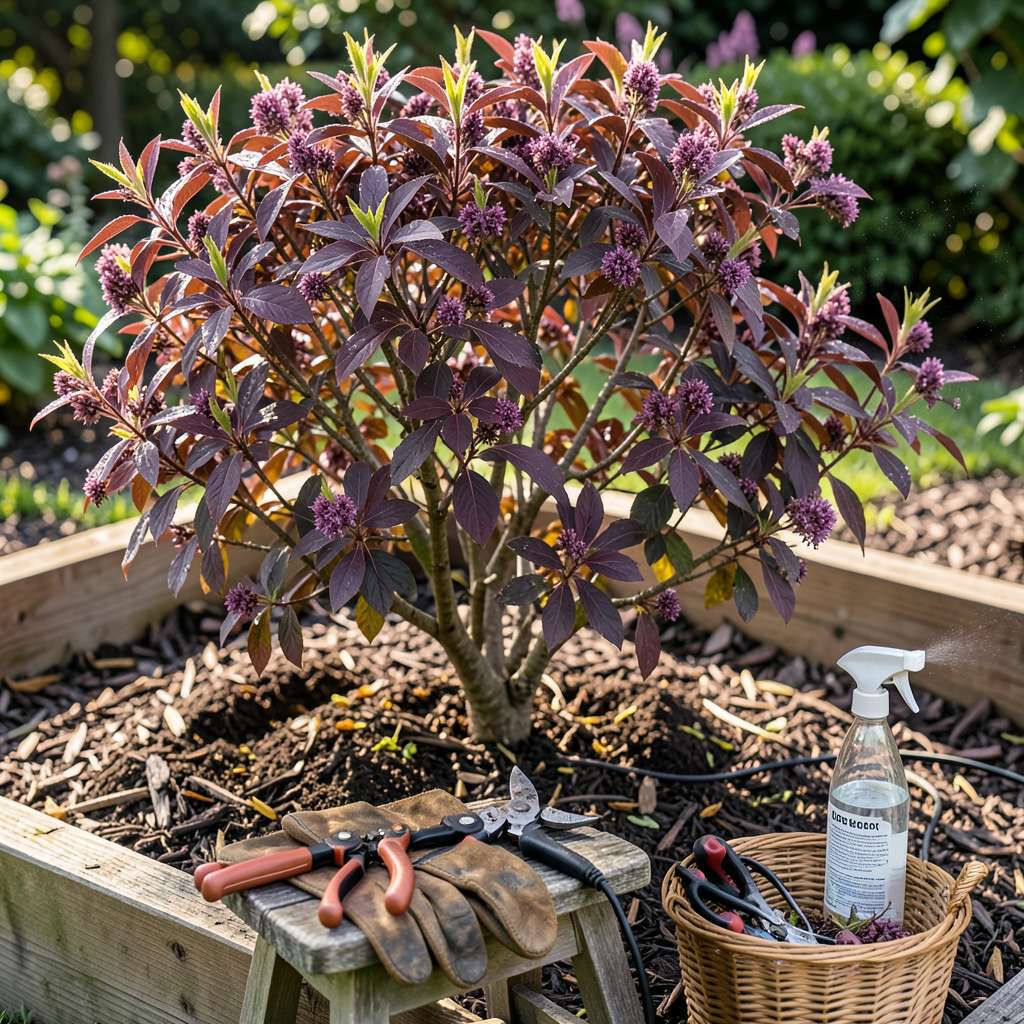
I used to dread pruning my loropetalum shrubs—until I realized it’s the secret to their vibrant purple foliage and perfect shape. That first time I trimmed them correctly, the difference was shocking: denser growth, brighter colors, and a form that actually looked intentional. Now I mark my calendar every late winter because timing matters more than you’d think.
Here’s the thing—loropetalums don’t need fancy tools or complicated techniques. A sharp pair of bypass pruners and 20 minutes is all it takes to transform a leggy shrub into a showstopper. The key is knowing exactly where to cut (hint: it’s not random) and how much to remove without stressing the plant. I’ve ruined my share of shrubs by being too aggressive early on.
You’ll see new growth emerge within 2-3 weeks of pruning, with the foliage coming in thicker and more colorful than before. The shape holds beautifully through the season, and you avoid that “wild and overgrown” look that makes landscapes appear neglected. My neighbors still ask how my shrubs stay so compact and vibrant year after year.
Works for all loropetalum varieties, from the deep purple ‘Plum Delight’ to the variegated ‘Ruby’. Whether you’re shaping a hedge or maintaining a single specimen, this approach keeps them healthy and stunning with minimal effort. Let’s grab those pruners and get started—the right way.
📚 In This Guide
Here’s my foolproof method for shaping these vibrant shrubs—you’ll get perfect results every time.
Trim your loropetalum immediately after flowering in late spring or early summer. This timing preserves the current year’s blooms while giving new growth plenty of time to develop before winter. I’ve found this window (typically May through June) produces the most vigorous regrowth.
Never prune in late fall or winter—this stimulates tender new growth that winter cold will damage. You’ll recognize the ideal time when 90% of flowers have faded but leaves remain deep green and healthy. Cloudy days are perfect for trimming—they reduce stress on freshly cut plants.
Use sharp bypass pruners (not anvil-style) that can cleanly cut branches up to ½ inch thick. Wipe blades with rubbing alcohol to prevent disease transmission. For larger branches, keep long-handled loppers ready. I always wear gloves—loropetalum stems can be surprisingly scratchy.
Before cutting, step back and visually divide the shrub into three sections: top, middle, and base. Identify any dead branches (they’ll be brittle and brown inside when scratched) and mark them for removal first. Look for crossing branches that rub together—they create wounds that invite pests.
Start by removing all dead, diseased, or damaged wood at its base. Then thin out the center by cutting one-third of the oldest stems down to ground level. This opens airflow and lets light reach inner branches, which prevents that “leggy” look many loropetalums develop.
For shaping, cut just above a leaf node (where leaves emerge) at a 45-degree angle. Never leave stubs longer than ¼ inch—they die back and become entry points for fungus. I make each cut deliberately, stepping back frequently to check balance. The goal is a slightly rounded shape that’s wider at the base than the top.
After major cuts, make smaller “heading back” cuts to encourage bushiness. Trim the tips of remaining branches by 2-4 inches, always cutting just above a leaf node. You’ll see new growth sprouting from these cuts within 2-3 weeks.
Collect all clippings immediately—loropetalum debris can harbor spores that reinfect the plant. I use a tarp under the shrub to catch everything for easy cleanup. Finish by watering deeply at the base (not overhead) to help the plant recover from stress. Apply a 2-inch layer of mulch to conserve moisture during regrowth.
Check your shrub weekly for the first month after trimming. You should see new growth emerging within 10-14 days. If any cut stems show dieback (blackened tips), prune them back another inch into healthy wood.
Plan to do light touch-ups in mid-summer if needed—loropetalums respond well to multiple light prunings. Avoid heavy cutting after August 1st in most climates; late new growth won’t harden off before winter. I keep notes each year on which branches grew most vigorously—it helps plan next year’s pruning strategy.
These practical insights will help you avoid the most common pruning pitfalls while achieving that picture-perfect shape.
Timing Precision: The May through June window mentioned in Step 1 isn’t just suggestion—it’s critical. I learned this the hard way after pruning in July one year and getting weak, sunburned new growth. Watch for exactly 90% faded flowers as your cue, not just “when it looks done.” Cloudy days truly make a difference for plant recovery, reducing moisture loss through leaves during those first vulnerable hours post-trim.
Tool Technique: When Step 2 mentions wiping pruner blades with rubbing alcohol, this isn’t just about cleanliness—it prevents spreading fungal spores between cuts. I keep a small spray bottle of alcohol handy to re-clean blades after removing diseased wood. For branches thicker than ½ inch, don’t force your pruners—switch to loppers to avoid jagged cuts that invite infection.
Cutting Strategy: The 45-degree angle cut in Step 3 isn’t arbitrary—it allows water to run off rather than pool on the cut surface. I’ve found that making a small notch on the opposite side of my cut (about ⅛ inch deep) helps guide the pruners for perfect angle consistency. When thinning oldest stems, always remove the thickest ones first—they’re usually the least productive anyway.
Follow-Up Care: That 2-inch mulch layer in Step 4 does double duty—it conserves moisture AND prevents soil-borne fungi from splashing onto fresh cuts during watering. I use shredded bark rather than wood chips as it decomposes slower and doesn’t rob nitrogen from the soil. The deep watering immediately after pruning isn’t optional; it helps the plant replace moisture lost through all those fresh cut surfaces.
The ideal time is late winter or early spring (February–March) before new growth starts. Light trimming for shape can also be done after flowering in summer. Avoid pruning in fall—it may stimulate tender growth vulnerable to frost.
Never remove more than ⅓ of the plant’s total growth in one session. For overgrown shrubs, spread pruning over 2–3 seasons. Focus on thinning inner branches first to improve airflow and sunlight penetration.
For formal hedges, shears work, but hand pruners are better for natural shapes—they prevent jagged cuts that brown the edges. Always sanitize tools with rubbing alcohol to avoid spreading disease.
Over-pruning (especially in summer) can remove flower buds. Stick to light shaping post-bloom, and avoid cutting back hard after July. Ensure it gets 6+ hours of sunlight daily for best blooms.
Trimming maintains shape (light cuts). Rejuvenation is drastic—cutting back to 6–12 inches from the ground—to revive leggy or overgrown shrubs. Do this in early spring and pair with fertilizer.
Trimming your loropetalum shrubs doesn’t have to be daunting—just follow the right timing, tools, and techniques for Healthy Growth“>lush, healthy growth and a polished look! 🌿✂️ Remember, regular pruning keeps these vibrant shrubs thriving while preventing overgrowth. Now that you’re equipped with the know-how, grab your shears and give your loropetalum the TLC it deserves. For next steps, mark your calendar for the next pruning season or explore companion plants to pair with your freshly trimmed shrubs!
