
Beautiful Plants For Your Interior
Beautiful Plants For Your Interior
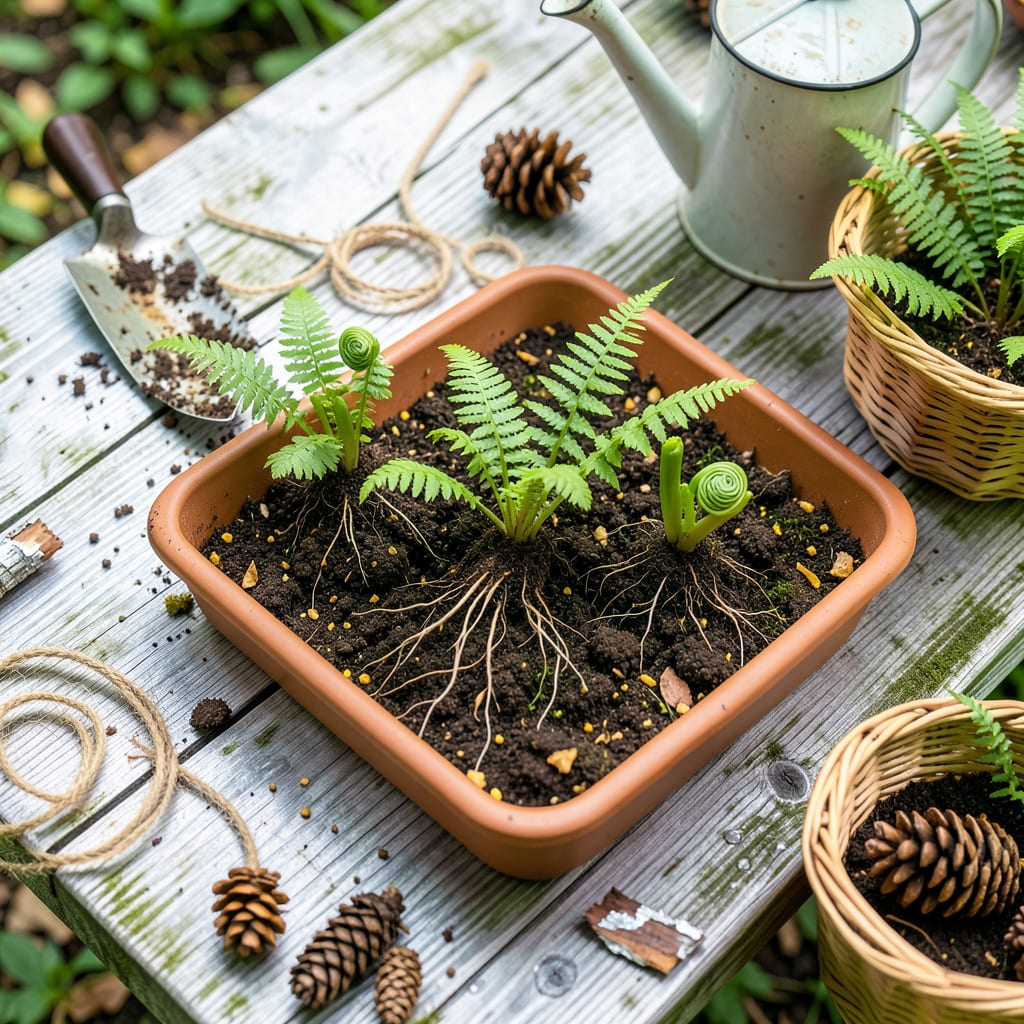
There’s something magical about bringing wild ferns into your garden—like capturing a piece of the forest’s quiet resilience. I’ve moved dozens over the years, and the ones that thrive always start with two things: the right timing (early spring or fall) and respect for the plant’s roots. No fancy tools required, just a sharp trowel, some patience, and a shady spot ready to welcome them home.
What most people don’t realize? Ferns bounce back faster than you’d think if you keep their roots damp and their new soil loose. I’ve had transplanted ferns unfurl fresh fronds within a week—as long as you avoid the two big killers: letting roots dry out or planting too deep. The secret isn’t luck; it’s treating them like the tough, adaptable survivors they are.
📚 In This Guide
This method ensures your ferns establish quickly with minimal shock—perfect for beginners and experienced gardeners alike.
Transplant wild ferns in early spring or fall when temperatures stay between 50-70°F and soil remains naturally moist. Avoid summer’s heat or winter’s freeze—both stress plants beyond recovery. I always check the forecast for a stretch of mild, overcast days, which gives ferns time to adjust without harsh sun.
Select a shaded or partially shaded spot that mimics their natural woodland habitat. Look for areas with dappled sunlight (like under tree canopies) or north-facing garden beds. If your yard lacks shade, create it with a temporary shade cloth until ferns establish. Test the soil moisture—it should feel damp but not soggy when you press your fingers into it.
Use a sharp, narrow trowel to dig a wide circle around the fern’s base, at least 6-8 inches out from the visible fronds. Fern roots spread horizontally, so going wide prevents severing critical growth points. Work the trowel deep—4-6 inches down—to lift the entire root ball without tearing.
Once loosened, slide your hands under the root mass and lift gently. If resistance occurs, dig wider rather than pulling. I keep a bucket of water nearby to immediately place the roots in if they’ll wait more than 10 minutes before replanting. Never let roots dry out—they should glisten with moisture until they’re back in soil.
Dig a hole twice as wide as the fern’s root ball but only as deep. Loosen the sides of the hole with your trowel so roots can penetrate easily. Mix a handful of leaf mold or compost into the removed soil to boost organic matter—ferns thrive in humus-rich, slightly acidic conditions.
Fill the hole with water and let it drain completely before planting. This ensures the surrounding soil is moist, which prevents air pockets around roots. I also sprinkle a thin layer of the amended soil in the bottom of the hole to create a soft landing spot for the roots—this prevents them from bending upward during placement.
Set the fern in the hole so the top of its root ball sits level with the surrounding soil. Backfill with your amended soil, gently firming it around the roots to eliminate air gaps. Don’t tamp it down heavily—ferns need loose soil for their delicate roots to spread.
Water thoroughly until the soil is saturated and forms a small puddle at the base. This settles everything in place. I then add a 2-inch layer of mulch (shredded leaves or pine needles) around—but not touching—the fronds to retain moisture and regulate temperature. The mulch should extend 8-10 inches out from the plant to protect the shallow roots.
Keep the soil consistently moist (but not waterlogged) for the first 4-6 weeks. Check daily by feeling the soil 1 inch deep—if it’s dry, water slowly at the base until it runs off. Ferns wilt dramatically when thirsty but usually recover quickly once watered. Avoid overhead watering, which invites fungal spots on fronds.
Watch for new frond growth—this is your signal the fern has taken hold. If fronds yellow or crisp at the edges, increase shade or humidity temporarily. I mist my transplants lightly every morning for the first week to mimic their native damp forest air. Once you see 3-4 new fronds, your fern is established and needs only routine care.
Transplanting ferns successfully comes down to understanding their woodland nature and replicating those conditions. Here’s what I’ve learned from years of trial and error.
The Temperature Window: Those 50-70°F guidelines in Step 1 aren’t just suggestions—they’re critical. I once tried transplanting during a late spring heatwave when temperatures hit 75°F, and lost half my ferns to transplant shock. The cooler temperatures keep the plants from drying out while their roots re-establish. If you must transplant when it’s warmer, do it at dawn when temperatures are lowest and humidity is highest.
Root Protection Secret: In Step 2, when you’re digging up ferns, the 10-minute window before replanting is your absolute maximum. I keep a spray bottle handy to mist the roots every 2-3 minutes if I can’t plant immediately. The fine mist prevents drying without waterlogging. For larger transplant projects, I use a plastic storage bin lined with damp burlap to hold multiple ferns—this buys me up to 30 minutes of safe holding time.
Soil Contact Matters: When backfilling in Step 4, here’s what nobody tells you—press the soil gently but firmly enough that when you tug very lightly on a frond, the plant doesn’t shift. I use the “knuckle test”: press down with your knuckles until you feel slight resistance. This ensures good soil-to-root contact without compacting the soil too much. The 2-inch mulch layer should feel like a fluffy blanket, not a dense mat.
Establishment Monitoring: During those first 4-6 weeks mentioned in Step 5, I’ve found that ferns tell you exactly what they need if you know how to read them. Drooping fronds in the heat of day but perky in the morning means you’re watering correctly. If they’re still droopy in the morning, you’re underwatering. Yellowing fronds usually indicate too much sun, while brown crispy edges mean either too little humidity or wind exposure. A simple cloche made from a clear plastic bottle (with the bottom cut off) can create the perfect microclimate for struggling transplants.
Spring (early to mid) is ideal when ferns are just emerging, but fall also works before the first frost. Avoid summer heat or winter dormancy—transplanting during these times stresses the plant and lowers survival rates. Mild, moist weather gives roots the best chance to establish.
Expect 4–8 weeks for roots to settle, but full recovery (new frond growth) may take a season. Keep soil consistently moist—not soggy—and provide shade during this period. Patience is key! Some species (like maidenhair ferns) bounce back faster than others (e.g., slow-growing cinnamon ferns).
Don’t panic! Trim dead fronds to redirect energy to roots, and check for underwatering (most common issue) or sunburn. Mist leaves daily and ensure the root ball stays damp. If the crown (base) remains firm, it’s likely recovering. Mushy stems? Rot may be setting in—reduce water and improve drainage.
Yes, but it’s much slower (1–3 years to mature)! Collect spores from frond undersides in late summer, sow on sterile peat moss, and keep humid under glass. Transplanting adults is easier for instant greenery. Spores are fun for patient gardeners or rare species propagation.
Most native ferns (like ostrich or Christmas ferns) spread slowly via rhizomes but won’t become invasive. To control growth, plant in containers sunk into the ground or divide clumps every 3–4 years. Avoid aggressive species like bracken fern if you’re worried about sprawl.
