
Beautiful Plants For Your Interior
Beautiful Plants For Your Interior
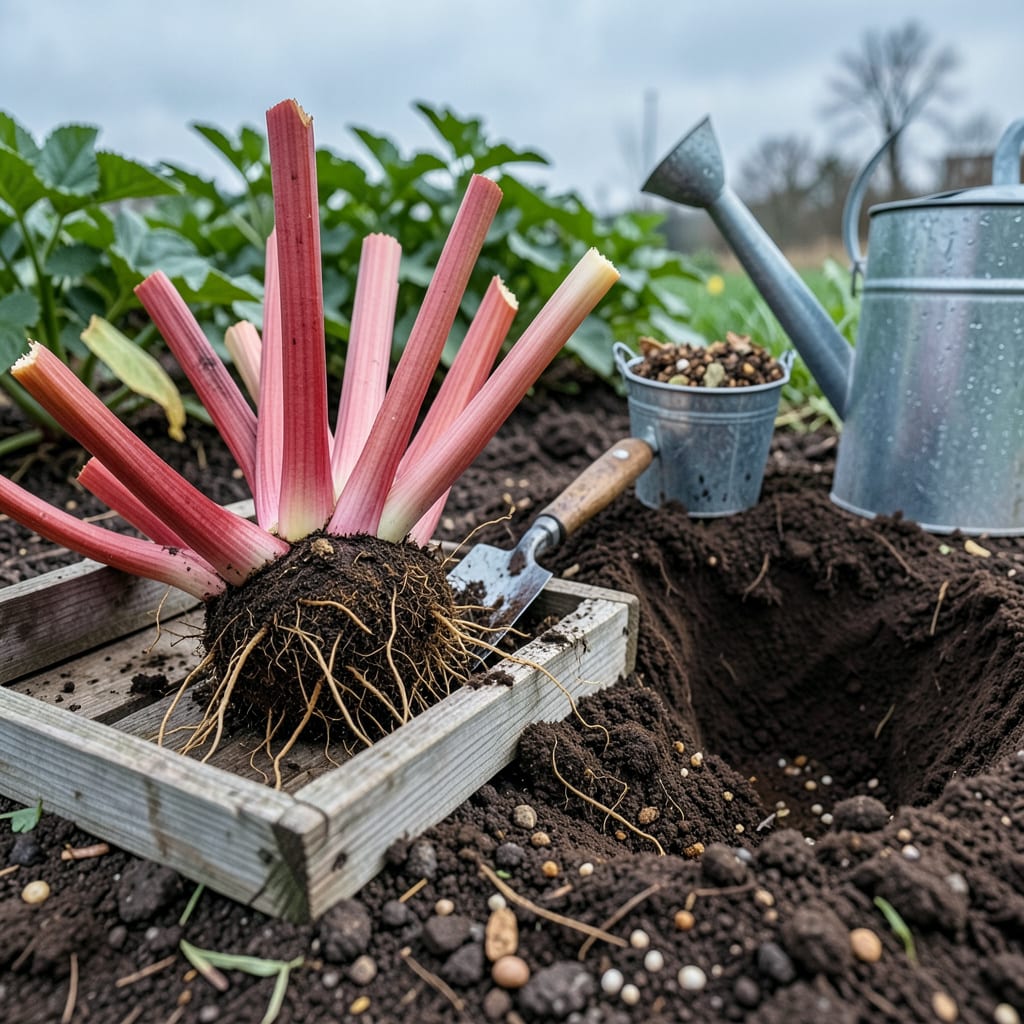
Moving rhubarb feels like a gamble—until you realize it’s the secret to thicker, sweeter stalks for years. I’ve relocated my patch three times, and each move resulted in more vigorous growth the following season. The key is timing: early spring or fall, when the plant is dormant but the soil is workable.
What most guides don’t tell you? Rhubarb crowns are tougher than they look. You’ll dig up what appears to be a tangled mess of roots, but with the right technique, those divisions establish faster than store-bought plants. Within 4-6 weeks, you’ll see new red shoots pushing through the soil—proof your transplant took hold.
📚 In This Guide
This method ensures your rhubarb thrives in its new location with minimal stress and maximum stalk production next year.
Early spring or late fall—when plants are dormant—is ideal for transplanting. I aim for 4-6 weeks before the last frost in spring or 4-6 weeks after the first frost in fall. This timing prevents shock during active growth periods when the plant’s energy is focused on stalk production.
The new site must receive full sun (6+ hours daily) and have well-draining soil. Rhubarb crowns rot quickly in soggy conditions. Test drainage by digging a 12-inch deep hole, filling it with water, and timing how long it takes to empty. Anything over 2 hours indicates poor drainage that needs amending.
Begin by cutting back all stalks to 6 inches above the crown using clean pruners. This reduces water loss through transpiration and directs energy to root establishment. Dig a 18-inch wide by 12-inch deep hole at the new location—rhubarb roots spread horizontally more than vertically.
Mix the excavated soil with 2-3 inches of compost to improve fertility. I avoid fresh manure, which can burn tender roots. Create a small mound at the hole’s center where the crown will sit—this prevents the bud (where new stalks emerge) from being buried too deeply, which delays spring growth.
Use a sharp spade to dig 12-15 inches outward from the crown’s base, working in a circle to avoid severing major roots. Once loosened, lift the entire plant carefully. Shake off excess soil to expose the crown’s structure—you’ll see multiple buds (eyes) where stalks emerge.
For established plants (3+ years old), I divide the crown into sections with 2-3 buds each using a clean knife. Each division should include a portion of the root system. Smaller divisions produce thinner stalks initially but establish faster than oversized sections that struggle to regenerate roots.
Place the crown (or divisions) on the prepared mound so the buds sit 1-2 inches below soil level. Backfill with your soil-compost mix, firming gently to eliminate air pockets. Create a 3-inch high watering basin around the plant’s perimeter to direct moisture toward roots during establishment.
Water immediately with 1-2 gallons per plant until the soil is saturated to a 6-inch depth. The goal is to settle the soil around roots while providing deep moisture that encourages downward growth. I add a 2-inch mulch layer of straw or shredded leaves to conserve moisture and suppress weeds, keeping it 3 inches away from the crown to prevent rot.
Keep the soil consistently moist but not waterlogged for the first 4-6 weeks. You’ll know the plant has established when you see new leaf growth emerging from the buds. Avoid harvesting any stalks during the first year—this allows the plant to rebuild its root system and energy reserves.
Apply a balanced 10-10-10 fertilizer at half strength when leaves reach 12 inches tall, then again 6 weeks later. Watch for yellowing leaves, which typically indicate either overwatering or nitrogen deficiency. By the second year, your transplanted rhubarb will produce thicker, more vigorous stalks than ever.
Transplanting rhubarb successfully comes down to timing and technique—here’s what I’ve learned from years of trial and error.
Timing is Everything: The 4-6 week window before last frost or after first frost in Step 1 isn’t arbitrary. I’ve found that transplanting during active growth (when stalks are emerging) sets the plant back by an entire season. Use your local frost dates as a guide, not just calendar dates—microclimates can vary significantly even within the same region. A soil thermometer reading of 40°F at 6 inches deep confirms ideal conditions.
Root System Protection: When digging the 12-15 inch circle around the crown in Step 3, work methodically in sections rather than trying to lift the entire plant at once. I use a horizontal cutting motion with my spade at about 10 inches deep to sever peripheral roots cleanly. This preserves the critical central root mass that supports initial establishment. For older plants, you’ll feel resistance from woody roots—this is normal and indicates healthy root development.
Watering Wisdom: The 1-2 gallons per plant immediately after transplanting in Step 4 should be applied slowly over 10-15 minutes, not all at once. I use a gentle stream from a watering can, moving around the watering basin to ensure even saturation. Check moisture depth by inserting a wooden dowel—it should come out moist at the 6-inch mark. Overhead watering during the first 4-6 weeks can promote fungal issues, so keep water directed at the soil level.
Establishment Monitoring: During those critical first 4-6 weeks mentioned in Step 5, pay attention to leaf color and turgor. New growth should be medium green and firm to the touch. Yellowing edges suggest overwatering, while curled or limp leaves indicate underwatering. I maintain a journal tracking daily temperatures and precipitation—rhubarb establishes fastest when soil temps stay between 50-60°F consistently.
The ideal time is early spring (as soon as the ground thaws) or late fall (4-6 weeks before frost). Avoid transplanting in summer heat or while the plant is actively flowering. Cool, damp conditions help roots establish faster.
It’s risky! Summer heat stresses plants, even with extra water. If you must move it, choose a cloudy day, trim leaves to reduce stress, and water deeply for 2+ weeks. Expect slower recovery or smaller harvests next year.
Place crowns 1-2 inches below soil surface—burying too deep can rot the buds, while shallow planting dries them out. Ensure the top of the crown (where stalks emerge) is just covered. Use loose, compost-rich soil for best results.
Common causes:
Dividing while transplanting is efficient. Use a sharp spade to split crowns into 3-4 bud sections. Discard woody centers and replant healthy outer pieces. This rejuvenates old plants too!
