
Beautiful Plants For Your Interior
Beautiful Plants For Your Interior
That moment when your aloe outgrows its pot is both exciting and nerve-wracking. I’ve transplanted dozens of these resilient plants, and the difference between a thriving transplant and a struggling one comes down to three critical moves: timing, root care, and the right new home. Aloe plants bounce back fast when you handle them properly—we’re […]
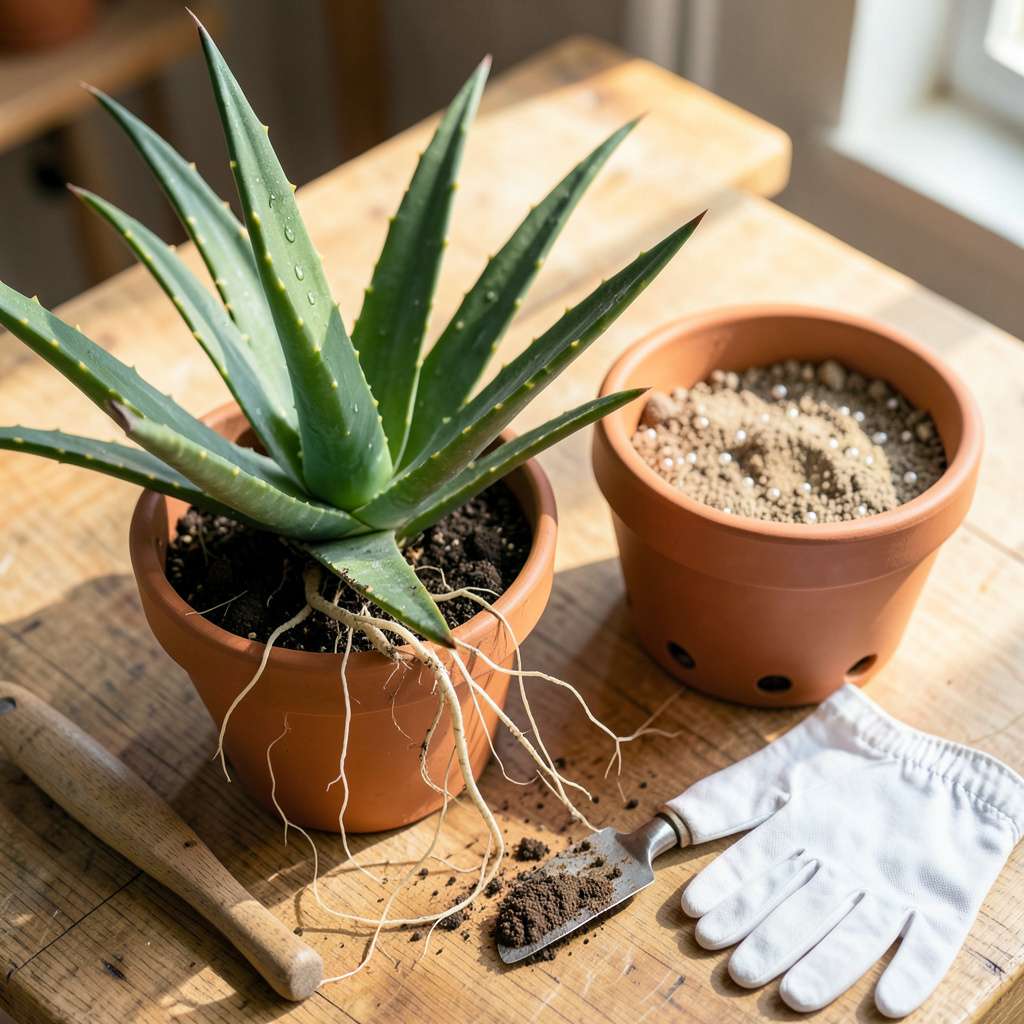
That moment when your aloe outgrows its pot is both exciting and nerve-wracking. I’ve transplanted dozens of these resilient plants, and the difference between a thriving transplant and a struggling one comes down to three critical moves: timing, root care, and the right new home. Aloe plants bounce back fast when you handle them properly—we’re talking new growth in 2-3 weeks instead of months.
Here’s the thing—most people rush this process and end up with limp, sad plants. The secret isn’t fancy tools or expensive soil; it’s working with the plant’s natural rhythm. Dry soil slips off roots cleaner, calloused cuts heal faster, and a slightly snug pot prevents rot better than you’d expect. My first aloe transplant looked like a science experiment gone wrong until I learned these simple adjustments.
You’ll know you nailed it when the leaves perk up within days and the plant starts pushing out fresh, firm growth. The best part? A properly transplanted aloe will reward you with faster pups, thicker leaves, and that satisfying hefty feel when you lift the pot. No more tipping over or drying out between waterings.
Works for overgrown mama plants, rescued grocery store aloes, or pups you’re separating for the first time. The same principles apply whether you’re moving to a 6-inch pot or a 2-gallon container—just scale up the patience with the pot size. Let’s get those roots happy in their new space.
📚 In This Guide
Here’s my tried-and-true method for moving your aloe plants without stress—works every time.
Choose a pot that’s 1-2 inches wider than the current one, with drainage holes at the base. Aloe roots rot quickly in standing water, so drainage isn’t optional. I use unglazed terra cotta because it wicks away excess moisture through the pot walls.
Fill the new container one-third full with a well-draining cactus/succulent mix. Don’t use regular potting soil—it holds too much moisture. I like to blend in 30% perlite or coarse sand for even better drainage. Moisten the mix slightly so it’s damp but not wet.
Water your aloe lightly 1-2 days before transplanting—this helps the root ball hold together. Turn the pot sideways and tap the rim on a table edge to loosen the plant. Slide it out carefully; if it resists, run a butter knife around the inner edge to free the roots.
Hold the plant by its base, not the leaves (they’re fragile and can snap). Brush off the old soil gently—don’t wash the roots, as this removes beneficial microbes. You’ll see thick, fleshy roots; any that are black or mushy should be trimmed away with clean scissors.
Place the aloe in the new pot so the base sits ½ inch below the rim—this prevents water from pooling around the stem. The top of the root ball should be level with the soil surface. Fill around the roots with your mix, pressing lightly to eliminate air pockets.
Don’t water immediately. Wait 3-5 days before the first watering—this lets any damaged roots callous over and prevents rot. You’ll know it’s ready when the soil feels completely dry to the touch. Set the plant in bright, indirect light for a week to reduce transplant shock.
After the initial waiting period, water deeply but infrequently—only when the soil is bone-dry down to your first knuckle. Aloe stores water in its leaves, so overwatering is the biggest risk. I check mine every 10-14 days in summer, less in winter.
Watch for signs of stress: yellowing leaves mean too much water, while wrinkled leaves indicate thirst. If the plant leans, it’s reaching for light—rotate the pot quarter-turn weekly for even growth. You’ll see new growth in 4-6 weeks, which means your transplant was successful.
Transplanting aloe doesn’t have to be stressful—these practical insights will help your plant thrive in its new home.
Pot Selection Secret: I’ve learned through experience that terra cotta pots work best for aloe because they breathe, allowing excess moisture to evaporate through the walls. While plastic pots might seem convenient, they trap moisture and increase rot risk. The 1-2 inch size increase mentioned in Step 1 is crucial—too much extra space holds unnecessary moisture around the roots.
Root Handling Technique: When removing your aloe in Step 2, resist the urge to pull it out by the leaves. I made this mistake early on and lost several plants to snapped leaves. Instead, support the base firmly while gently working the pot off the root ball. If roots are tightly bound, make clean cuts with sterilized scissors rather than tearing them—this reduces transplant shock significantly.
Post-Transplant Care: The 3-5 day waiting period before watering in Step 3 might feel counterintuitive, but it’s the most critical step. I’ve found that aloe plants actually establish better when slightly thirsty initially—it forces them to grow new roots searching for moisture. During this time, keep the plant in bright but indirect light; direct sun can stress the plant while it’s vulnerable.
Long-Term Success: After transplanting, I recommend marking your calendar for the 4-6 week mark mentioned in Step 4. That’s when you should see new growth emerging from the center—a clear sign your transplant was successful. Until then, be patient and resist the urge to fertilize; aloe plants need time to recover before they can process additional nutrients.
Got questions about transplanting your aloe? You’re not alone! Here are the most common concerns—and quick answers—to help your spiky friend thrive.
Aim for spring or early summer when aloe is actively growing. Avoid winter—cold stress slows recovery. If your plant is root-bound (roots circling the pot) or top-heavy, transplant ASAP regardless of season, but keep it indoors in stable temps.
Nope! Aloe hates soggy roots. Use a well-draining mix: 50% cactus/succulent soil + 50% perlite/pumice. Avoid garden soil or moisture-retentive blends—they cause rot. Pre-mixed “succulent soil” works too!
Check for these signs:
If yes, upsize the pot by 1–2 inches in diameter.
Don’t panic! Mild wilting is normal (transplant shock). Yellow leaves? Usually overwatering. Wait 5–7 days before watering, ensure bright indirect light, and trim mushy leaves. Recovery takes 2–4 weeks.
Absolutely! If your aloe has pups (baby plants), twist them off gently at the base, let cuts callus (2–3 days), then pot in dry soil. Skip watering for a week. Bonus: Pups grow faster than seeds!
Transplanting aloe doesn’t have to be intimidating—just remember gentle handling, well-draining soil, and patience are your best tools! 🌱 With the right steps, your aloe will not only survive the move but thrive in its fresh home, rewarding you with lush, healing leaves for years.
Now that you’re equipped with the know-how, grab your trowel and give it a try! If you’re feeling extra ambitious, consider propagating those aloe pups you removed—double the plants, double the green-thumb pride. Happy planting! 🌿
