
Beautiful Plants For Your Interior
Beautiful Plants For Your Interior
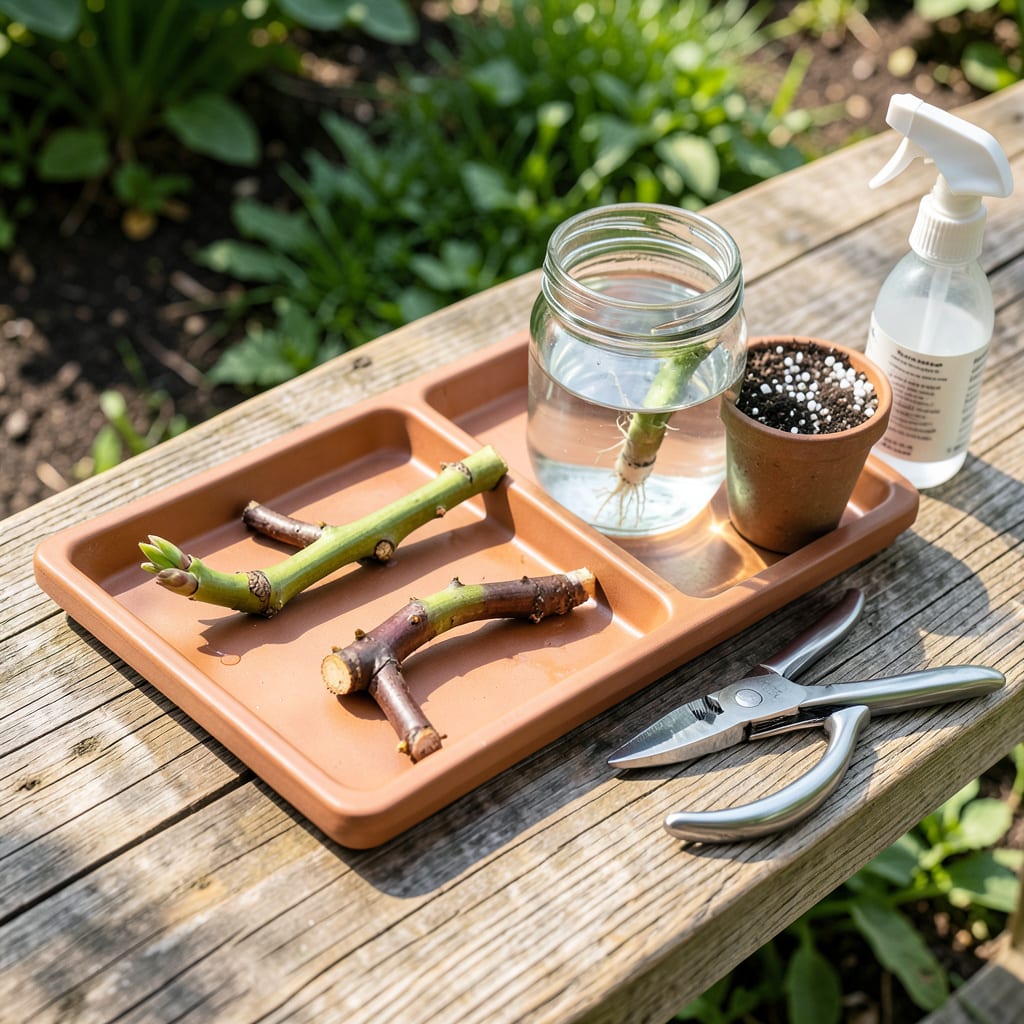
I’ve rooted dozens of fig cuttings this way with near-perfect success. Water propagation removes the guesswork, letting you watch roots form before transplanting.
This method requires just a healthy clipping, clean water, and patience. Within 3-4 weeks, you’ll see white roots emerging, ready for soil. No special tools, no complicated steps—just reliable results.
📚 In This Guide
Here’s the water propagation method I use every time with near-perfect success rates.
Choose a healthy pencil-thick stem from last year’s growth, ideally 6-8 inches long with 3-4 nodes. The cutting should have a mix of green and brown bark—completely green stems often rot, while fully brown ones may be too old to root. I always take cuttings in early spring when the plant is just breaking dormancy.
Use clean, sharp pruners to make a 45-degree cut just below a node. Remove all leaves from the lower half, leaving 2-3 leaves at the top to continue photosynthesis. This reduces moisture loss while maintaining enough foliage to feed the cutting during root development.
Fill a clean glass container with room-temperature water, submerging only the bottom 1-2 nodes. The water level should never touch the remaining leaves. I use filtered or distilled water to eliminate chlorine, which can inhibit root formation. Change the water every 3-4 days to prevent bacterial growth.
Place the container in a spot with bright, indirect light at 65-75°F. Direct sun will overheat the water and cook the cutting. You’ll see the first signs of root development—tiny white bumps—emerging from the nodes within 2-3 weeks.
Once roots reach 1-2 inches long, your cutting is ready for the next phase. This typically takes 4-6 weeks total. I check progress daily by lifting the cutting slightly to inspect the roots. Don’t be alarmed if some roots appear brown—that’s normal as long as new white roots continue growing.
If the water turns cloudy before your scheduled change, replace it immediately. Cloudiness indicates bacterial growth that can rot your cutting. Add a few drops of hydrogen peroxide to the water (1 tsp per cup) if you notice any funky smells or slimy residue.
Prepare a small pot with well-draining potting mix. Create a hole with your finger and gently place the cutting in, firming the soil around the base. Water thoroughly until it drains from the bottom. I always use a chopstick to make the planting hole first—this prevents damaging the delicate new roots.
Keep the soil consistently moist (not soggy) for the first 2 weeks while the roots adapt to their new environment. Maintain high humidity by covering the pot with a plastic bag or placing it in a propagation box. Remove the cover for 1 hour daily to prevent mold.
After 2-3 weeks in soil, gradually acclimate your new plant to normal conditions. Start by removing the humidity cover for increasingly longer periods each day. Once new leaf growth appears, you’ll know the plant has successfully transitioned.
Move the pot to a location with 6+ hours of direct sun daily. Figs are tough, but young plants need protection from strong afternoon sun for the first month. I fertilize lightly with a balanced liquid fertilizer (half-strength) after the first month to encourage strong growth.
These subtle adjustments can dramatically improve your success rate with water propagation.
Cutting Selection Secret: In Step 1, that 45-degree cut just below a node isn’t just for aesthetics—it maximizes the surface area for root emergence while preventing water from pooling on the cut surface, which can lead to rot. I’ve found that stems with a mix of green and brown bark root most reliably, as they’re mature enough to handle the stress but still young enough to respond to propagation.
Water Quality Insight: The 3-4 day water change schedule in Step 2 is non-negotiable. I learned the hard way that even crystal-clear water can harbor bacteria that will rot your cutting. If you notice cloudiness before the 3-4 day mark, change it immediately. That 1 tsp per cup hydrogen peroxide trick can save a cutting that’s starting to smell funky.
Light and Temperature Precision: That 65-75°F range in Step 2 is the sweet spot—any cooler and root growth stalls, any hotter and you risk cooking the cutting. Bright, indirect light is equally crucial; direct sun through a window can raise water temperature by 10-15°F in minutes. I use a north-facing windowsill or a spot about 6 feet from a south-facing window.
Transition Timing: Don’t rush moving to soil in Step 4 just because you see roots. Wait until they’re truly 1-2 inches long—this typically happens right at that 4-6 week mark. The first 2 weeks in soil are critical, so maintain that humidity dome religiously, remembering to remove it for exactly 1 hour daily to prevent mold while still allowing the plant to acclimate.
Yes! While water propagation is popular, you can root fig clippings directly in well-draining soil. Keep the soil moist (not soggy) and provide warmth for best results. Soil-rooted cuttings may establish faster once planted.
Typically, roots appear in 2–4 weeks, but it can vary. Warmer temperatures (70–80°F) and bright, indirect light speed up the process. Change the water every 3–5 days to prevent bacteria.
Late winter or early spring is ideal, just before new growth starts. This aligns with the tree’s natural growth cycle, increasing success rates. Avoid extreme heat or cold.
Common issues include old wood (use green, flexible stems), cold temps, or poor light. Trim the cutting’s end and refresh the water. If rot appears, start fresh with a new clipping.
Not required, but it can boost success, especially for harder-to-root varieties. Dip the cut end in hormone powder before placing it in water or soil for faster root development.
