
Beautiful Plants For Your Interior
Beautiful Plants For Your Interior
That moment when a single cutting transforms into a cascading waterfall of pearls? Pure magic. I’ve propagated string of pearls more times than I can count, and the method that consistently delivers lush, trailing growth is simpler than most gardeners realize. No fancy equipment, no horticulture degree—just a few strategic cuts and the right conditions. […]
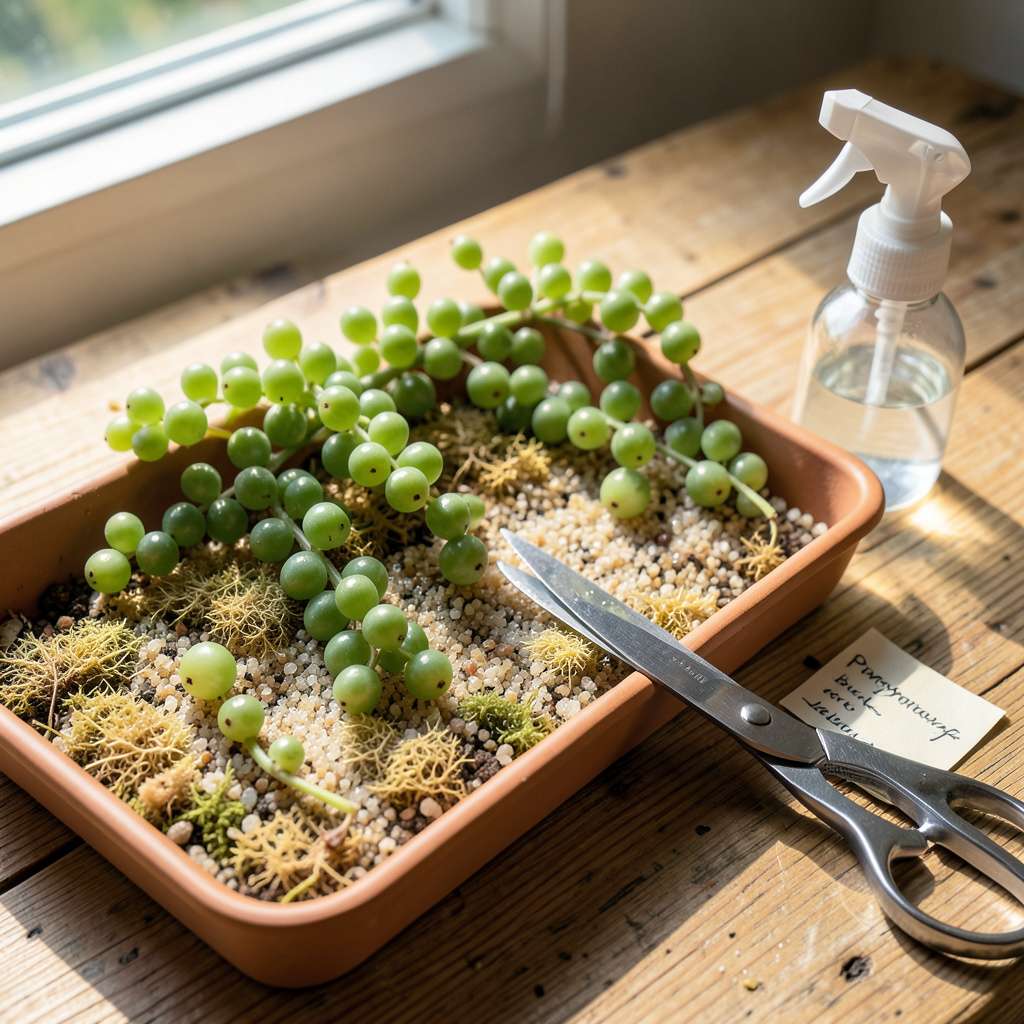
That moment when a single cutting transforms into a cascading waterfall of pearls? Pure magic. I’ve propagated string of pearls more times than I can count, and the method that consistently delivers lush, trailing growth is simpler than most gardeners realize. No fancy equipment, no horticulture degree—just a few strategic cuts and the right conditions.
Here’s the thing—this plant practically wants to multiply. My first attempt failed because I overcomplicated it (learned that the hard way). Now I know the sweet spot: 4-inch cuttings, calloused ends, and a well-draining mix that mimics their native habitat. The roots appear faster than you’d expect, often within 2-3 weeks, and those little beads start plumping up almost immediately.
What you’ll end up with are multiple thriving plants from one parent, each developing those signature trailing stems that can grow 3-4 feet long in a season. The satisfaction of watching new growth emerge from cuttings you rooted yourself never gets old—especially when friends ask where you bought your “expensive” plants.
Works equally well for beginners and seasoned growers, whether you’re filling a hanging basket or expanding your succulent collection. The key is patience during those first two weeks when nothing seems to happen—then suddenly, you’ve got roots.
📚 In This Guide
Well-draining cactus/succulent soil mix (2–3 cups)
Rooting hormone powder/gel (e.g., Clonex or Hormex) to speed up growth ✨
This method delivers reliable results every time—no guesswork, just healthy new plants ready to cascade.
Choose a mature, vigorous strand with plump, uniformly green “pearls” (those are the modified leaves). Avoid sections with shriveled or yellowing beads, as they indicate stress and reduce propagation success. Using clean scissors, snip a 4-6 inch segment just below a leaf node—the tiny brown bump where roots will emerge.
Let the cuttings callous for 24-48 hours in a warm, dry spot. You’ll know they’re ready when the cut end develops a thin, white film. This critical step prevents rot when you introduce moisture. I lay mine on a paper towel away from direct light during this period.
Fill a shallow tray or small container with 1-2 inches of clean water. Place the calloused cuttings on the water’s surface so only the bottom 1/4 inch touches the liquid. The pearls should remain completely dry to prevent rot. Use room-temperature water—cold shocks the plant and delays rooting.
Position the tray in bright, indirect light (an east-facing windowsill works perfectly). You’ll see tiny white root nubs emerge from the nodes within 2-3 weeks. Change the water every 5-7 days to prevent bacterial growth. If the water looks cloudy before then, replace it immediately.
Once roots reach 1-2 inches long, prepare a well-draining mix of 50% cactus/succulent soil and 50% perlite or pumice. Moisten the mix lightly—it should feel like a wrung-out sponge. Create small planting holes with a pencil to avoid breaking the delicate new roots.
Lay the rooted cuttings on the soil surface, gently pressing the rooted nodes into the pre-made holes. Don’t bury the pearls—they’ll rot if covered. The roots will naturally anchor themselves within 7-10 days. Mist the surface lightly but avoid soaking until you see new growth.
Place the newly potted cuttings in bright, indirect light for 6-8 hours daily. A sheer curtain over a south-facing window creates ideal conditions. Water only when the top 1-2 inches of soil feel completely dry—typically every 10-14 days in average home conditions.
Rotate the pot a quarter turn weekly to ensure even growth. You’ll notice new pearls forming along the strand within 3-4 weeks, signaling successful establishment. Once strands reach 6-8 inches long, you can begin light pruning to encourage bushier growth if desired.
After 8-12 weeks, treat your propagated string of pearls like a mature plant. Fertilize monthly during the growing season with a diluted succulent fertilizer (half-strength). Watch for etiolated growth (elongated spaces between pearls), which indicates insufficient light—move to a brighter location immediately.
Repot annually in fresh soil mix to prevent compaction. When strands become overly long, take new cuttings from the healthiest sections to propagate again. This renewal process keeps your plant vigorous and provides endless new starts to share or expand your collection.
After propagating countless string of pearls plants, we’ve learned what truly makes the difference between success and disappointment.
Callousing Technique: The 24-48 hour callousing period in Step 1 isn’t just waiting time—it’s when the plant forms a protective barrier against rot. We’ve found that placing cuttings on a paper towel in a warm kitchen cabinet (not direct sun) creates the ideal environment. The white film should form evenly across the entire cut surface before moving to water.
Water Temperature Matters: In Step 2, room-temperature water is critical because cold water can shock the delicate cuttings and delay root development by up to a week. We use filtered water to avoid chlorine stress, and we’ve noticed faster rooting when we change the water every 5 days rather than waiting the full 7 days—fresh water means more oxygen for the developing roots.
Soil Transition Timing: When you see those 1-2 inch roots in Step 3, resist the urge to plant immediately if the roots look fragile. Wait until they’re firm enough to handle without breaking. We create pencil holes in the soil mix at a 45-degree angle—this allows the cutting to settle naturally while keeping the pearls above soil level, preventing accidental burial that leads to rot.
Light Consistency: The 6-8 hours of bright, indirect light mentioned in Step 4 is non-negotiable for preventing etiolated growth. We’ve had best results using a sheer white curtain over a south-facing window—it diffuses the light perfectly. If you notice the new pearls forming with more space between them, increase light exposure immediately by moving the plant closer to the window or adding a grow light for 2-3 hours in the evening.
Most cuttings develop roots in 2–4 weeks when kept in bright, indirect light and lightly moist soil. Water propagation may show roots slightly faster (10–14 days), but soil-grown cuttings often establish stronger systems. Patience is key—avoid tugging to check roots, as this can disrupt growth!
Yes! Water propagation works well—just submerge the cut ends (1–2 nodes) in room-temperature water, changing it weekly to prevent bacteria. However, transitioning water-rooted cuttings to soil can be tricky. For best results, start in soil or move them once roots reach 1–2 inches long.
Brown/mushy stems usually mean overwatering or poor drainage. Let cuttings callus for 1–2 days before planting, use a gritty mix (like cactus soil + perlite), and water only when soil is bone-dry. If rot spreads, trim affected areas and restart with fresh cuttings.
Spring or early summer (active growing season) yields the fastest results. Avoid winter propagation—cooler temps slow growth, and cuttings may rot before rooting. If propagating indoors year-round, use a grow light to mimic summer conditions.
Technically yes, but it’s much slower and less reliable. A single bead may sprout roots, but a stem cutting with 3–4 beads has stored energy for faster growth. For best success, use healthy stems—save single-bead experiments for fun side projects!
Propagating your string of pearls is easier than you think—just a little patience and the right technique will reward you with endless trailing beauty! 🌱 Whether you chose water or soil propagation, remember: bright, indirect light and gentle care are your best friends for success.
Now that you’ve got the know-how, why not pick your healthiest stem and give it a try? Share your progress with fellow plant lovers or experiment with different methods to see what works best for you. Happy propagating—your future lush, cascading plant is just a snip away! ✂️✨
