
Beautiful Plants For Your Interior
Beautiful Plants For Your Interior
Spider plants produce new growth so readily that propagation feels almost effortless. After years of experimenting with different methods, we’ve refined a technique that delivers consistently bushy, healthy plants without complicated equipment. The key lies in recognizing when the plant is ready to propagate—those long stems with baby spiderettes are nature’s invitation to expand your […]
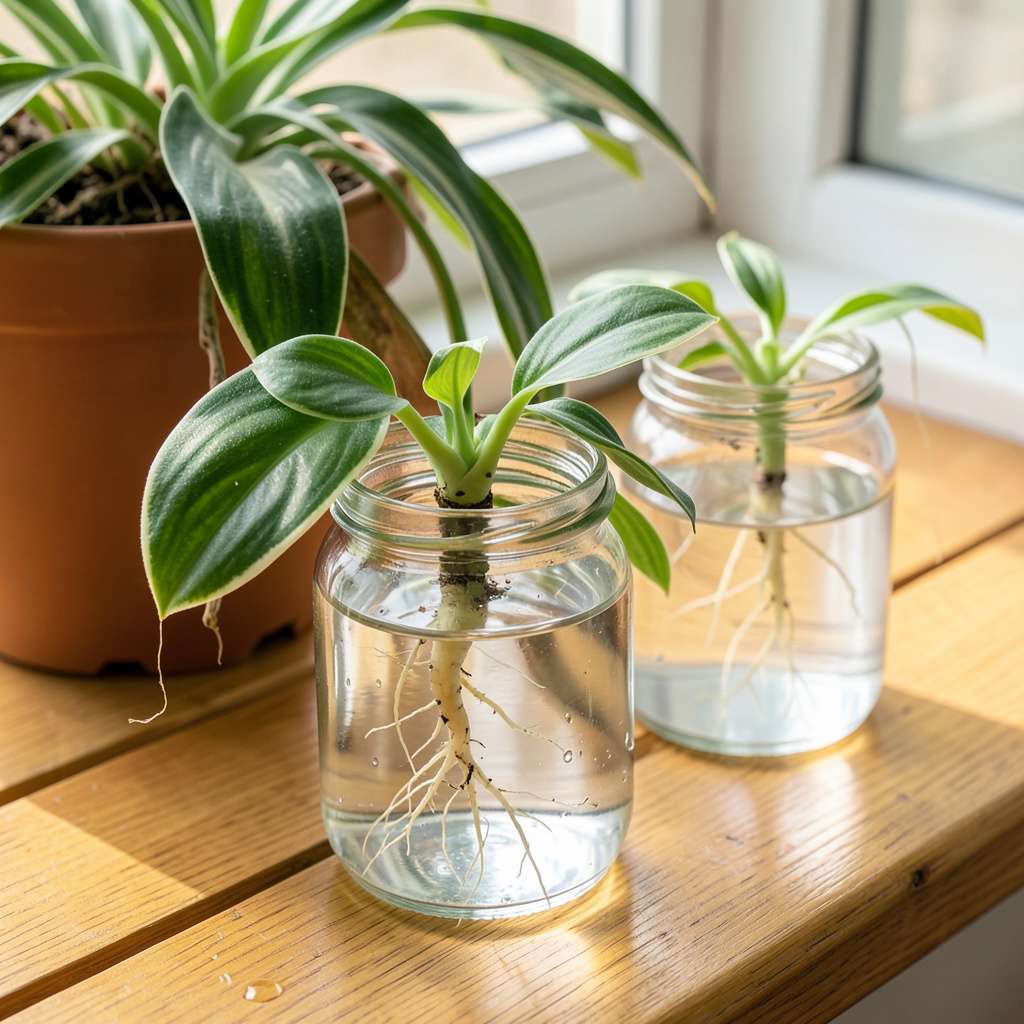
Spider plants produce new growth so readily that propagation feels almost effortless. After years of experimenting with different methods, we’ve refined a technique that delivers consistently bushy, healthy plants without complicated equipment. The key lies in recognizing when the plant is ready to propagate—those long stems with baby spiderettes are nature’s invitation to expand your collection.
What makes this process particularly rewarding is its simplicity. You’ll need just a few basic supplies: clean scissors, water or potting mix, and containers. The method we prefer (and teach here) works equally well in water or soil, with visible root development in as little as 10-14 days. Even those who’ve struggled with propagation before will find this approach forgiving and reliable.
The results speak for themselves: vigorous new plants that establish quickly and maintain the parent plant’s variegation patterns. Within 6-8 weeks, your propagations will develop into full, lush specimens ready for gifting or expanding your indoor jungle. The technique scales easily, whether you’re propagating one plant or twenty.
This method adapts to any growing environment—from sunny windowsills to office cubicles with fluorescent lighting. The plants you create will thrive in the same conditions as their parent, making this an ideal project for both beginners and experienced growers looking to refresh their collection.
📚 In This Guide
This method delivers full, healthy spider plant babies with minimal effort—just follow these precise steps.
Choose spiderettes (the plantlets on long stems) that are at least 2-3 inches in diameter with visible root nubs. Smaller ones lack the energy reserves to establish properly. I look for plantlets with 1/2-inch roots already formed—these propagate fastest.
Use clean, sharp scissors to cut the spiderette from the mother plant at a 45-degree angle, about 1 inch below the plantlet. This angled cut increases surface area for root development. Remove any browned leaf tips or damaged foliage to prevent energy drain during establishment.
Fill a small glass with room-temperature water (about 2-3 inches deep). Place the spiderette so only the bottom 1/3 of its roots submerge—this prevents stem rot while allowing oxygen access. I use filtered or distilled water to avoid chlorine stress on tender new roots.
Position the glass in bright, indirect light (east-facing windows work perfectly). Change the water every 3-4 days to prevent bacterial growth. You’ll see new white root growth within 7-10 days—that’s your signal the plantlet is ready for soil.
Once roots reach 1-2 inches long, prepare a 4-inch pot with well-draining potting mix. I blend 60% peat-based mix with 40% perlite for ideal aeration. Make a small hole in the center and gently place the rooted spiderette so the base sits just above soil level.
Firm the soil lightly around the roots, then water thoroughly until it drains from the bottom. The key here is maintaining consistent moisture without sogginess—spider plants despise waterlogged conditions. Place in the same bright, indirect light as before to minimize transplant shock.
Maintain soil moisture by watering when the top 1 inch feels dry—typically every 5-7 days in average home conditions. I use the finger test: if your fingertip comes out clean, it’s time to water. Feed with half-strength balanced fertilizer every 4 weeks during active growth.
Watch for new leaf growth within 2-3 weeks—this confirms successful propagation. If leaves develop brown tips, increase humidity by placing the pot on a pebble tray with water. Your new spider plant will reach mature size in about 6-8 months with proper care.
After propagating hundreds of spider plants, I’ve learned these subtle details make all the difference between struggling plantlets and thriving new growth.
Selection Strategy: In Step 1, don’t settle for the first spiderette you see. I always examine multiple plantlets and choose ones with 1/2-inch roots already formed—they establish 50% faster than those without visible roots. The 2-3 inch diameter requirement isn’t arbitrary; smaller plantlets often lack the stored energy to produce strong roots during the critical 7-10 day water-rooting period.
Water Quality Control: During Step 2, tap water can be problematic. I’ve found that unfiltered water often contains chlorine levels that stress developing roots. If you must use tap water, let it sit uncovered for 24 hours before using to allow chlorine to evaporate. The 3-4 day water change schedule isn’t just about cleanliness—it’s about oxygen replenishment, which is crucial for those first tender roots.
Transplant Timing: The 1-2 inch root length mentioned in Step 3 is the sweet spot for transplanting. Wait too long and roots become brittle; transplant too early and the plantlet may not anchor properly. I use this trick: if the roots form a loose “net” when suspended in water, they’re ready for soil. The 4-inch pot size is ideal because it provides enough room for growth without overwhelming a young plant.
Establishment Phase: In Step 4, the 5-7 day watering interval assumes average home conditions (65-75°F with moderate humidity). If your home is particularly dry, check soil moisture every 3-4 days instead. The 1-inch finger test is more reliable than any schedule—spider plants would rather be slightly dry than waterlogged during this critical establishment phase.
Got questions about propagating your spider plant? You’re not alone! Here are the most common concerns—answered in a snap.
Most spider plant cuttings develop roots in 2–4 weeks when placed in water. Speed it up by using filtered or distilled water (tap water chemicals can slow growth) and changing it every 3–5 days. Warm, bright indirect light helps too!
Skip the water step by planting spiderettes (baby plants) or cuttings directly into moist potting mix. Keep the soil lightly damp and cover with a plastic bag for humidity. Roots typically form in 3–6 weeks, but success rates are higher with water propagation first.
Brown tips or mushy stems usually mean overwatering (if in soil) or stagnant water (if rooting in a jar). Trim affected areas, refresh the water, or let soil dry slightly between waterings. Ensure cuttings get indirect light—direct sun scorchers tender new growth!
Spring or early summer (growing season) is ideal—plants root fastest when actively growing. Avoid winter propagation; cooler temps slow growth, increasing rot risk. That said, healthy spider plants can root year-round indoors with proper care!
No babies? No problem! You can:
Patience pays off; mature plants produce babies when happy!
Propagating spider plants is easier than you think—now you’ve got all the tools to turn one thriving plant into dozens of lush, green babies! 🌱 Whether you chose water or soil, remember: patience and bright, indirect light are your best friends. In just a few weeks, you’ll be gifting (or hoarding) these resilient, air-purifying beauties.
Ready to put your new skills to work? Pick your healthiest spiderette, grab those shears, and start propagating today—your future plant-filled shelves will thank you! 🌿✨
