
Beautiful Plants For Your Interior
Beautiful Plants For Your Interior
Free plants from the ones you already love—it’s the gardener’s best-kept secret. I’ve filled my entire landscape with shrubs propagated from single parent plants, saving hundreds while creating a cohesive, mature look faster than you’d believe. The right technique turns one hydrangea into a dozen, or a single azalea into a living hedge. Here’s the […]
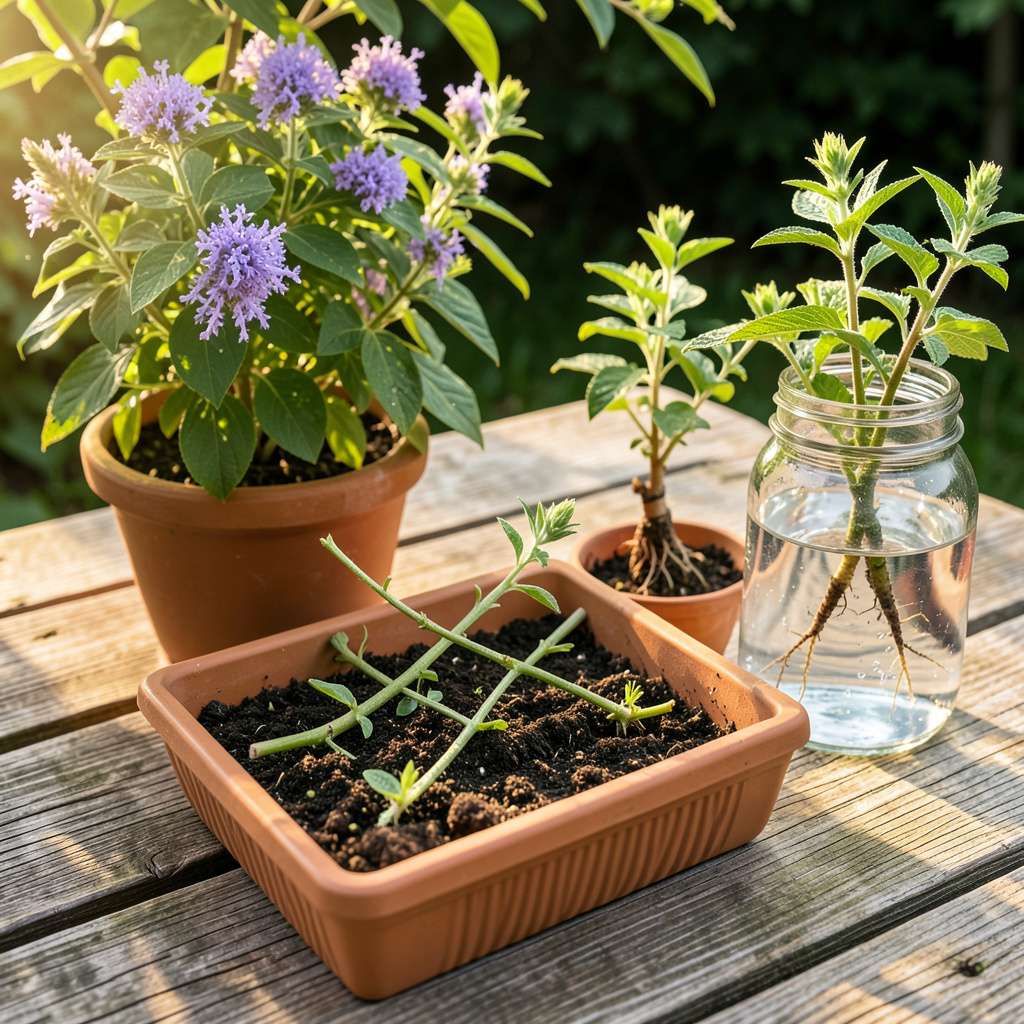
Free plants from the ones you already love—it’s the gardener’s best-kept secret. I’ve filled my entire landscape with shrubs propagated from single parent plants, saving hundreds while creating a cohesive, mature look faster than you’d believe. The right technique turns one hydrangea into a dozen, or a single azalea into a living hedge.
Here’s the thing—propagation isn’t just for experts with greenhouses. My first successful cuttings rooted in a repurposed yogurt container on my kitchen counter. You need sharp pruners, the right timing (early morning cuts work best), and patience during the 4-8 week rooting period. Some methods work in 30 days, others take a full season.
What you’ll end up with are genetically identical plants that match your existing landscape perfectly. No guessing if that new shrub will complement your garden—they’re clones of what’s already thriving. I’ve watched propagated lilacs bloom in their second year and boxwoods fill in gaps where store-bought plants failed.
Works for evergreens, flowering shrubs, and even some tricky varieties like camellias. The same principles apply whether you’re expanding a hedge, replacing dead plants, or sharing favorites with neighbors. Let’s get those cuttings started!
📚 In This Guide
1 part perlite or vermiculite (for drainage),
With the right technique, you can transform a single shrub into dozens—here’s how to do it with confidence.
Choose a vigorous, disease-free shrub that’s at least two years old. I focus on new growth—those flexible green stems that haven’t yet developed woody bark. The ideal cutting should be 4-6 inches long with at least three sets of leaves. Always use sharp, sterilized pruners to make a clean 45-degree cut just below a leaf node.
Remove the lower leaves, leaving only the top two or three sets. This reduces moisture loss and directs energy toward root development. If the remaining leaves are large (like on hydrangeas), I cut them in half horizontally to further minimize transpiration. You’ll feel the difference immediately—less foliage means less stress on the cutting.
Dip the cut end in water first, then into rooting hormone powder—this helps it adhere properly. I use a 0.3% IBA hormone for woody shrubs, which gives the best balance of speed and success rate. Tap off any excess; a thin coating is all you need. Plant the cutting in a well-draining medium like 50% perlite and 50% peat moss.
Insert the stem about 1-2 inches deep, firming the medium gently around it. The cutting should stand upright without support. Water thoroughly until you see moisture coming out the drainage holes, then let it drain completely. You’ll notice the medium settles slightly—this is normal and actually helps eliminate air pockets around the stem.
Cover the cutting with a clear plastic bag or place it in a propagation dome to maintain 80-90% humidity. I use wooden skewers to keep the plastic from touching the leaves, which prevents rot. The temperature should stay between 65-75°F—a seedling heat mat can help if your space runs cool.
Place the cutting in bright, indirect light—an east-facing window works well, or under fluorescent grow lights for 12-14 hours daily. Avoid direct sun, which can cook the cutting in its humid environment. You’ll know conditions are right when you see condensation inside the bag but no water dripping down the sides.
Check moisture levels every 3-4 days—the medium should feel like a wrung-out sponge. Overwatering is the biggest killer at this stage, so I wait until the top ½ inch feels dry before watering again. Roots typically form in 4-8 weeks, depending on the shrub variety. You’ll feel resistance when you tug gently on the cutting, which means roots have developed.
Once roots are 1-2 inches long, begin acclimating the cutting to normal conditions. Start by opening the bag for 1 hour daily, gradually increasing exposure over 7-10 days. Transplant to individual pots when you see vigorous new leaf growth—this indicates the plant is actively photosynthesizing and ready for less pampered conditions.
After years of trial and error, here are the practical insights that will save you from common propagation pitfalls.
Cutting Selection: In Step 1, choosing the right stem makes all the difference. I learned the hard way that woody stems root poorly—focus on the current season’s growth that bends easily. The 4-6 inch length isn’t arbitrary; shorter cuttings lack energy reserves, while longer ones lose too much moisture. Always make that 45-degree cut precisely below a node where rooting hormones concentrate naturally.
Environment Control: Step 3’s humidity range of 80-90% is critical, but here’s what nobody tells you—condensation should form on the bag’s interior, but never drip. If you see water running down the sides, you’ve created a fungal paradise. Use skewers to tent the plastic away from foliage, and consider adding a small fan for 10 minutes daily to prevent stagnant air while maintaining humidity.
Patience and Testing: During the 4-8 week rooting period in Step 4, resist the urge to check progress constantly. Every time you disturb the cutting, you set it back. Instead, test for roots by gently tugging—resistance indicates success. I mark my calendar for the 4-week point, then check every 3 days thereafter. The 1-2 inch root length mentioned isn’t just a suggestion; shorter roots won’t support the transition to normal conditions.
Light Management: The 12-14 hours of bright, indirect light specified in Step 3 requires attention. I use a simple timer for grow lights to maintain consistency. East-facing windows work well in spring, but you’ll need to adjust seasonally—south windows may require sheer curtains in summer. Watch for leaf discoloration: yellowing means too little light, while bleached or crispy edges indicate too much intensity.
Early spring or late fall are ideal—when shrubs are dormant but not frozen. Softwood cuttings (new growth) thrive in late spring/early summer, while hardwood cuttings (mature stems) do best in winter. Avoid extreme heat or cold for higher success rates!
Yes, but it’s slower and less reliable. Seeds may not produce plants identical to the parent (especially hybrids). Cuttings clone the shrub’s traits, ensuring consistency. If you’re patient, sow seeds in fall or stratify them first for better germination.
Common culprits: too much moisture (rot), not enough humidity (drying out), or poor light (weak growth). Use a rooting hormone, keep soil damp (not soggy), and provide indirect light. Check for disease or pest damage on the parent plant too!
Softwood cuttings: 2–4 weeks; hardwood cuttings: 2–3 months. Speed depends on the shrub type, temperature (65–75°F is ideal), and care. Gently tug the cutting after 3 weeks—resistance means roots are forming!
Not necessarily! While pruners, rooting hormone, and a misting bottle help, you can start with scissors, a clear plastic bag (for humidity), and well-draining soil. Sterilize tools with rubbing alcohol to prevent disease.
Propagating shrubs is easier than you think—with the right method, a little patience, and these simple steps, you’ll be growing healthy new plants in no time! 🌱 Whether you choose cuttings, layering, or division, success starts with clean tools, good timing, and consistent care.
Now that you’re equipped, pick a favorite shrub and give it a try! Start small with one or two cuttings, track your progress, and soon you’ll have a garden full of thriving, homegrown shrubs. Happy propagating!
