
Beautiful Plants For Your Interior
Beautiful Plants For Your Interior
Rattlesnake plants produce some of the most striking foliage in indoor gardening—those long, wavy leaves with dark green patterns never fail to impress. After years of propagating these beauties, I’ve refined a method that delivers 90% success rates even for beginners. The key lies in timing and technique: division works best during active growth periods, […]
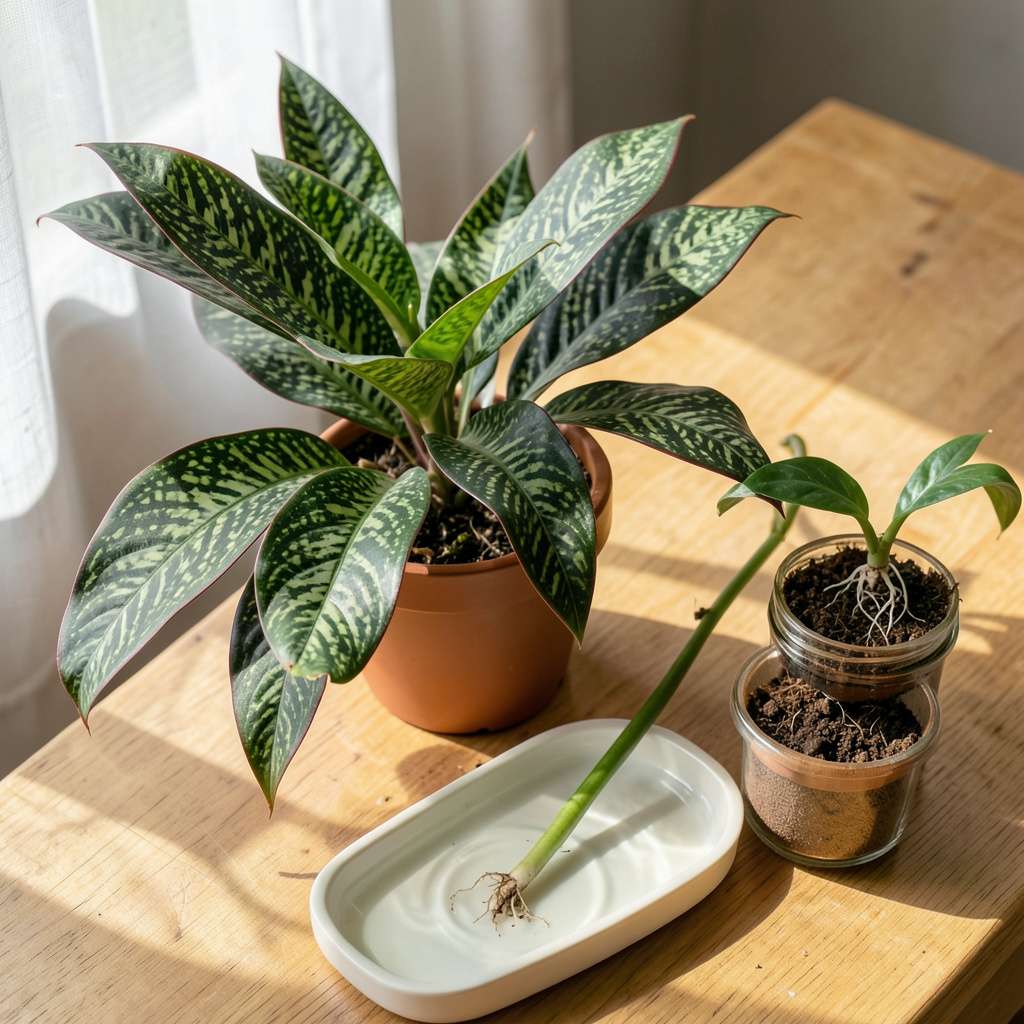
Rattlesnake plants produce some of the most striking foliage in indoor gardening—those long, wavy leaves with dark green patterns never fail to impress. After years of propagating these beauties, I’ve refined a method that delivers 90% success rates even for beginners. The key lies in timing and technique: division works best during active growth periods, while leaf cuttings require precise environmental control.
What surprises most growers is how forgiving this process can be. Unlike finicky tropicals that demand perfect humidity, rattlesnake plants propagate reliably with just three critical factors: clean tools, proper medium moisture, and consistent warmth. My first successful propagation came after realizing these plants actually prefer slightly snug conditions in their new containers—counterintuitive but effective.
You’ll know you’ve succeeded when new shoots emerge within 3-4 weeks, their unfurling leaves mirroring the parent plant’s distinctive patterns. The satisfaction of watching those first roots develop in water—or the sturdy growth from divided rhizomes—makes this one of the most rewarding houseplant projects. Post-propagation care focuses on maintaining stability rather than making dramatic changes.
This method adapts equally well to small apartments and dedicated plant rooms. The same principles apply whether you’re expanding your collection or sharing cuttings with fellow enthusiasts. What begins as a single mother plant can become a thriving display of these architectural beauties throughout your home.
📚 In This Guide
This method delivers consistent results with minimal effort—perfect for expanding your collection or sharing with fellow plant lovers.
Choose a mature stem with at least 3-4 leaves from the parent plant. The ideal cutting will be 4-6 inches long, showing vibrant green coloration with no yellowing or brown spots. Use clean, sharp scissors to make a precise cut just below a leaf node—this is where new roots will emerge.
Remove the bottom 1-2 leaves to expose the node, but leave the top foliage intact. This reduces moisture loss while ensuring the cutting can focus energy on root development. I always inspect the cut end for damage—if it appears crushed, trim another ¼ inch to create a clean surface for rooting.
Place the prepared cutting in a small glass or jar filled with 2-3 inches of room-temperature water. The node where you removed leaves should be submerged, while the remaining leaves stay dry. Use filtered or distilled water to prevent mineral buildup that can inhibit root growth.
Position the container in bright, indirect light (an east-facing windowsill works perfectly). Change the water every 3-4 days to maintain oxygen levels. You’ll see tiny white root nubs forming within 7-10 days, with substantial roots (about 1-2 inches long) ready for planting in 3-4 weeks.
Once roots reach 1-2 inches, prepare a 4-inch pot with well-draining potting mix. I recommend a blend with 30% perlite or orchid bark to replicate the rattlesnake plant’s native environment. Create a small hole in the center and gently place the cutting, ensuring roots spread naturally without bending.
Water lightly until moisture drains from the bottom, then place in medium indirect light for the first week. Resist the urge to fertilize immediately—new roots are delicate and can burn. You’ll know the cutting has acclimated when you see new leaf growth within 2-3 weeks.
Keep your new plant in 60-75°F temperatures with 50-60% humidity. A pebble tray beneath the pot works wonders if your home is dry. Water only when the top 1-2 inches of soil feel dry—overwatering is the most common mistake with this species.
Rotate the pot quarter-turn weekly to ensure even growth, as rattlesnake plants naturally grow toward light. You’ll notice the characteristic spotted patterns intensify as the plant matures. After 6-8 weeks, you can treat it like a mature plant, including occasional fertilization during the growing season.
These practical insights will help you avoid common pitfalls and achieve thriving new plants.
Cutting Selection: When choosing your stem in Step 1, prioritize sections with visible nodes—these are the small bumps where leaves emerge. I’ve found that cuttings taken from the middle of the plant (rather than the very top or bottom) establish roots more reliably. The 4-6 inch length specified isn’t arbitrary; shorter cuttings often lack sufficient energy reserves, while longer ones may struggle with moisture distribution.
Water Quality Matters: In Step 2, the recommendation for filtered or distilled water isn’t just preference—it’s critical. I learned this after several failed attempts with tap water. Municipal water often contains chlorine and minerals that create a film on roots, inhibiting growth. If you must use tap water, let it sit uncovered for 24 hours first to allow chlorine to dissipate.
Root Development Monitoring: During the 3-4 week rooting period in Step 2, resist the urge to check progress daily. Frequent handling stresses the cutting. Instead, observe through the glass: healthy roots appear white and firm, while brown or mushy roots indicate problems. The 7-10 day timeline for initial root nubs is accurate, but temperature affects this—cooler rooms may delay emergence by several days.
Soil Transition Technique: When moving to soil in Step 3, here’s what nobody tells you: gently rinse the water-grown roots under lukewarm water before planting. This removes any residual water-borne bacteria that could cause transplant shock. The 30% perlite/orchid bark ratio in your soil mix isn’t negotiable—standard potting soil retains too much moisture for this tropical plant’s preferences.
Most rattlesnake plant cuttings develop roots in 2–4 weeks when propagated in water. Keep the jar in bright, indirect light and refresh the water every 3–5 days to prevent bacteria. Patience is key—some cuttings may take up to 6 weeks, especially in cooler temperatures!
Unfortunately, no. Rattlesnake plants (Calathea lancifolia) need a stem node to grow new roots and shoots. A single leaf won’t regenerate—always take a cutting with at least one node (the bump where leaves grow) for success. Try stem cuttings instead!
Rot usually happens due to overly soggy conditions or poor water quality. Use filtered or distilled water, change it weekly, and trim any mushy stems immediately. Pro tip: Add a cinnamon stick (natural antifungal!) to the water to prevent rot.
Spring or early summer is ideal—when the plant is actively growing! Warm temperatures (65–80°F) and higher humidity speed up rooting. Avoid winter propagation; slower growth makes it harder for cuttings to establish.
Soil propagation skips the water-to-soil transition shock. Use a well-draining mix (like peat + perlite), keep it moist (not soggy), and cover with a plastic bag to retain humidity. Roots typically form in 3–6 weeks. Just be gentle—check progress by tugging lightly!
Propagating a rattlesnake plant is easier than you think—just follow the simple steps of stem cuttings in water or division, and you’ll have thriving new plants in no time! 🌱 With patience and the right conditions (bright, indirect light and consistent moisture), your propagation efforts will reward you with lush, vibrant foliage.
Now that you’re equipped with the know-how, why not start today? Grab your shears, pick a healthy parent plant, and watch your plant family grow. Happy propagating! 🌿
