
Beautiful Plants For Your Interior
Beautiful Plants For Your Interior
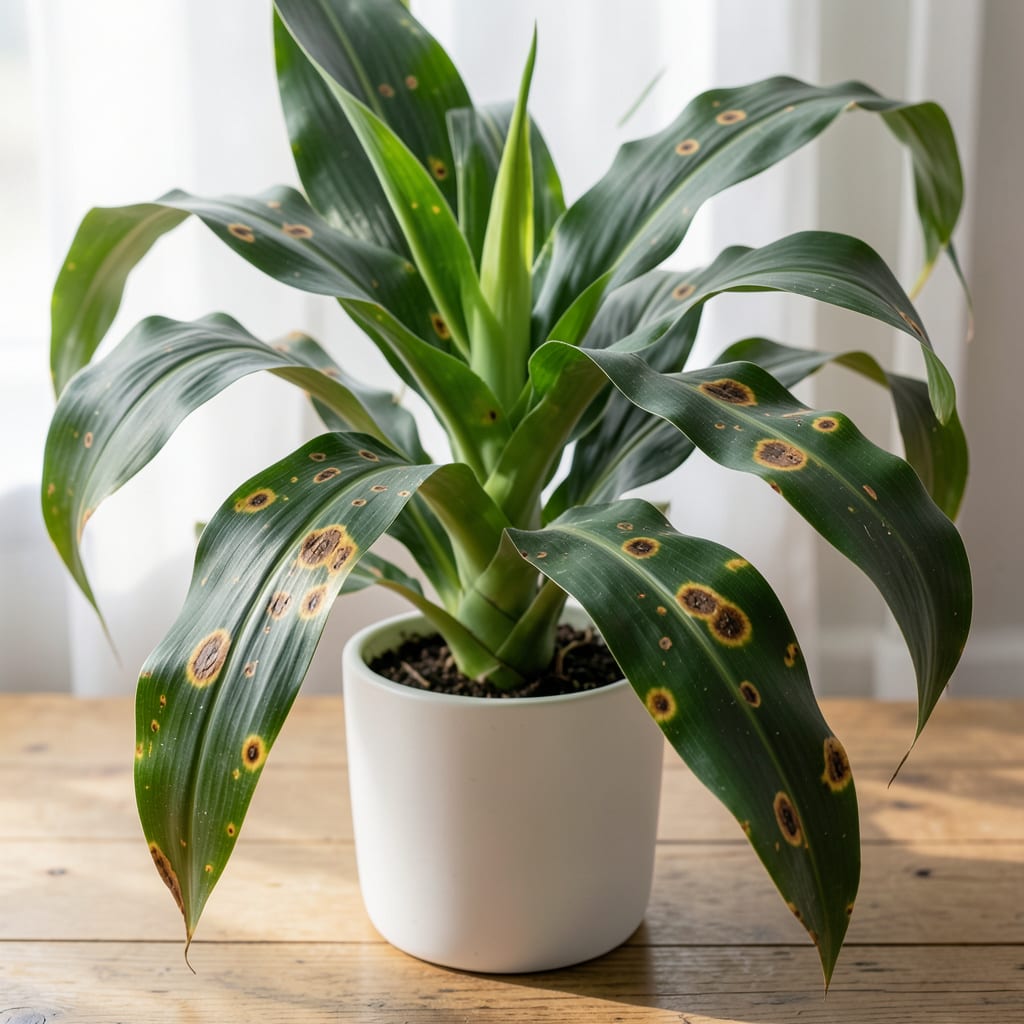
Those brown spots on your corn plant aren’t just ugly—they’re a warning sign. I’ve seen everything from fungal invaders to thirsty roots cause this exact issue.
Diagnosing takes 5 minutes with a close look at the pattern and texture. The fix is usually simpler than you’d think: better airflow, adjusted watering, or a targeted treatment. Your plant can bounce back to vibrant green within weeks.
📚 In This Guide
Here’s the method I use to diagnose and fix brown spots while keeping your plant thriving.
Start by examining the brown spots closely. If they’re dry and crispy with yellow halos, your plant is likely getting too much direct sunlight. Corn plants prefer bright, indirect light—move yours a few feet back from the window or use a sheer curtain to diffuse the intensity.
Check the soil moisture next. Overwatering often causes soft, mushy brown spots, while underwatering leads to dry, papery edges. I run my finger 1-2 inches into the soil to gauge moisture—if it feels damp, hold off on watering for a few days.
Corn plants hate soggy roots. Ensure your pot has drainage holes and that excess water can escape freely. If the soil stays waterlogged, repot the plant into a container with fresh, well-draining potting mix. I add a layer of pebbles or perlite at the bottom to improve airflow.
Water only when the top 1-2 inches of soil feels dry to the touch. When you do water, do it deeply until water runs out the drainage holes, then empty the saucer after 15-20 minutes to prevent root rot. This mimics the natural drying cycles the plant would experience in its native environment.
Brown spots can also appear if the plant is exposed to cold drafts or temperatures below 50°F. Corn plants thrive in 65-75°F during the day and a 10°F drop at night. Move yours away from air conditioning vents, drafty windows, or doors that open frequently in winter.
If the spots are concentrated on the side facing a window, it’s likely sunburn. Rotate the pot a quarter turn weekly to ensure even light distribution. This prevents one side from getting too much exposure while the other suffers from lack of light.
Inspect the undersides of leaves for pests like spider mites or scale, which can cause brown stippling or spots. I wipe leaves gently with a damp cloth or spray with neem oil solution (mix according to package instructions) to deter infestations. Focus on the undersides, where pests often hide.
For fungal issues, improve air circulation around the plant. Space it away from other plants, and consider running a fan on low nearby. If the problem persists, apply a fungicide labeled for houseplants, following the instructions carefully. Fungal spots often have a fuzzy or powdery texture, which helps distinguish them from other causes.
Using clean, sharp scissors, trim away any leaves with extensive brown damage. Cut just above a leaf node to encourage new growth. I sterilize my tools with rubbing alcohol between cuts to prevent spreading disease. Remove only the affected portions if the rest of the leaf is still green and healthy.
After making adjustments, give your plant 2-4 weeks to respond. New growth should emerge without brown spots if the issue has been resolved. If spots continue to appear, re-evaluate the light, water, and temperature conditions—sometimes it takes a few tweaks to get it just right.
These insights will help you address brown spots effectively while maintaining your plant’s health.
The Inspection Technique: In Step 1, when examining brown spots, use a magnifying glass to check for subtle differences. Dry, crispy spots with yellow halos indicate too much direct sunlight, while soft, mushy spots suggest overwatering. This close inspection helps you address the root cause rather than just treating symptoms.
Watering Precision: For Step 2, the 1-2 inch soil check is crucial. I use a wooden skewer to test moisture at different depths—if it comes out with soil sticking to it at the 2-inch mark, wait to water. This method is more reliable than just touching the surface, especially for larger pots where the top can dry out while the bottom stays soggy.
Temperature Management: The 65-75°F range in Step 3 isn’t just a suggestion—it’s critical for corn plants. I keep a small thermometer near my plants to monitor conditions. If your home drops below 50°F, even briefly, it can trigger stress responses that manifest as brown spots. Consider a plant heating mat for colder climates.
Recovery Monitoring: Step 5’s 2-4 week observation period is non-negotiable. New growth will be the first indicator of recovery, but don’t expect damaged leaves to heal. Instead, focus on the health of new leaves emerging from the center. If brown spots persist beyond this timeframe, reconsider your light, water, and temperature conditions more carefully.
Brown spots often indicate overwatering, fungal infections, or pest infestations. Check soil moisture and inspect leaves for signs of disease or bugs. Adjust care accordingly to prevent further damage.
Yes, if caused by fungal or bacterial infections, brown spots can spread. Isolate the affected plant and treat with fungicides or neem oil to protect nearby greenery.
Trim damaged leaves, improve drainage, and adjust watering habits. For fungal issues, use a copper-based fungicide. Ensure good airflow and avoid overhead watering.
Not always! They can also result from underwatering, nutrient deficiencies, or environmental stress like low humidity. Assess your plant’s overall health and growing conditions.
Absolutely! Maintain consistent watering, provide proper drainage, and keep leaves dry. Regularly inspect for pests and ensure the plant gets adequate light and nutrients.
